
How to Deploy Umami: Self-Hosted, Privacy-Focused Analytics with Docker Compose
Umami is an open-source, privacy-first web analytics platform that provides full data ownership without cookie consent banners. Learn how to deploy Umami with Docker Compose and PostgreSQL, configure your tracking snippet, and monitor real-time traffic.
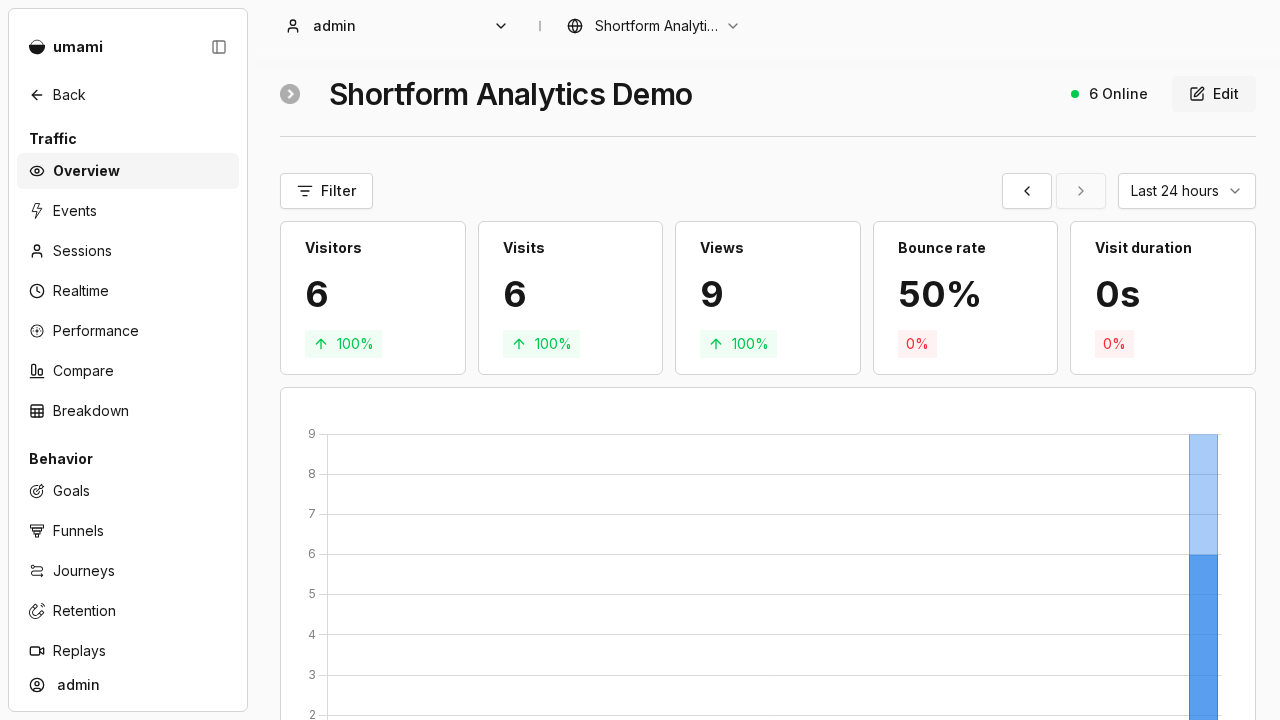
Umami is an open-source, self-hosted web analytics solution engineered as a privacy-respecting alternative to Google Analytics. Licensed under the MIT License, Umami delivers rich, actionable web traffic insights without invading visitor privacy, selling user behavior data, or burdening websites with intrusive GDPR/CCPA cookie consent banners.
Key Capabilities and Architecture
- Cookie-Free Privacy Compliance:
Commercial analytics providers track individuals across the web using persistent device cookies and cross-domain profiling, requiring mandatory consent popups under GDPR, CCPA, and PECR. Umami generates a daily anonymized session hash combining a rotating cryptographic salt (APP_SECRET), visitor IP address, user agent, and website ID. Because no cookies or local storage objects are saved to client browsers, websites powered by Umami do not require cookie consent banners.
- Lightweight, Non-Blocking Tracking:
While enterprise tracking scripts degrade Core Web Vitals and Lighthouse scores, Umami's tracking script (script.js) is minuscule (~2.3 KB gzipped, 4.77 KB uncompressed). It executes asynchronously with defer to ensure page render times remain unaffected.
- Complete Data Sovereignty:
All collected pageviews, referrer URLs, geographic locations, and custom conversion events are stored directly in your own PostgreSQL database. No metrics are forwarded to third-party ad networks or remote cloud telemetry aggregators.
- Modern Fullstack Stack:
Built on Next.js 16 and React 19 with Prisma 7 ORM, Umami compiles down to an optimized standalone Node.js server. The backend features automated database schema migrations on container boot, high-throughput event ingestion at /api/send, and built-in GeoIP lookup via MaxMind GeoLite2 databases.
- Real-Time Dashboards & Custom Events:
Monitor active visitors second-by-second, visualize traffic breakdown by pages, referrers, browsers, operating systems, and countries, and track custom conversions (e.g. signups, button clicks, purchases) via simple HTML data attributes or JavaScript API calls.
---
Prerequisites
Before deploying Umami, ensure the host system satisfies the following baseline requirements:
- Host Operating System: Linux (Ubuntu, Debian, Arch, Fedora, Rocky), macOS, or Windows via WSL2.
- Container Runtime: Docker Engine and Docker Compose v2 (
docker compose versionv2.20+ recommended). - Available Host Port: An unallocated TCP port on the host (e.g. port 3000, or alternate fallback ports such as 3002, 8080, or 8000).
- Core CLI Utilities: Standard shell environment with
openssl(for generating cryptographic secrets) andcurl(for health and smoke tests). - Zero Host Runtime Dependencies: Neither Node.js, pnpm, Python, nor PostgreSQL need to be installed on the host system. The official container images encapsulate the complete Node.js runtime and PostgreSQL 15 database engine.
---
Exact Install Steps
The deployment uses Docker Compose to run the official Umami container alongside a dedicated PostgreSQL 15 container connected over an isolated internal bridge network.
Step 1: Create the Project Directory
Create an isolated directory for the Umami deployment and navigate into it:
mkdir umami && cd umamiStep 2: Configure Environment Variables
Umami requires two cryptographic secrets:
APP_SECRET: A 64-character hexadecimal random string (32 bytes) used as a cryptographic salt when hashing visitor IPs and sessions.TWO_FACTOR_ENCRYPTION_KEY: A 64-character hexadecimal random string (32 bytes) used to encrypt two-factor authentication secrets in the database.
Generate these keys automatically using openssl and write the .env file:
cat > .env <<EOF
UMAMI_PORT=3000
APP_SECRET=$(openssl rand -hex 32)
TWO_FACTOR_ENCRYPTION_KEY=$(openssl rand -hex 32)
POSTGRES_DB=umami
POSTGRES_USER=umami
POSTGRES_PASSWORD=umami
EOF
Security Note: In production environments exposed to the public internet, replace
POSTGRES_PASSWORDwith a strong, random password. If host port 3000 is occupied by another application, modifyUMAMI_PORT(for example,UMAMI_PORT=3002).
Step 3: Create the Docker Compose Specification
Write the docker-compose.yml file. This configuration links Umami to PostgreSQL, synchronizes startup via container healthchecks, mounts a persistent Docker volume for database storage, and isolates the PostgreSQL database port from host exposure:
cat > docker-compose.yml <<'EOF'
services:
  umami:
    image: ghcr.io/umami-software/umami:latest
    restart: unless-stopped
    ports:
      - "${UMAMI_PORT}:3000"
    environment:
      DATABASE_URL: postgresql://${POSTGRES_USER}:${POSTGRES_PASSWORD}@db:5432/${POSTGRES_DB}
      APP_SECRET: ${APP_SECRET}
      TWO_FACTOR_ENCRYPTION_KEY: ${TWO_FACTOR_ENCRYPTION_KEY}
      PORT: 3000
      HOSTNAME: "0.0.0.0"
    depends_on:
      db:
        condition: service_healthy
    init: true
    healthcheck:
      test: ["CMD-SHELL", "curl -f http://localhost:3000/api/heartbeat || exit 1"]
      interval: 5s
      timeout: 5s
      retries: 12
      start_period: 15s
    networks:
      - umami-net

  db:
    image: postgres:15-alpine
    restart: unless-stopped
    environment:
      POSTGRES_DB: ${POSTGRES_DB}
      POSTGRES_USER: ${POSTGRES_USER}
      POSTGRES_PASSWORD: ${POSTGRES_PASSWORD}
    volumes:
      - umami-db-data:/var/lib/postgresql/data
    healthcheck:
      test: ["CMD-SHELL", "pg_isready -U ${POSTGRES_USER} -d ${POSTGRES_DB}"]
      interval: 5s
      timeout: 5s
      retries: 10
    networks:
      - umami-net

volumes:
  umami-db-data:

networks:
  umami-net:
EOF
Step 4: Pull Published Container Images
Fetch the official container images before launching:
docker compose pullStep 5: Start the Stack
Launch both services in detached mode:
docker compose up -dDuring startup:
- Docker initializes the private bridge network (
umami-net) and named volume (umami-db-data). - PostgreSQL 15 starts and completes internal cluster initialization within approximately 6 seconds.
- Once PostgreSQL signals healthy via
pg_isready, theumamiservice starts. - On its initial boot, the Umami container automatically applies 26 Prisma database schema migrations and seeds the default administrator account.
---
Verification
Once the stack is launched, verify container health and service responsiveness.
1. Check Container Health Status
Run the following wait loop until the Umami service transitions to healthy:
until [ "$(docker inspect -f '{{.State.Health.Status}}' $(docker compose ps -q umami))" = healthy ]; do
  printf .
  sleep 2
done
echo " healthy!"
Inspect both running containers:
docker compose psExpected output:
NAME          IMAGE                                   COMMAND                  SERVICE   CREATED          STATUS                    PORTS
umami-db-1    postgres:15-alpine                      "docker-entrypoint.s…"   db        30 seconds ago   Up 30 seconds (healthy)   5432/tcp
umami-1       ghcr.io/umami-software/umami:latest     "docker-entrypoint.s…"   umami     30 seconds ago   Up 24 seconds (healthy)   0.0.0.0:3000->3000/tcp
2. Verify API Heartbeat
Query the built-in health endpoint:
curl -si http://localhost:3000/api/heartbeat | head -1Expected output:
HTTP/1.1 200 OK3. Verify Web Login Route
Confirm the Next.js server serves the login route:
curl -so /dev/null -w "%{http_code}\n" http://localhost:3000/loginExpected output:
2004. Verify Administrator Authentication API
Verify the seeded database credentials through the REST API:
curl -s -X POST http://localhost:3000/api/auth/login \
  -H "Content-Type: application/json" \
  -d '{"username":"admin","password":"umami"}'
Expected output: A JSON payload containing a signed bearer token and user profile details.
---
Browser Setup
Follow these steps to configure your website, copy the tracking snippet, and inspect analytics data.
Step 1: Log In to the Administration Console
- Open your web browser and navigate to
http://localhost:3000. The server automatically redirects unauthenticated sessions to/login.
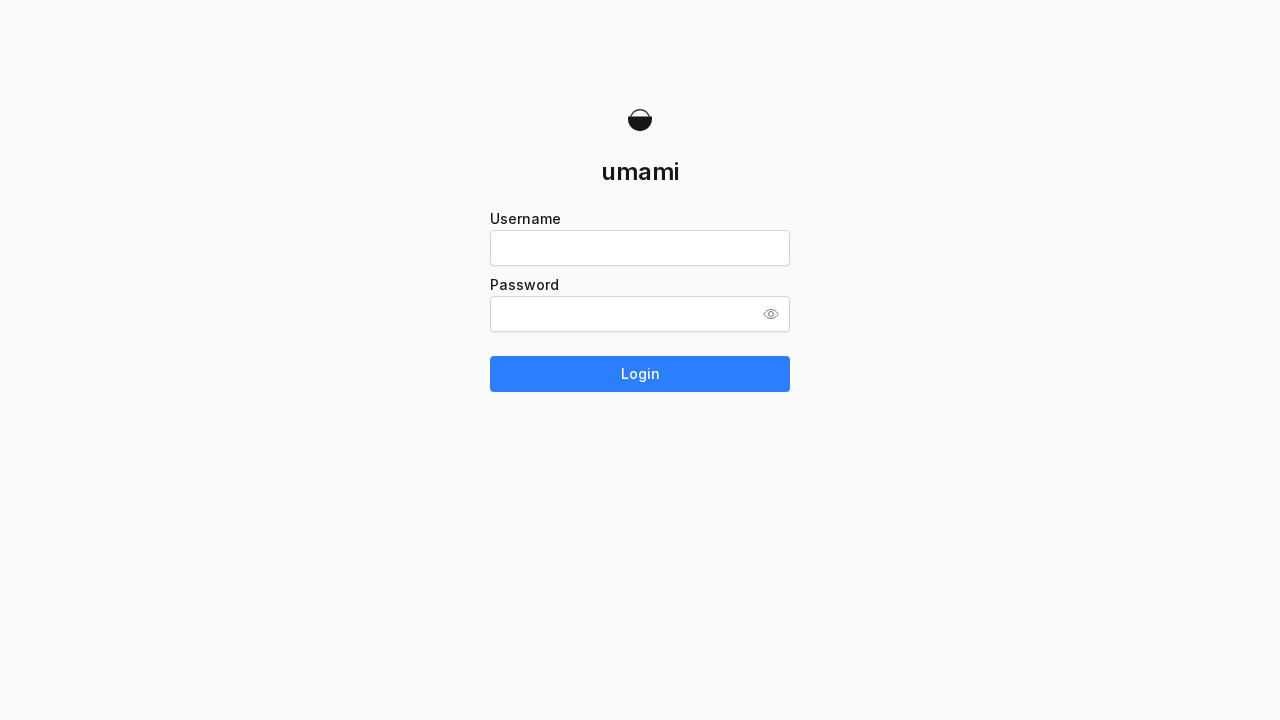
- Enter the default administrator credentials:
- Username: admin - Password: umami
- Click Log in.
Important: Immediately change the default administrator credentials after first login by navigating to Settings > Profile > Change password.
Step 2: Add Your Website
Upon login, you land on the Websites management view (/websites).
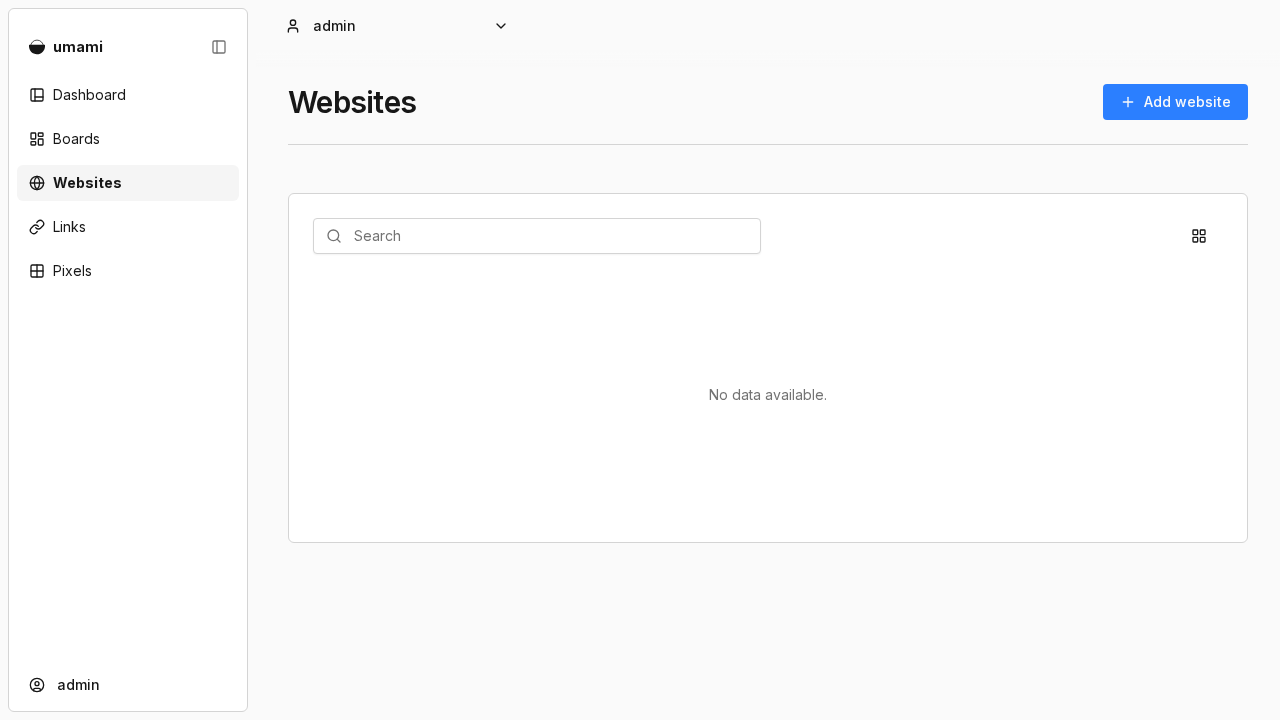
- Click the Add website button in the upper right.
- In the modal dialog, configure your website details:
- Name: A descriptive label (e.g. Shortform Analytics Demo). - Domain: The public domain or hostname (e.g. demo.croogserverdude.ca or mysite.example.com).
- Click Save.
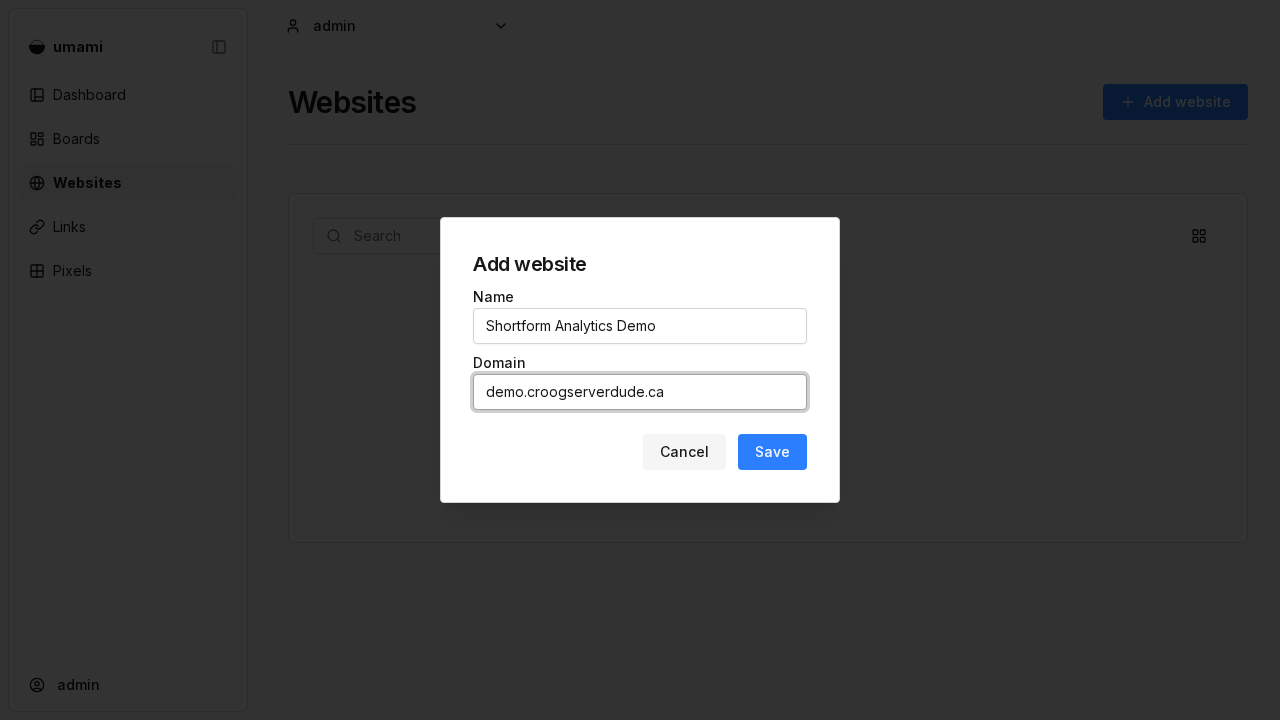
The newly created website row appears in your websites table with a generated UUID website ID.
Step 3: Retrieve the Tracking Code Snippet
- Click the Edit (gear/pencil) icon on your website row or open
/websites/:id/settings. - Locate the Tracking code card.
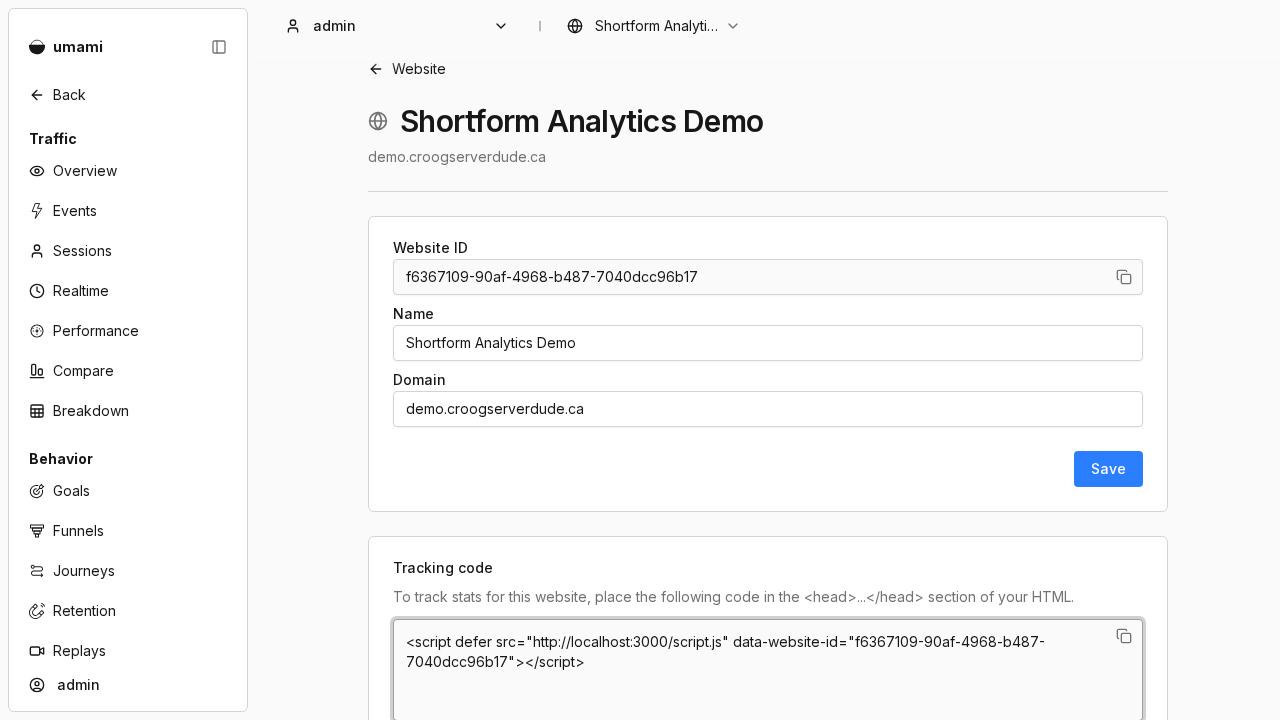
The card displays the HTML script tag:
<script defer src="http://localhost:3000/script.js" data-website-id="f6367109-90af-4968-b487-7040dcc96b17"></script>- Copy this snippet and paste it into the
<head>section of all HTML pages or templates you want to measure.
Step 4: Verify Incoming Analytics Data
Once visitors browse your website or telemetry events are sent to /api/send, open the website Overview tab:
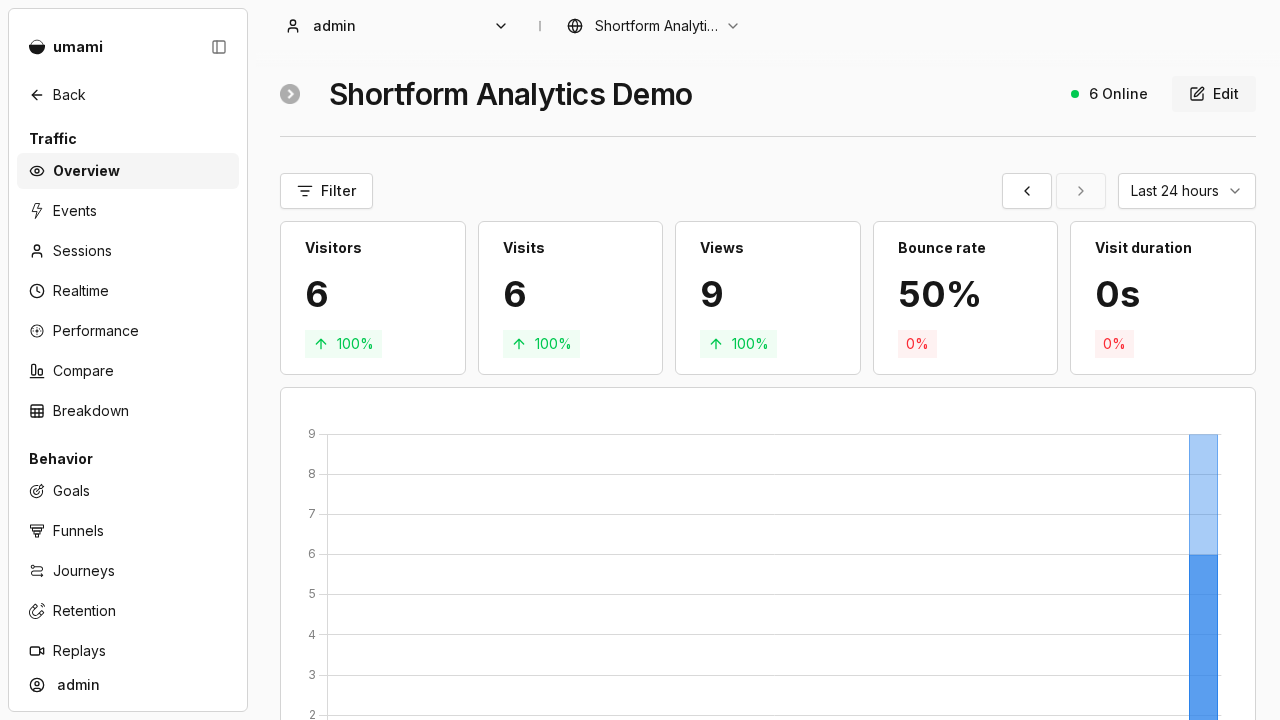
The overview displays:
- Core Summary Cards: Real-time metrics for Visitors, Visits, Views, Visit duration, and Bounce rate.
- Live Activity Badge: A green pill showing currently online visitors.
- Traffic Trends: Visual bar charts showing hourly or daily traffic velocity.
Step 5: Explore Detailed Metrics and Real-Time Activity
Scroll down the overview to review segmented breakdown panels:
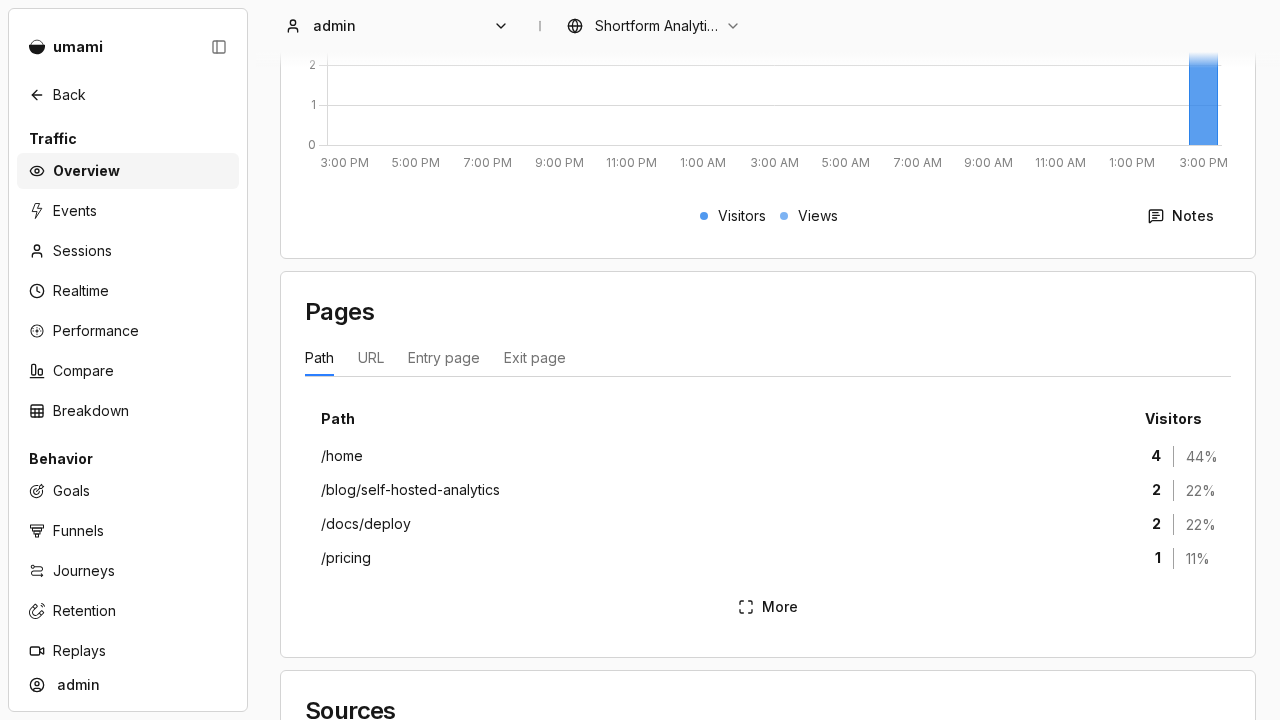
- Pages: Top requested URLs and subpaths (e.g.
/home,/pricing,/docs). - Referrers: Attribution sources directing traffic to your site (e.g. Google, GitHub, YouTube, Reddit).
- Environment: Breakdown by Browser (Chrome, Safari, Firefox), Operating System (iOS, Linux, Android, Windows), and Device type.
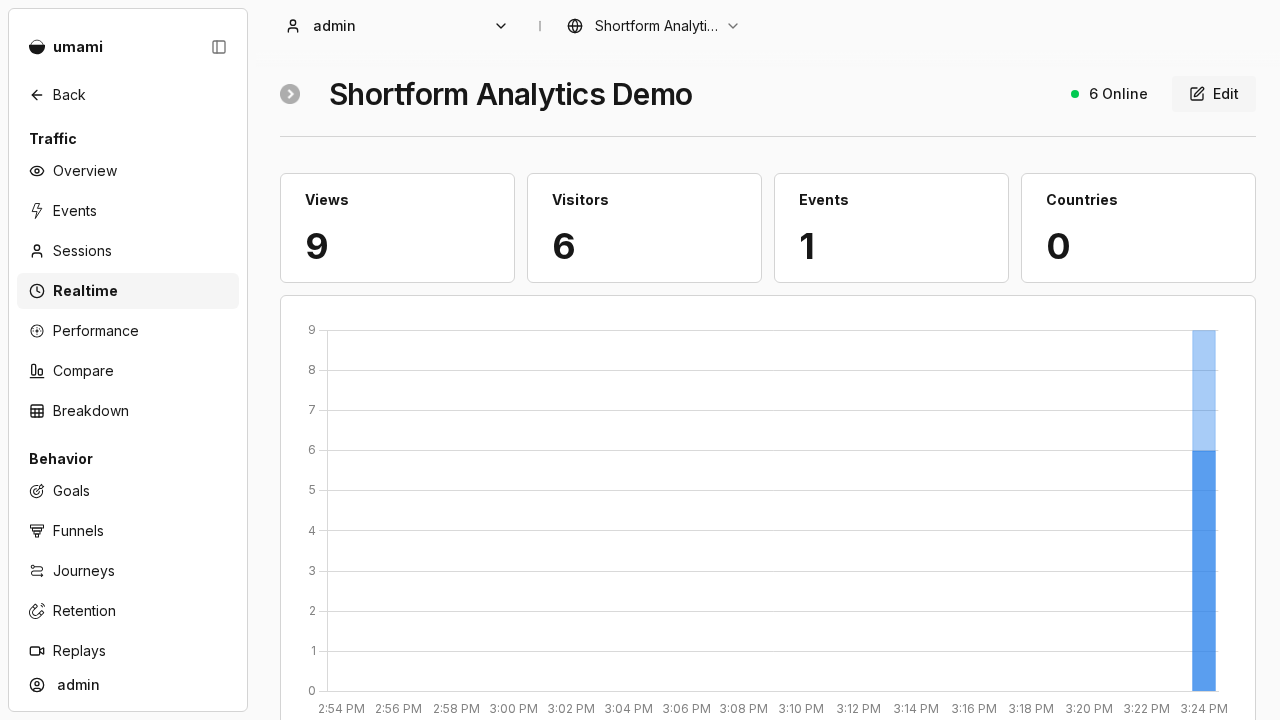
To observe visitor actions as they occur, click Realtime in the navigation bar to see an active event stream:
---
Troubleshooting
| Symptom / Issue | Probable Cause | Recommended Resolution |
|---|---|---|
Port 3000 address in use (bind: address already in use) | Another service on the host is already listening on TCP port 3000 | Update UMAMI_PORT in .env to an unused port (e.g. UMAMI_PORT=3002) and run docker compose up -d. |
Database connection error (PrismaClientInitializationError) | Umami container started before PostgreSQL was ready to accept queries | Ensure depends_on.db.condition: service_healthy is present in docker-compose.yml. Inspect database health with docker compose logs db. |
| Tracking script blocked by browser extensions | Browser ad blockers filter requests matching known analytics filenames (script.js) | Proxy script.js through your reverse proxy under an alternative name, or set the environment variable TRACKER_SCRIPT_NAME=custom-telemetry in docker-compose.yml. |
| Inaccurate visitor locations or "Unknown" countries | Missing client IP headers behind a reverse proxy (Nginx, Traefik, Caddy) | Configure the reverse proxy to pass X-Forwarded-For: $remote_addr and ensure Umami receives the real client IP for GeoIP resolution. |
Visit duration displays 0s | Single-page visits (bounces) record an initial hit but no subsequent interaction | Duration is calculated as the interval between the first and last hit of a session. Multi-page visits or event triggers record positive visit duration. |
| Database migrations take longer than timeout on first boot | Initial Prisma migration runs 26 schema files against fresh database | Check progress using docker compose logs -f umami. The compose healthcheck includes a 15-second start period and 12 retries to allow migrations to complete. |
---
Teardown & Maintenance
To stop the running containers while preserving all analytics data and website configurations:
docker compose downTo update to the latest Umami release in the future:
docker compose pull
docker compose up -d
To permanently stop the stack and completely purge database volumes:
docker compose down -v---
Assumptions & decisions
- Deployment Pattern: Selected the official Docker Compose deployment pattern pairing
ghcr.io/umami-software/umami:latestwithpostgres:15-alpine. This approach was verified end-to-end with zero host toolchain requirements. - Port Strategy: Standardized on port 3000 as the primary documented port while providing environment variable configuration (
UMAMI_PORT) to accommodate environments where port 3000 or 3001 is already bound. - Database Isolation: PostgreSQL runs on the internal bridge network (
umami-net) with port 5432 unpublished to the host, preventing port conflicts with existing database engines. - UI Route Navigation: Reflected the current Umami interface structure where authenticated login directs to
/websites, site settings live at/websites/:id/settings, and performance analytics live on the website overview (/websites/:id) rather than the user-configurable/dashboardworkspace. - Script Metrics: Accurately documented the tracker script footprint as ~2.3 KB gzipped (4.77 KB uncompressed) based on live response verification from
/script.js. - Screenshot References: Embedded verified PNG screenshots from
runs/umami-20261031-150744/browser/illustrating login, site creation, tracking snippet configuration, overview metrics, breakdown panels, and realtime streaming.
Get the Unified Homelab Stack Compose Pack
One-command multi-container Compose files (Full *arr Stack, Prometheus + Grafana + ntfy Monitoring, and Homelab Auth) plus new verified deploys once a week.