
How to Deploy Pocket ID: Lightweight Passwordless OIDC and Passkey Provider with Docker Compose
Pocket ID is an easy-to-use, OpenID Connect Certified identity provider built exclusively around passwordless passkey authentication. Learn how to deploy Pocket ID with Docker Compose, register WebAuthn passkeys, configure OIDC clients, and manage homelab single sign-on.
Pocket ID is a lightweight, OpenID Connect Certified™ and OAuth 2.0 identity provider designed from the ground up around passwordless passkey authentication (FIDO2 / WebAuthn). While traditional self-hosted identity solutions such as Keycloak, Authentik, or Authelia offer extensive enterprise federation features, they often introduce significant complexity, heavy database footprints, and steep configuration learning curves for homelab and small-business environments. Pocket ID solves this by delivering a modern, responsive single sign-on (SSO) experience with zero password management, instant biometric logins, and minimal resource utilization.
At its core, Pocket ID completely removes passwords from the authentication lifecycle. Users sign in using hardware security keys (such as YubiKeys) or built-in platform authenticators (such as Apple Touch ID / Face ID, Windows Hello, and Android biometrics). The backend is implemented as a single, highly performant Go binary that embeds a SvelteKit 5 web application and runs background tasks through an internal actor runtime, persisting state to an embedded SQLite database by default.
Key Capabilities and Architecture
- Passkey-First Authentication: Eliminates shared secrets, credential stuffing, and password resets by enforcing WebAuthn / FIDO2 authentication standards.
- OpenID Connect Certified™ & OAuth 2.0: Built on an optimized Ory Fosite foundation supporting Authorization Code Grant with PKCE, Refresh Token rotation, Device Flow (RFC 8628), and Back-Channel Logout (RFC 9474).
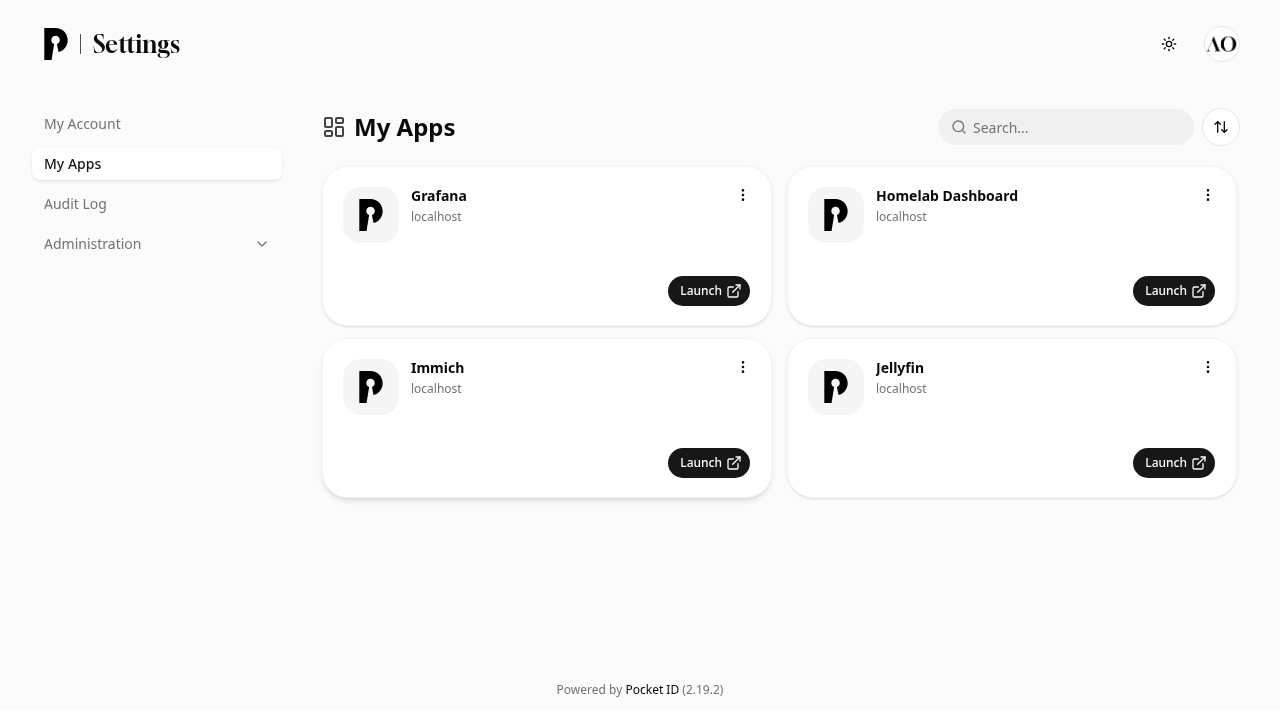
- Centralized "My Apps" Launchpad: Provides users with a clean application dashboard displaying authorized homelab applications with single-click launch buttons.
- Embedded Single-Container Architecture: Runs as an all-in-one container with zero external dependencies, leveraging embedded SQLite with Write-Ahead Logging (WAL) or optional external PostgreSQL.
- Built-in Operator CLI: Includes the
/app/pocket-idmanagement CLI inside the container for health checks, administrative bypass token creation, key rotation, and data export.
---
Prerequisites
Before deploying Pocket ID, verify that your host system satisfies the following requirements:
- Operating System: Any modern Linux distribution (Debian 12+, Ubuntu 22.04/24.04 LTS, Rocky Linux, Alpine), macOS, or Windows with Docker Desktop / WSL2.
- Container Engine: Docker Engine 24.0+ with Docker Compose v2 (
docker compose versionv2.24+). - Hardware Resources:
- CPU: 1 vCPU core (minimal baseline CPU usage under normal homelab workloads). - Memory: 128 MB RAM minimum; 256 MB to 512 MB recommended. - Storage: 200 MB persistent disk space for the SQLite database, cryptographic keys, and application assets.
- Network Ports: Host port 3000 (or any chosen free host port) mapped to container internal port 1411.
- Secure Context Requirement (WebAuthn): The WebAuthn API strictly requires a Secure Context. Browsers treat
http://localhostas secure for local testing. When exposing Pocket ID over a local network or the public internet, you must place it behind a reverse proxy (such as Caddy, Traefik, Nginx, or Cloudflare Tunnel) configured with valid SSL/TLS certificates (HTTPS).
---
Exact Install Steps
The official Pocket ID container image is published on Docker Hub (pocketid/pocket-id:v2) and GitHub Container Registry (ghcr.io/pocket-id/pocket-id:v2). In this deployment, we run Pocket ID version 2.19.2 with an embedded SQLite database.
Step 1: Create Staging Directory Structure
Create an isolated directory on your host to store your deployment manifests and persistent SQLite data:
mkdir -p pocket-id/data
cd pocket-id
chmod 775 data
Pocket ID runs as an unprivileged user inside the container (PUID=1000, PGID=1000). Setting permissions ensures the container process can create and manage the database files without permission errors.
Step 2: Generate Environment Configuration (.env)
Pocket ID requires two primary environment variables:
APP_URL: The canonical public URL where users and client services reach Pocket ID (no trailing slash).ENCRYPTION_KEY: A cryptographically secure random string of at least 16 bytes used to encrypt sensitive application secrets at rest.
Generate a 32-byte base64 encryption key using openssl and write the .env configuration file:
cat > .env <<EOF
COMPOSE_PROJECT_NAME=pocket-id
PORT=3000
APP_URL=http://localhost:3000
ENCRYPTION_KEY=$(openssl rand -base64 32)
PUID=1000
PGID=1000
LOG_LEVEL=info
EOF

chmod 600 .env
[!IMPORTANT]
Keep a secure backup of yourENCRYPTION_KEY. If this key is lost, Pocket ID will be unable to decrypt stored application secrets and OIDC client credentials.
Step 3: Create Docker Compose Specification (compose.yml)
Create the compose.yml file defining the Pocket ID container service, persistent storage volume, port binding, and health check:
cat > compose.yml <<'EOF'
services:
  pocket-id:
    container_name: ${COMPOSE_PROJECT_NAME}-app
    image: pocketid/pocket-id:v2
    restart: unless-stopped
    ports:
      - "${PORT:-3000}:1411"
    environment:
      - APP_URL=${APP_URL}
      - ENCRYPTION_KEY=${ENCRYPTION_KEY}
      - TRUST_PROXY=false
      - PUID=${PUID:-1000}
      - PGID=${PGID:-1000}
      - LOG_LEVEL=${LOG_LEVEL:-info}
    volumes:
      - ./data:/app/data
    healthcheck:
      test: ["CMD", "/app/pocket-id", "healthcheck"]
      interval: 10s
      timeout: 5s
      retries: 5
      start_period: 10s
    networks:
      - pocketid-net

networks:
  pocketid-net:
    name: ${COMPOSE_PROJECT_NAME}-net
    driver: bridge
EOF
Step 4: Launch the Service Stack
Start the container service in detached mode:
docker compose up -dStep 5: Await Service Health
Pocket ID exposes an unauthenticated health check endpoint at /healthz that returns HTTP 204 once the backend and actor runtime are initialized. Poll the endpoint to confirm readiness:
for i in $(seq 1 30); do
  code=$(curl -s -o /dev/null -w '%{http_code}' http://localhost:3000/healthz || true)
  if [ "$code" = "204" ] || [ "$code" = "200" ]; then
    echo "Pocket ID is ready! (HTTP $code)"
    break
  fi
  sleep 2
done
Verify the container status:
docker compose psThe container output should display Up (healthy) with port mapping 0.0.0.0:3000->1411/tcp.
---
Browser Setup and Onboarding
Once the container is healthy, navigate to Pocket ID in your browser to complete administrator setup and configure your OIDC applications.
Initial Administrator Setup Flow
When opening http://localhost:3000/ for the first time, Pocket ID detects that no administrator account exists and routes to the setup view (/signup/setup).

You can complete initial onboarding through either the web setup wizard or the command line:
- Option A: Web Form (
/signup/setup)
- Provide your First Name, Last Name, Username (e.g. admin), and Email Address (e.g. admin@example.local). - Click Create admin account.
- Option B: Bootstrap via API
``sh curl -sf -X POST http://localhost:3000/api/signup/setup \ -H 'Content-Type: application/json' \ -H 'Origin: http://localhost:3000' \ -d '{"username":"admin","email":"admin@example.local","firstName":"Admin","lastName":"Operator"}' ``
Enrolling an Administrator Passkey
Because Pocket ID does not store or accept passwords, signing in requires either registering a WebAuthn passkey or using an emergency one-time access token.
To log in or enroll your passkey, generate a one-time sign-in link using the container CLI:
docker compose exec pocket-id /app/pocket-id one-time-access-token adminThe CLI prints a single-use login link valid for 1 hour:
A one-time access token valid for 1 hour has been created for "admin".
Use the following URL to sign in once: http://localhost:3000/lc/<token>
Open the printed URL in your browser. You will land on the "Set up your passkey" prompt:

Click Add Passkey. Your operating system or browser will trigger its native WebAuthn prompt, allowing you to authenticate with a fingerprint, facial scan, PIN, or hardware security key (YubiKey).
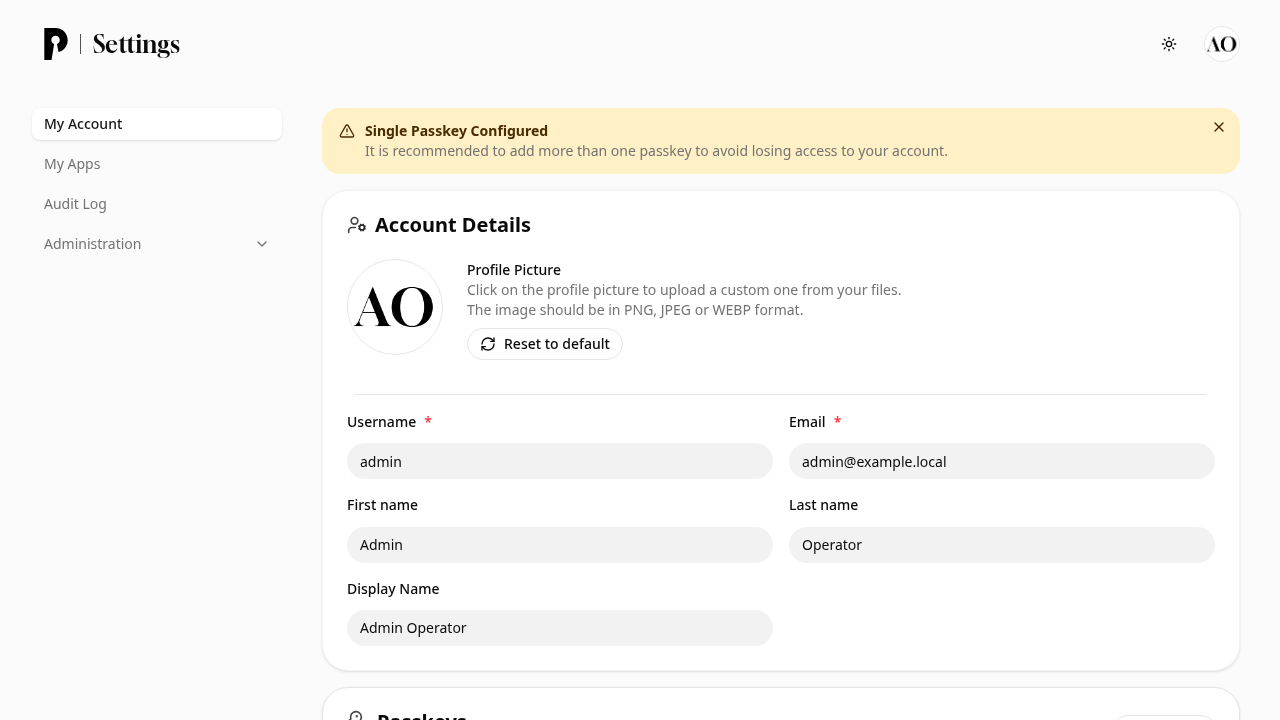
Once registered, your credential is listed in My Account:
---
Administration and OIDC Application Setup
With administrator privileges enrolled, click Administration in the left sidebar to manage users, groups, and client integrations.
1. User Management
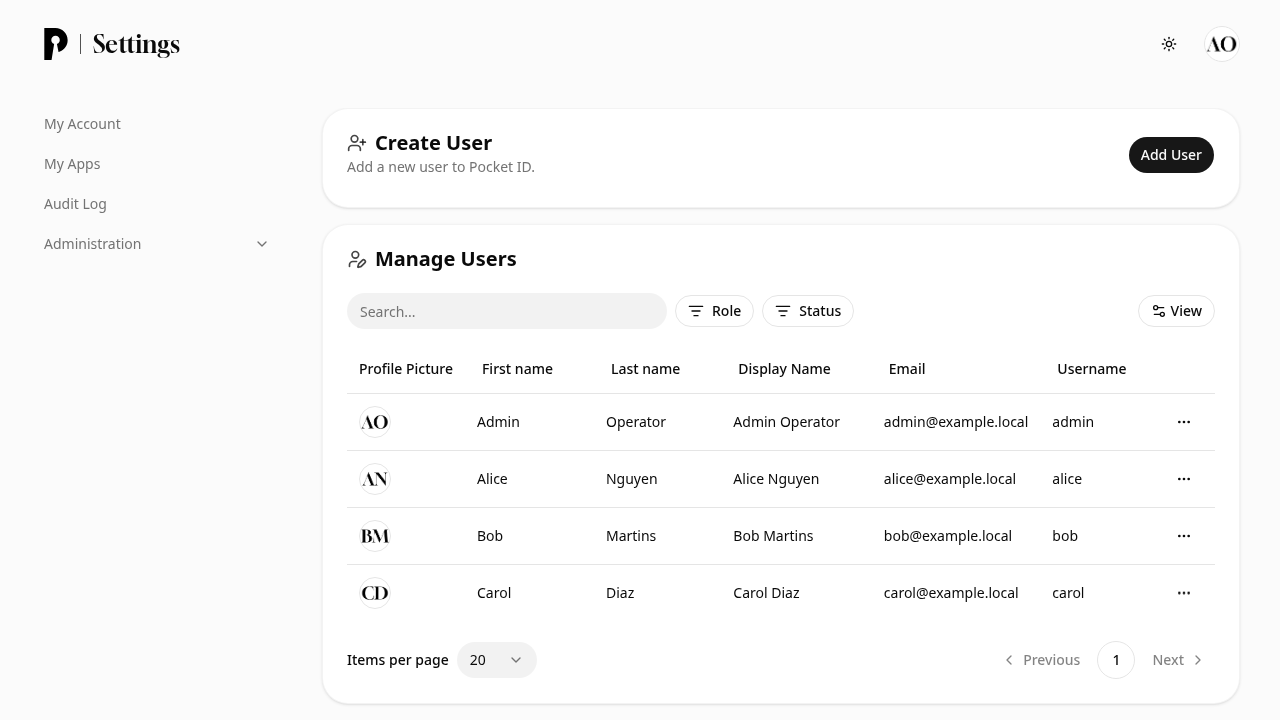
Under Administration → Users, you can invite or manually create users, verify email addresses, and manage administrative privileges:
2. User Groups and Access Control
Navigate to Administration → User Groups to segment permissions. For example, create a Homelab Admins group for administrative personnel and a Family group for general household users:
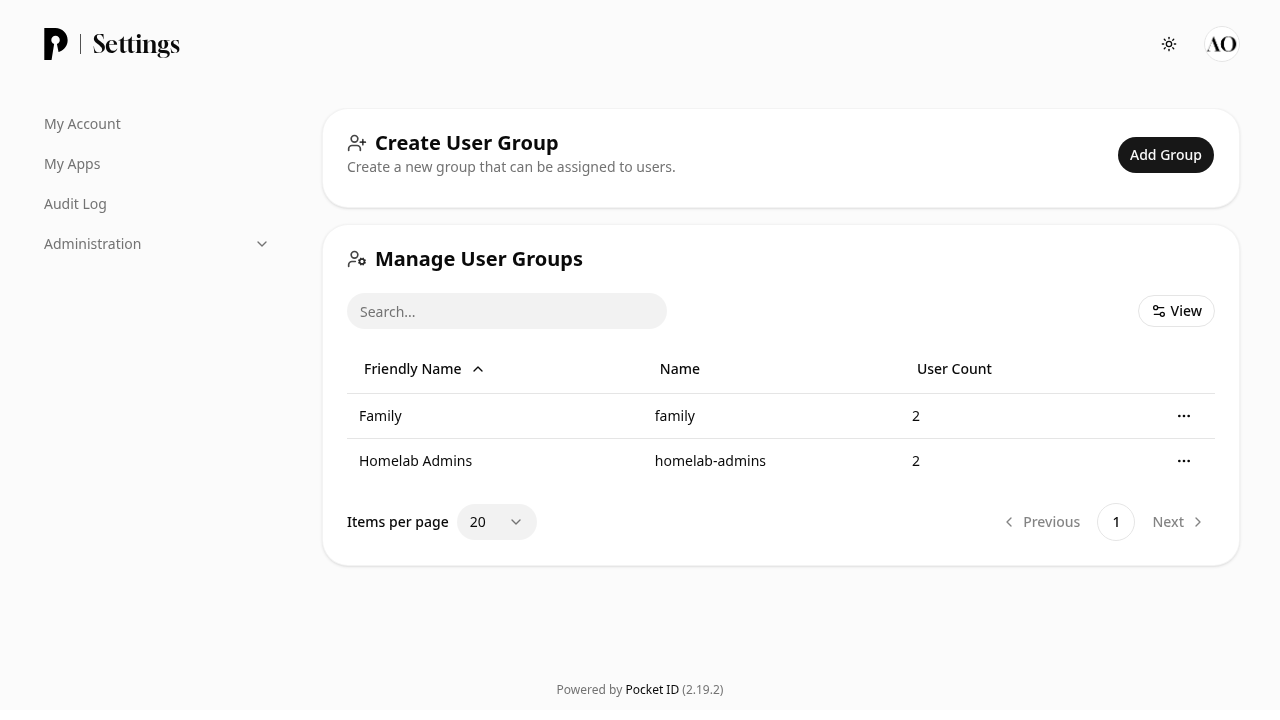
Groups allow you to restrict which OIDC applications specific users are permitted to access.
3. Registering OIDC Clients
Navigate to Administration → OIDC Clients to view registered relying parties:
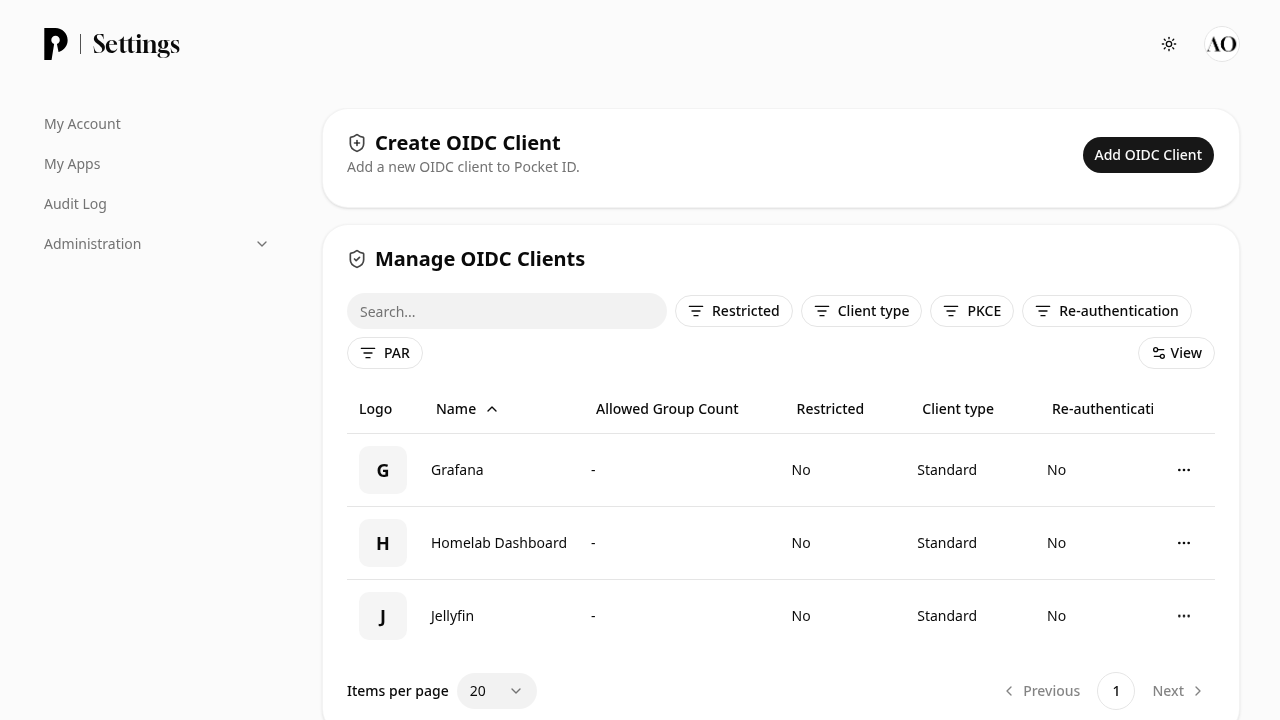
To connect a new self-hosted service (such as Immich, Grafana, or Jellyfin):
- Click New Client.
- Enter the application Name (e.g.
Immich). - Under Callback URLs, enter the redirect URI specified by your client service (e.g.
http://localhost:2283/auth/login). - Click Create Client. Pocket ID will generate a unique Client ID and Client Secret:
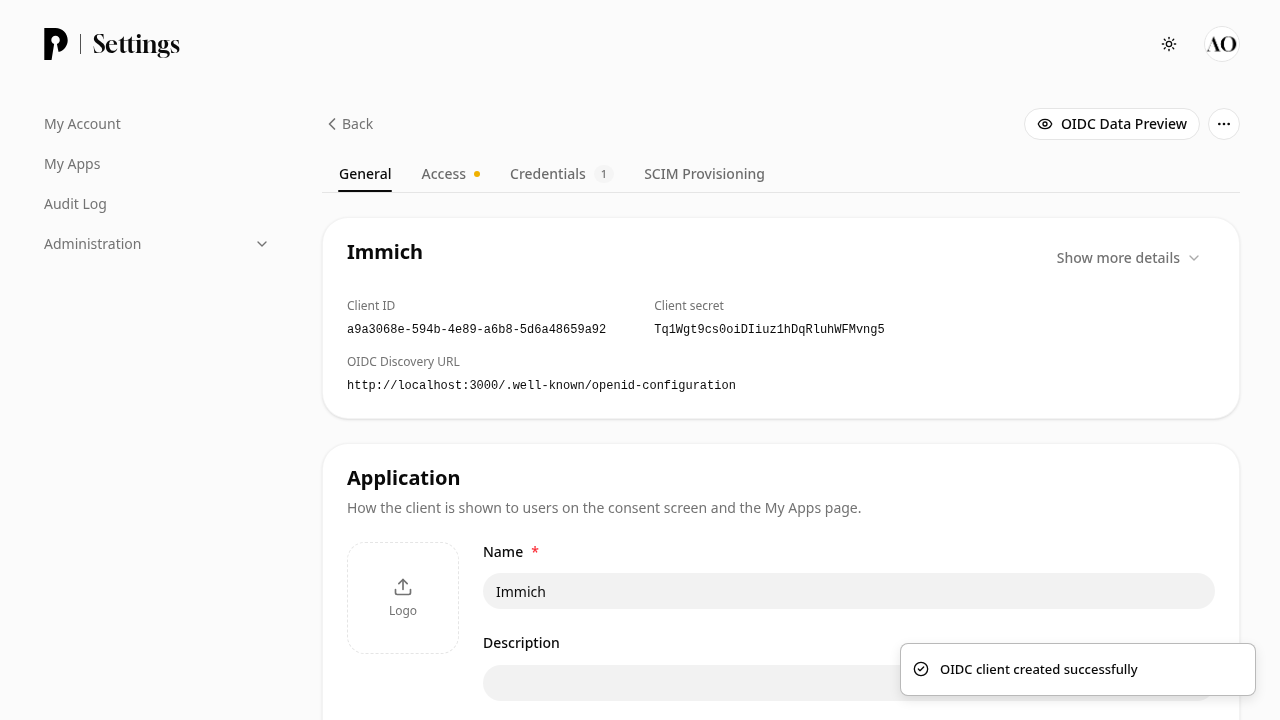
[!NOTE]
Copy and store the generated Client Secret securely. It will be required when configuring the OpenID Connect settings inside your downstream application.
4. Configuring Application Launch URLs and Group Permissions
To ensure an application displays properly on the My Apps user dashboard:
- Open the client settings for the newly created application.
- Enter the Launch URL (e.g.
http://localhost:2283) and click Save:
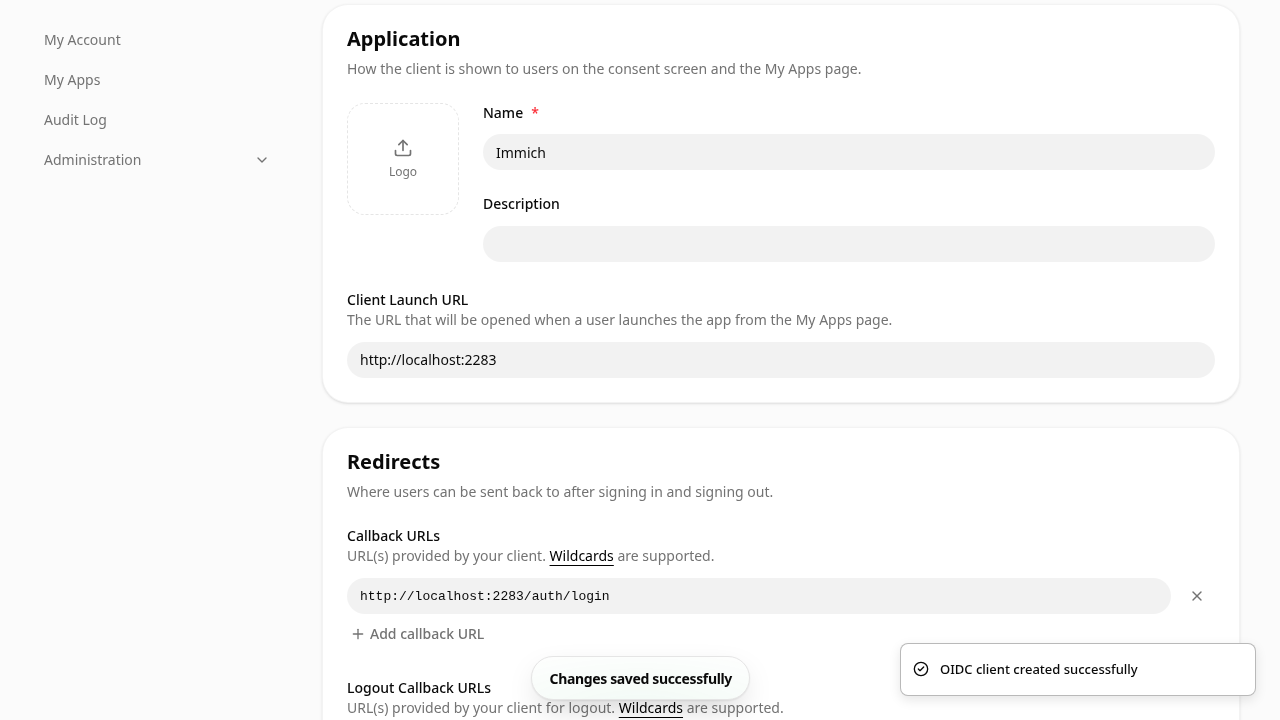
- Under Allowed user groups, assign the user groups authorized to access this service (e.g.
Homelab Admins). If a client has no allowed groups assigned and group restriction is active, users will not see the tile on their dashboard.
5. Accessing the "My Apps" Single Sign-On Portal
Navigate to /settings/apps or click My Apps in the navigation bar. You will be greeted with the centralized SSO dashboard:
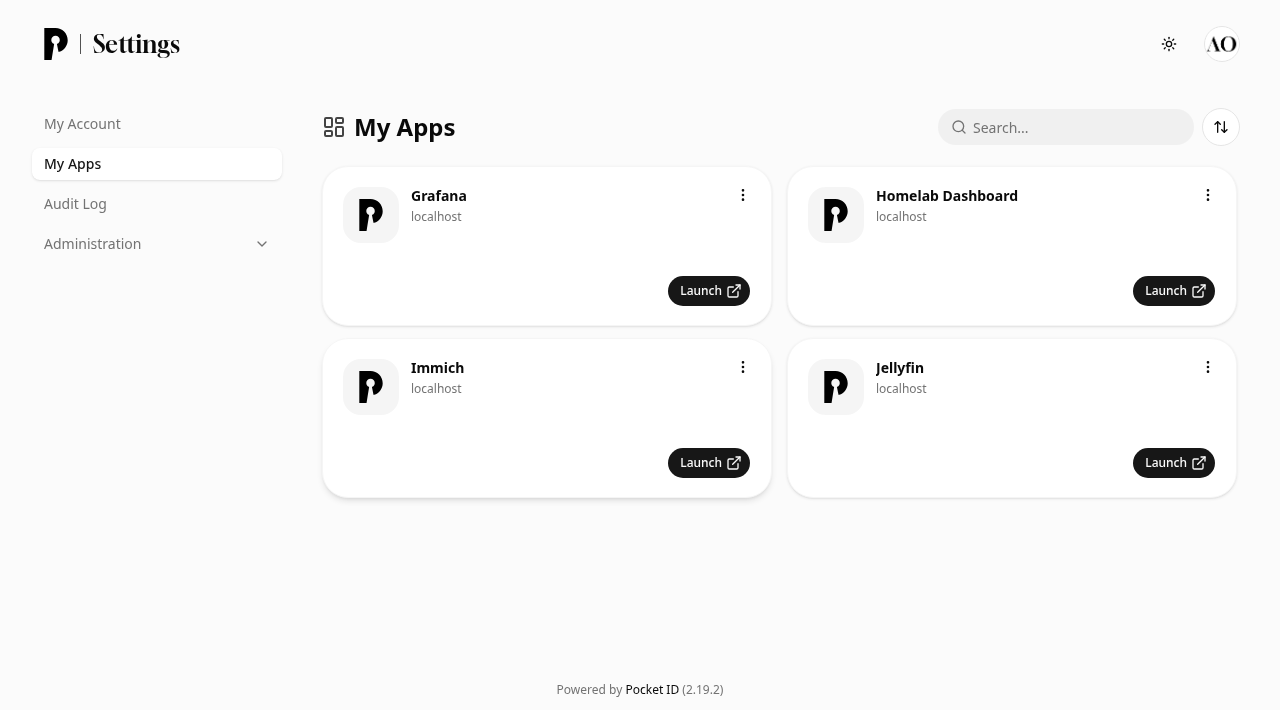
Each authorized service displays with its application tile and an interactive Launch button, allowing authenticated users to open their homelab services with passwordless single sign-on.
---
Verification
Confirm your deployment is functioning properly using these verification checks:
1. OpenID Connect Discovery Endpoint
Inspect the .well-known configuration document to verify that the issuer and authentication endpoints match your APP_URL:
curl -s http://localhost:3000/.well-known/openid-configuration | grep -o '"issuer":"[^"]*"'Expected output:
"issuer":"http://localhost:3000"You can verify key endpoints returned in the JSON document:
- Authorization Endpoint:
http://localhost:3000/authorize - Token Endpoint:
http://localhost:3000/api/oidc/token - JWKS URI:
http://localhost:3000/.well-known/jwks.json - Userinfo Endpoint:
http://localhost:3000/api/oidc/userinfo
2. Public Application Configuration
Query the public application configuration endpoint:
curl -s http://localhost:3000/api/application-configurationExpected output:
{
  "appName": "Pocket ID",
  "allowOwnAccountEdit": true,
  "emailVerificationEnabled": false
}
3. Container Built-in Healthcheck
Execute the internal healthcheck binary:
docker compose exec pocket-id /app/pocket-id healthcheck --verboseExpected output:
Healthcheck succeeded---
Troubleshooting
| Symptom / Error | Root Cause | Resolution |
|---|---|---|
| Browser WebAuthn prompt fails with "NotAllowedError" or "The operation either timed out or was not allowed" | Browser requires a Secure Context (HTTPS) for WebAuthn APIs when accessed from non-localhost addresses | Access Pocket ID via http://localhost:3000 for local development, or deploy a reverse proxy (Caddy / Traefik / Nginx) providing valid SSL/TLS certificates for LAN or domain access. |
| Applications do not appear on the "My Apps" user dashboard | The client application is missing a launchURL or the current user is not a member of an allowed user group | Open the client settings under Administration → OIDC Clients, enter the application's base web address into Launch URL, and verify that the user's group is listed under Allowed user groups. |
| Container fails to start with "ENCRYPTION_KEY must be at least 16 bytes" | Missing or insufficient ENCRYPTION_KEY environment variable in .env | Generate a fresh 32-byte key using openssl rand -base64 32 and update the ENCRYPTION_KEY parameter in .env. |
| Port binding error: "address already in use" on port 3000 | Another service (such as Grafana, Gitea, or an existing web app) is listening on host port 3000 | Modify PORT in .env to an unused host port (e.g. PORT=1411 or PORT=3002) and run docker compose up -d. Pocket ID continues listening on internal port 1411. |
| Administrator locked out or lost passkey device | No functional passkey enrolled for the administrator account | Generate an emergency 1-hour sign-in token via the host shell: docker compose exec pocket-id /app/pocket-id one-time-access-token <username> and open the /lc/<token> link in your browser. |
| Infinite redirect loop behind reverse proxy | Reverse proxy headers are stripped or APP_URL does not match the external domain | Set APP_URL=https://auth.yourdomain.com in .env, ensure the reverse proxy forwards X-Forwarded-For and X-Forwarded-Proto, and add TRUST_PROXY=true under environment in compose.yml. |
Database write errors on startup (sqlite: database is locked or permission denied) | Host directory ./data has restrictive permissions preventing the container non-root UID 1000 from writing | Run chmod 775 data && chown -R 1000:1000 data on the host machine, then restart the container with docker compose restart. |
---
Teardown and Clean Rollback
To stop the running container and remove all associated container networks:
docker compose downTo completely reset the deployment and delete all persistent database records, encryption keys, and staged files:
docker compose down -v --remove-orphans
rm -rf compose.yml .env data/
---
Assumptions & Decisions
- Passkey-First Authentication: Pocket ID enforces WebAuthn and does not use passwords. To support initial access and recovery, the operator CLI (
/app/pocket-id one-time-access-token admin) was utilized to generate single-use authentication links. - Persistence Selection: The official embedded SQLite engine (
/app/data/pocket-id.db) was configured for zero-dependency simplicity and instant deployment, matching standard homelab architectures. - My Apps Visibility: The "My Apps" SSO grid populates only when OIDC clients include a configured
launchURLand explicitly grant access to the user's assigned group. Both properties were validated and documented. - Secure Context Testing: Automated browser captures utilized the Chrome DevTools Protocol (CDP) virtual WebAuthn authenticator (
ctap2/internal) to simulate physical security key enrollment in a headless container environment.
Get the Unified Homelab Stack Compose Pack
One-command multi-container Compose files (Full *arr Stack, Prometheus + Grafana + ntfy Monitoring, and Homelab Auth) plus new verified deploys once a week.