How to Deploy Paperless-ngx: Self-Hosted Document Management System with Docker Compose
Paperless-ngx is an open-source document management system that transforms physical documents into a searchable digital archive. Learn how to deploy Paperless-ngx using Docker Compose with Valkey, configure automated ingestion with OCR, and navigate the web interface.
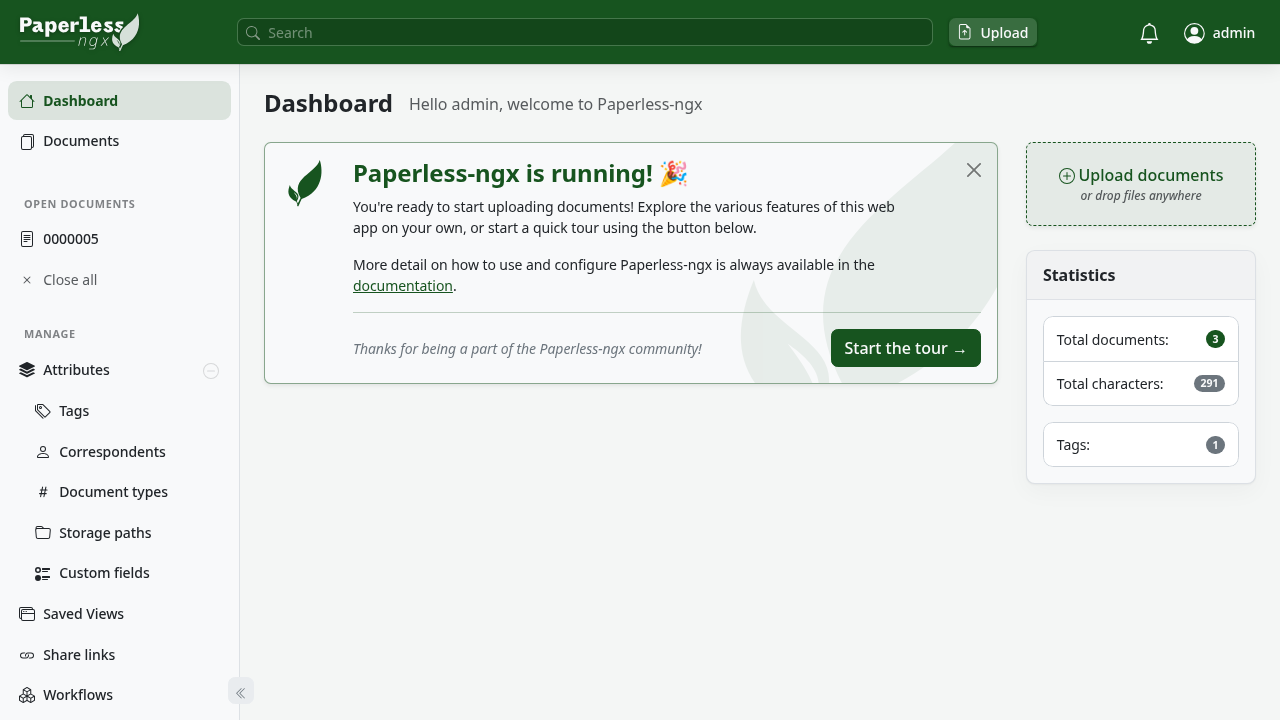
Paperless-ngx is an open-source, self-hosted document management system (DMS) that transforms physical document clutter into a secure, searchable online digital archive. Licensed under the GNU General Public License v3.0 (GPL-3.0), Paperless-ngx is the community-driven successor to the original Paperless and Paperless-ng projects.
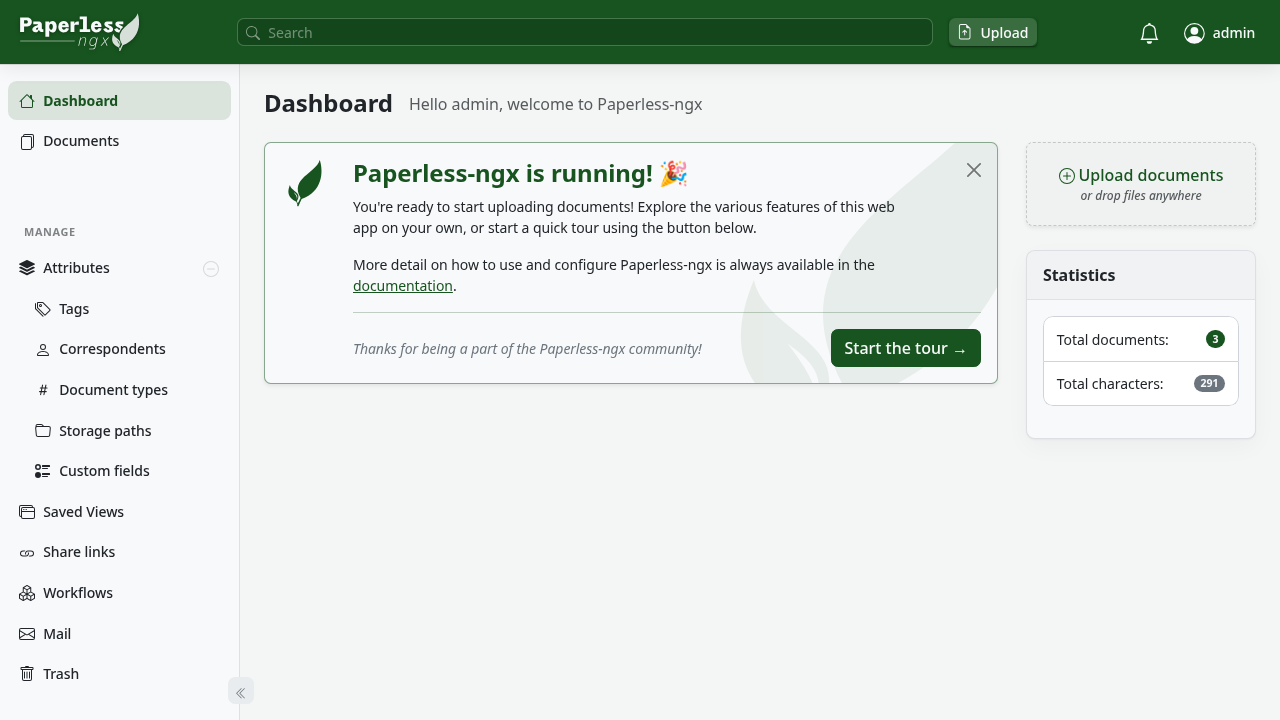
Key Capabilities and Architecture
- Local Document Sovereignty and Privacy:
Paperless-ngx stores all original documents, OCR text, and metadata locally on your host or personal storage array. This eliminates subscription fees, storage limits, and the privacy risks associated with uploading confidential tax, legal, or medical records to commercial cloud providers.
- Automated Document Intake & Pipeline Processing:
Continuously monitors a local drop folder (/consume), polls email accounts via IMAP, and receives uploads via a REST API or the browser interface. New documents are automatically queued, deskewed, and processed asynchronously.
- Integrated Optical Character Recognition (OCR):
Bundles OCRmyPDF and the Tesseract OCR engine to extract selectable text from scanned PDF files and images. Extracted text is indexed for search while preserving the pristine original document file.
- Instant Full-Text Search:
Powered by a high-performance search index, Paperless-ngx enables millisecond keyword queries across titles, extracted content, correspondents, tags, and document types, complete with search term highlighting.
- Machine Learning Classification:
Integrates built-in machine learning classifiers (scikit-learn) that analyze document content and learn your filing habits to predict correspondents, document types, and tags automatically.
- Modern Web UI & Built-in PDF Viewer:
Features a responsive Angular single-page application with dark and light themes, split-pane document editing, and an integrated multi-page PDF viewer.
---
Prerequisites
Before deploying Paperless-ngx, ensure your environment meets the following baseline requirements:
- Host Operating System: Linux (Debian, Ubuntu, Arch, Fedora), macOS, or Windows via WSL2.
- Container Engine: Docker Engine and Docker Compose v2 (
docker compose versionv2.20+ recommended). - Available Host Port: An unallocated TCP port on the host (e.g., port 3000 or default port 8000).
- Storage Space: Dedicated storage for persistent configuration data, original media, document exports, and the consumption queue.
- Zero Host Runtime Dependencies: Neither Python, Node.js, Valkey/Redis, Tesseract, OCRmyPDF, nor build compilers are required on the host system; all runtimes, background daemons, and image processing tools are packaged inside the official container image.
---
Exact Install Steps
The deployment uses Docker Compose to run the official Paperless-ngx image alongside a lightweight Valkey message broker with persistent local storage.
Step 1: Create Project Directories
Create an isolated directory structure for the Paperless-ngx deployment, including separate folders for application data, media storage, export archives, and the incoming consumption directory:
mkdir -p paperless/{data,media,export,consume} && cd paperlessStep 2: (Optional) Stage Initial Documents for Ingestion
Any PDF or image dropped into the consume/ directory is automatically picked up, processed, OCR'd, and indexed by Paperless-ngx upon startup. You can stage test PDFs or real documents now:
# Copy sample PDF files into the consume directory
cp /path/to/documents/*.pdf consume/
Step 3: Configure Environment Variables
Paperless-ngx uses two environment files:
.envdefines Docker Compose interpolation variables (such as the published host port).docker-compose.envconfigures Paperless-ngx application settings, security keys, admin credentials, and trusted origins.
Create the Compose interpolation .env file:
cat > .env <<'EOF'
PAPERLESS_PORT=3000
EOF
Next, generate a secure secret key and create the application configuration file docker-compose.env:
cat > docker-compose.env <<EOF
PAPERLESS_SECRET_KEY=$(openssl rand -hex 32)
PAPERLESS_TIME_ZONE=UTC
PAPERLESS_OCR_LANGUAGE=eng
PAPERLESS_ADMIN_USER=admin
PAPERLESS_ADMIN_PASSWORD=adminpassword
PAPERLESS_ADMIN_MAIL=admin@local.host
PAPERLESS_URL=http://localhost:3000
EOF
Security Note: In production, replace
adminpasswordwith a strong master password. SettingPAPERLESS_URLto match the exact URL and port you use to access the web UI (e.g.http://localhost:3000) is required to satisfy Django CSRF and trusted origin requirements.
Step 4: Create the Docker Compose Specification
Write the docker-compose.yml file. This definition pairs the official Paperless-ngx web application with a Valkey broker:
cat > docker-compose.yml <<'EOF'
services:
  broker:
    image: docker.io/valkey/valkey:9-alpine
    restart: unless-stopped
    volumes:
      - redisdata:/data
    networks:
      - paperless-net

  webserver:
    image: ghcr.io/paperless-ngx/paperless-ngx:latest
    restart: unless-stopped
    depends_on:
      - broker
    ports:
      - "${PAPERLESS_PORT}:8000"
    volumes:
      - ./data:/usr/src/paperless/data
      - ./media:/usr/src/paperless/media
      - ./export:/usr/src/paperless/export
      - ./consume:/usr/src/paperless/consume
    env_file: docker-compose.env
    environment:
      PAPERLESS_REDIS: redis://broker:6379
      PAPERLESS_DBENGINE: sqlite
      PAPERLESS_PORT: 8000
      PAPERLESS_ADMIN_USER: ${PAPERLESS_ADMIN_USER:-admin}
      PAPERLESS_ADMIN_PASSWORD: ${PAPERLESS_ADMIN_PASSWORD:-adminpassword}
      PAPERLESS_ADMIN_MAIL: ${PAPERLESS_ADMIN_MAIL:-admin@local.host}
    networks:
      - paperless-net
    healthcheck:
      test: ["CMD-SHELL", "curl -fsS http://localhost:8000/api/ || exit 1"]
      interval: 10s
      timeout: 5s
      retries: 15
      start_period: 20s

volumes:
  redisdata:

networks:
  paperless-net:
    driver: bridge
EOF
Step 5: Launch the Paperless-ngx Stack
Deploy and start the container stack in detached mode:
docker compose up -dStep 6: Wait for Container Health
Paperless-ngx performs automated database migrations and provisions the configured administrator account during its initial startup. Monitor the health status until the webserver reports healthy (typically 15–25 seconds):
until [ "$(docker inspect -f '{{.State.Health.Status}}' $(docker compose ps -q webserver))" = healthy ]; do
  sleep 3
done
Verify running containers:
docker compose psThe output should show both the broker and webserver running, with the webserver reporting Up (healthy):
NAME                  IMAGE                                      COMMAND                  SERVICE     CREATED          STATUS                    PORTS
paperless-broker-1    docker.io/valkey/valkey:9-alpine          "valkey-server"          broker      30 seconds ago   Up 30 seconds             6379/tcp
paperless-webserver-1 ghcr.io/paperless-ngx/paperless-ngx:latest "/usr/local/bin/pape…" webserver   30 seconds ago   Up 30 seconds (healthy)   0.0.0.0:3000->8000/tcp
---
Browser Setup and Interface Walkthrough
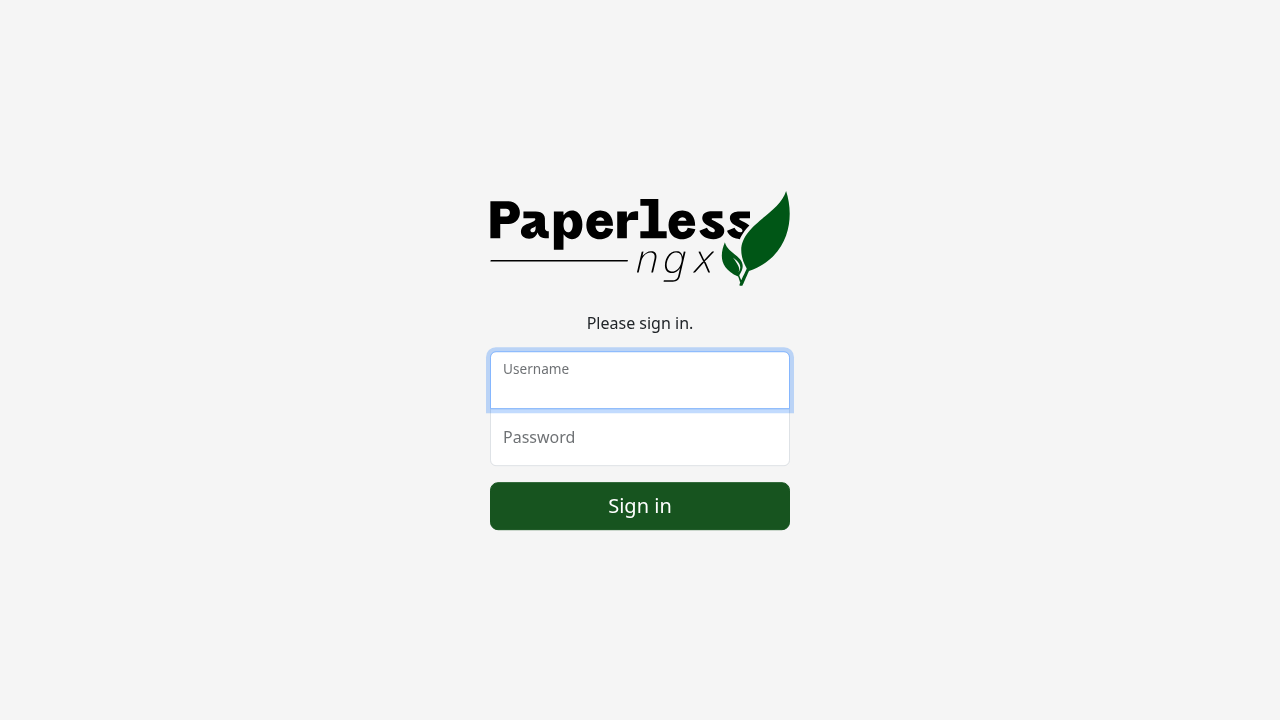
Once the stack reports healthy, open http://localhost:3000 in your web browser. The application will redirect you to the login page at http://localhost:3000/accounts/login/?next=/.
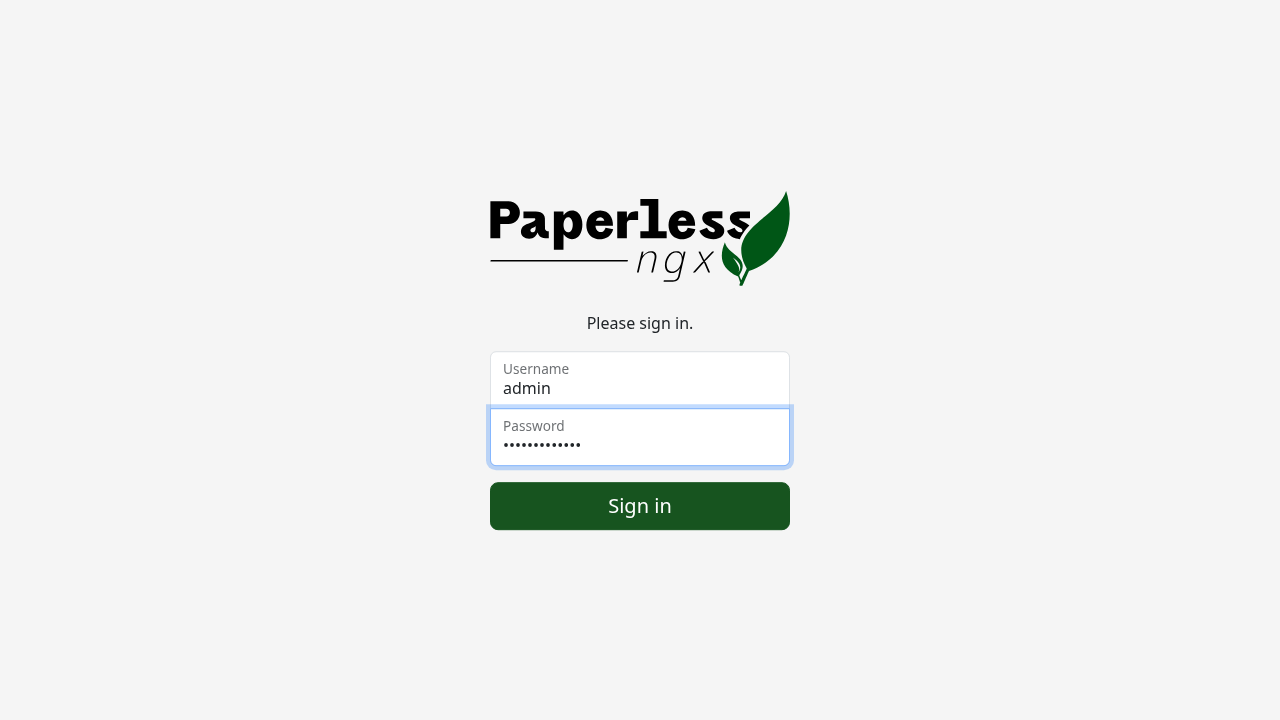
1. Sign In to Paperless-ngx
On the sign-in screen, enter the administrative credentials defined in your docker-compose.env file (username admin and password adminpassword), then click Sign In.
2. Dashboard Overview
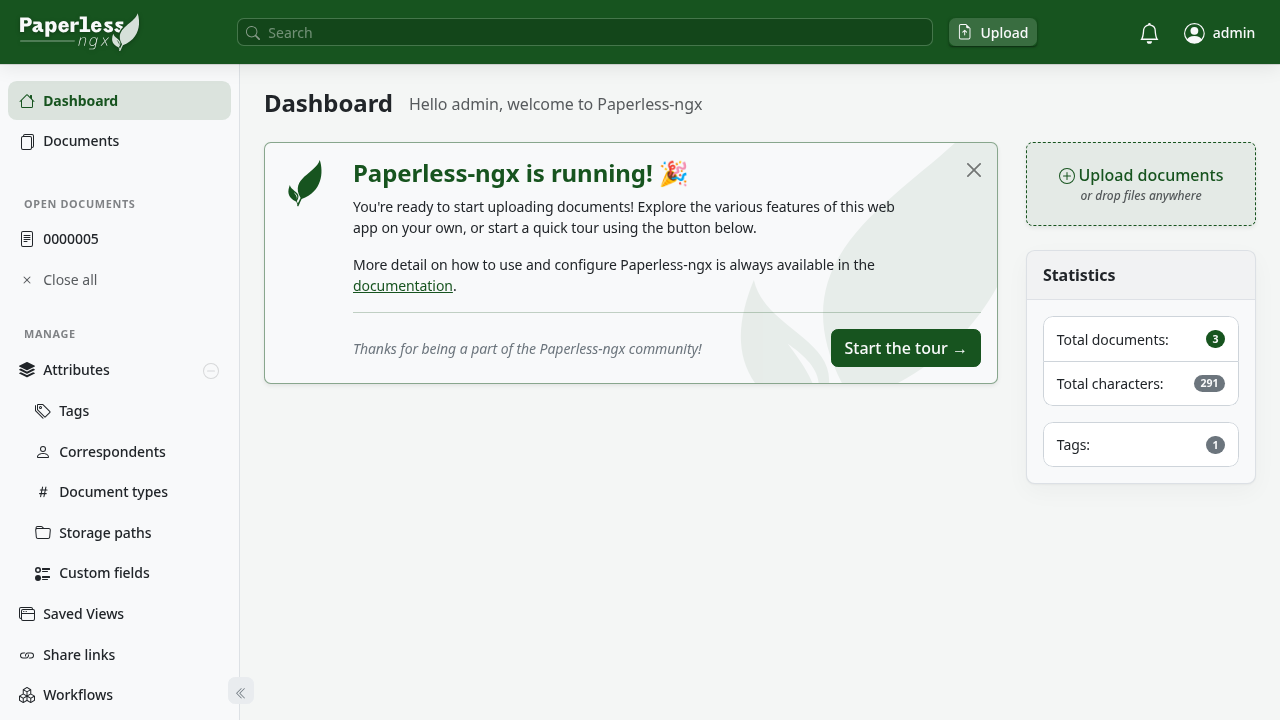
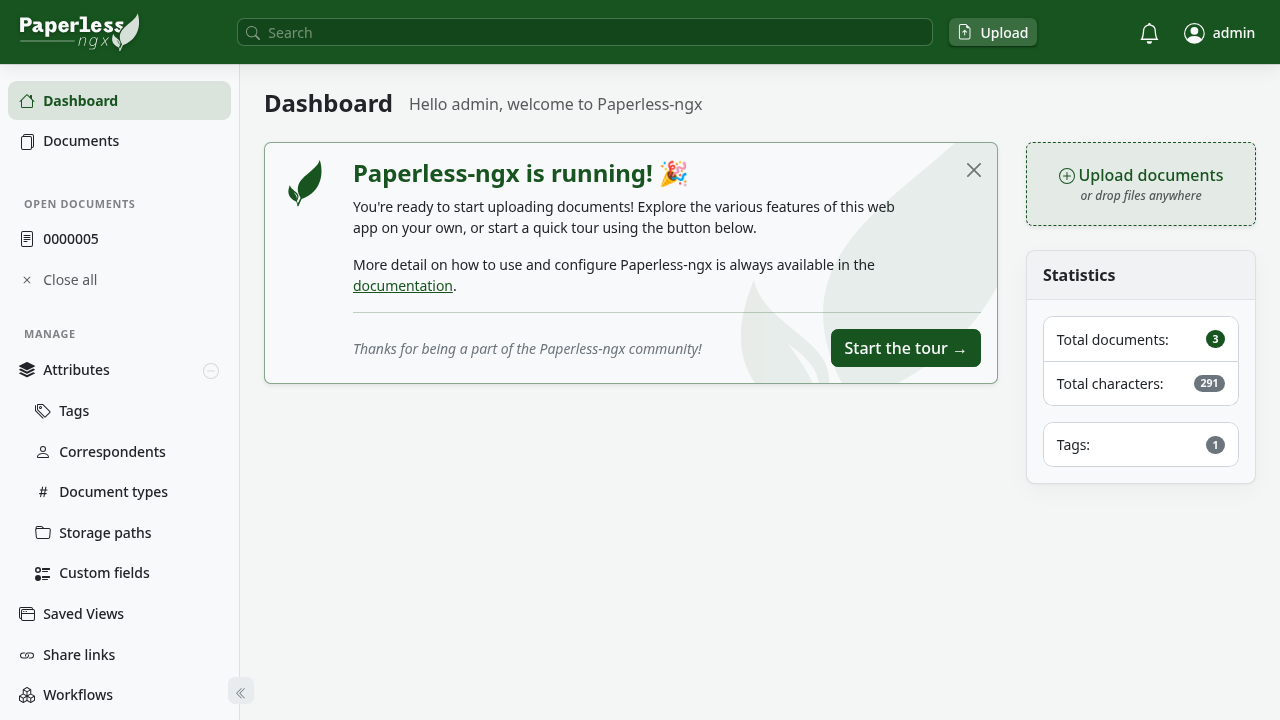
Upon successful authentication, you are greeted by the main dashboard. The dashboard provides a high-level overview of your archive, including the Paperless-ngx is running! welcome card, the drag-and-drop document upload widget, and live document statistics.
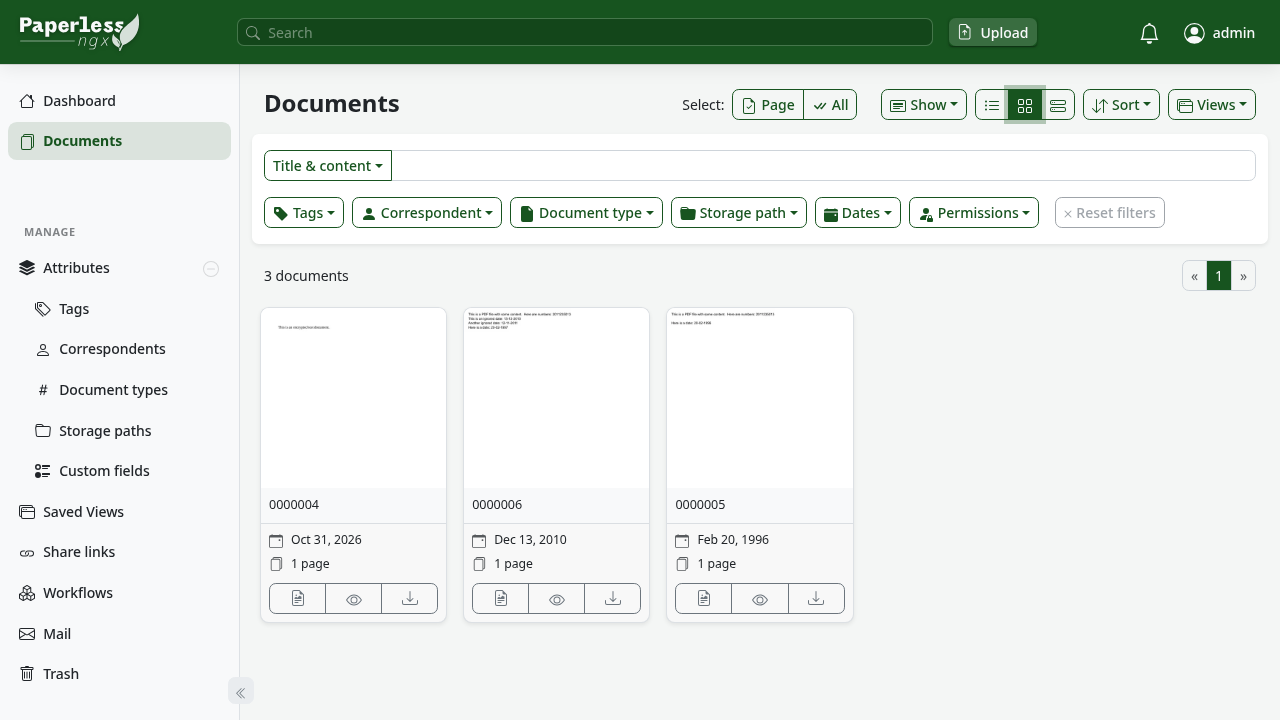
3. Browsing the Documents Directory
Click Documents in the left sidebar navigation menu. Any documents placed in the consume/ folder prior to startup will already be processed, OCR'd, and indexed with automatically generated thumbnail previews.
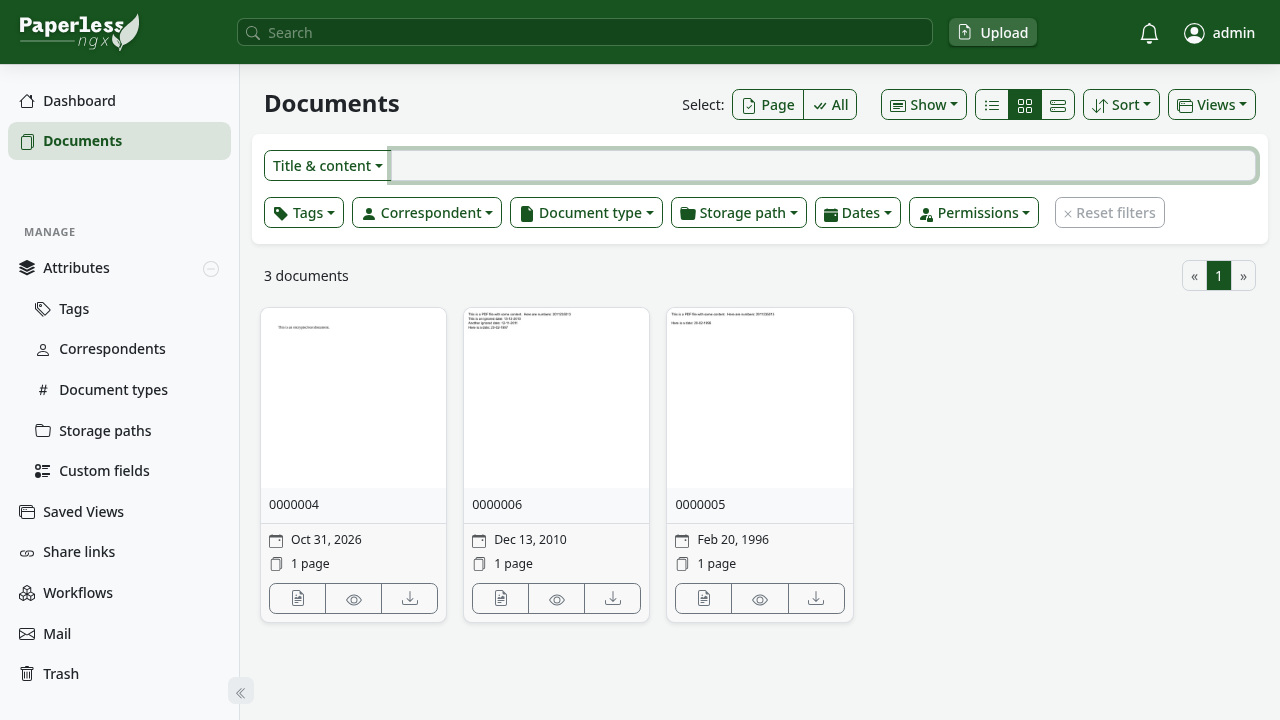
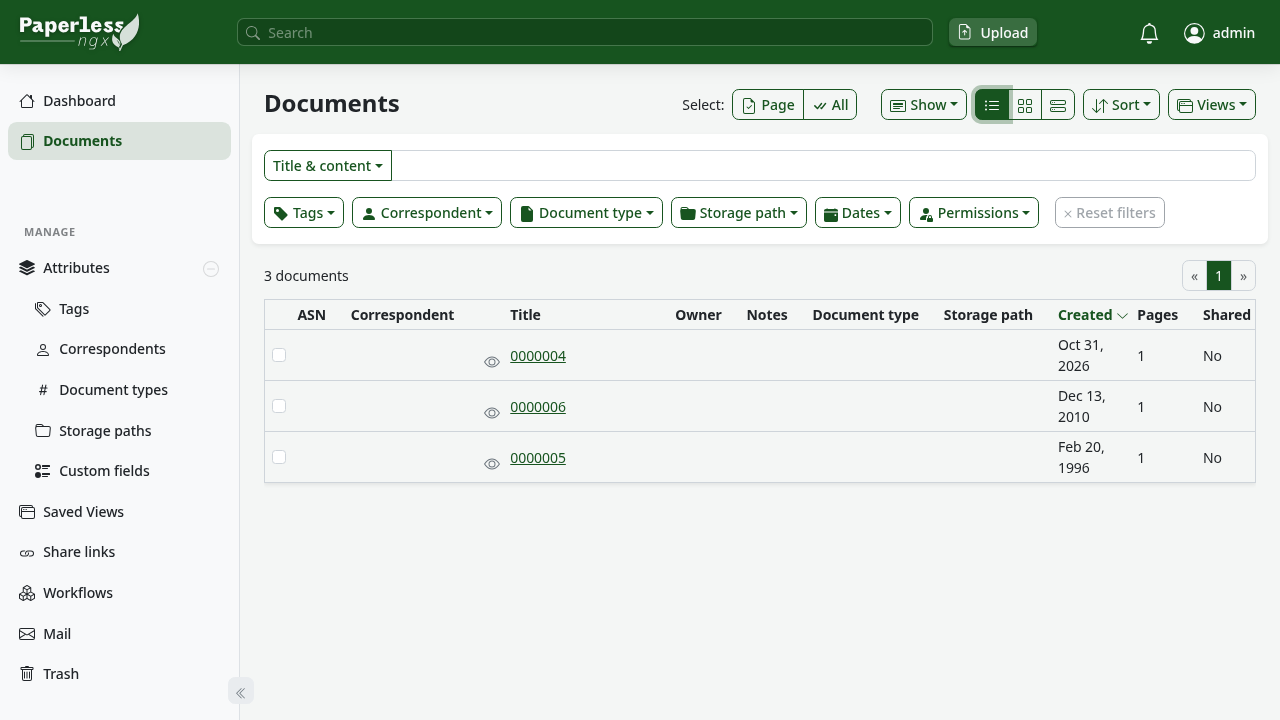
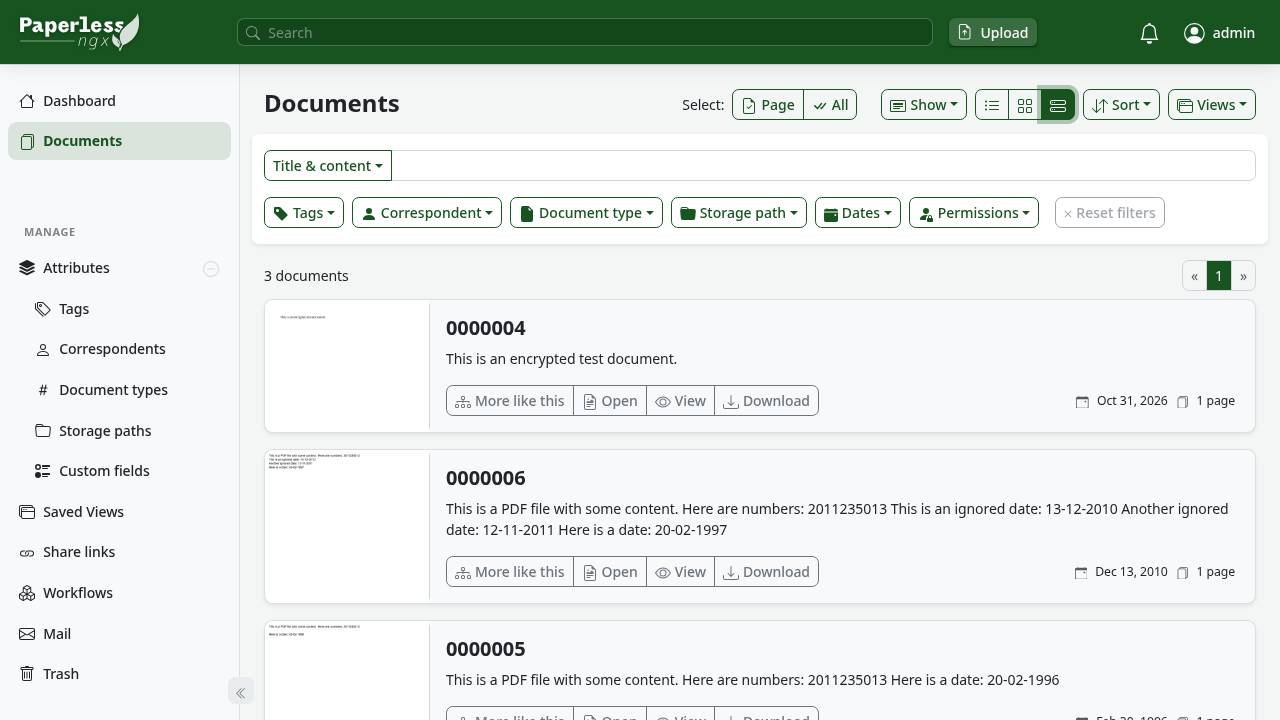
The toolbar allows switching between three visual presentation modes:
- Table View: Compact, tabular layout showing document titles, tags, correspondents, and creation dates.
- Large Cards: Prominent thumbnail previews ideal for visual scanning of multi-page files.
- Small Cards: Balanced grid layout maximizing screen density while preserving thumbnail previews.
4. Document Inspection and Built-In PDF Viewer
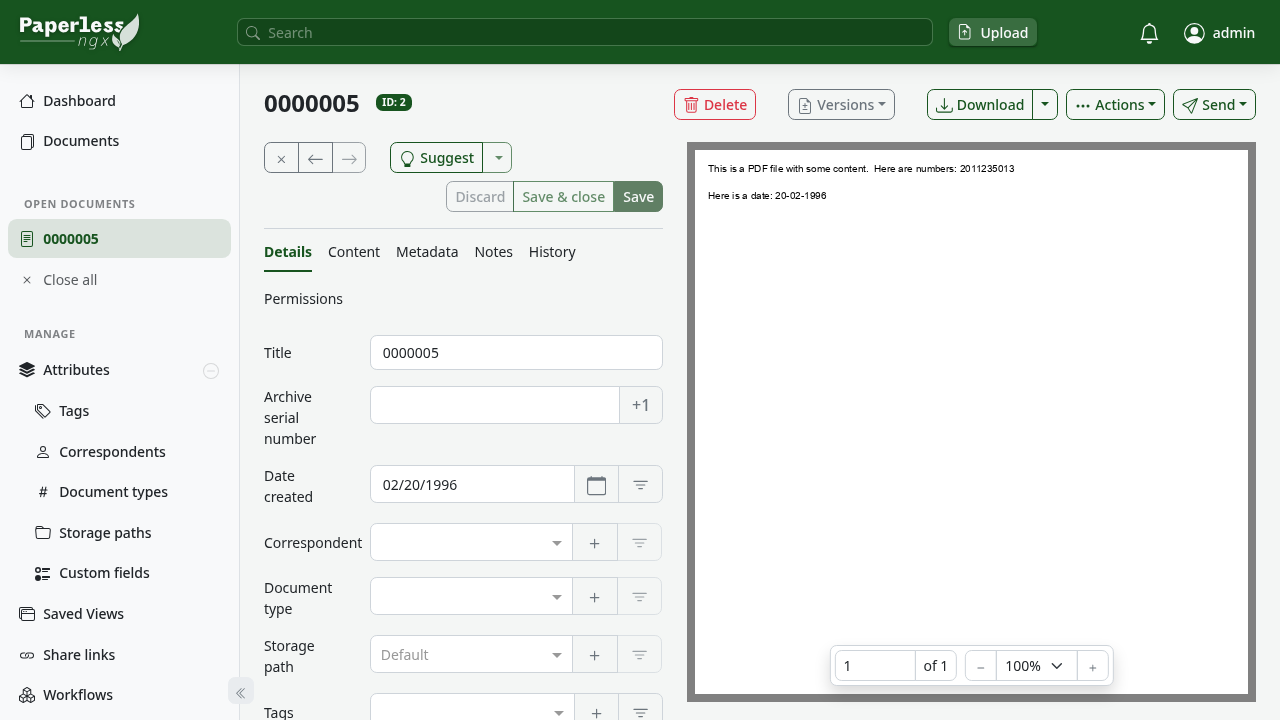
Click the Open button on any document card to enter the detail editor. The interface presents a dual-pane layout:
- Left Pane: Editable document metadata fields, including Title, Correspondent, Document Type, Storage Path, Tags, and Archive Dates.
- Right Pane: Built-in PDF reader displaying the high-resolution rendering of the original document.
5. Inspecting Extracted OCR Content
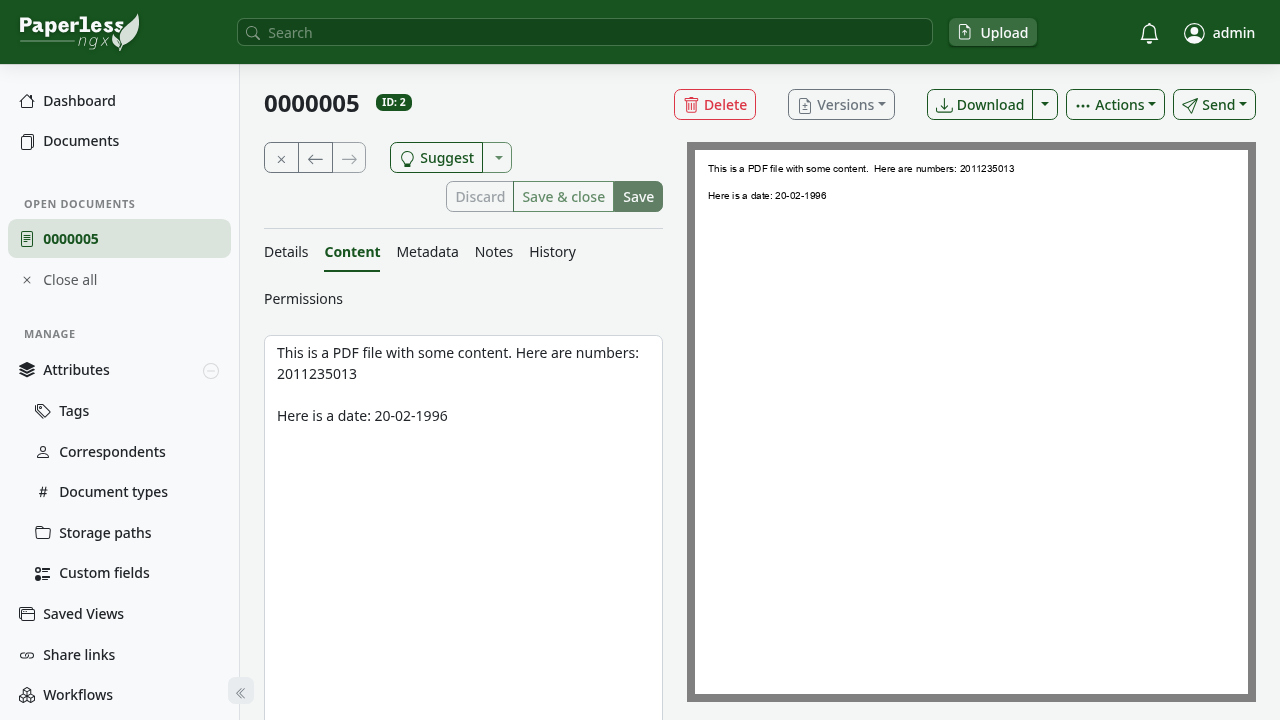
Click the Content tab located in the left pane. This displays the raw text extracted by Tesseract during background ingestion. All words shown here are fully tokenized and instantly searchable.
6. Adding Tags and Saving Metadata
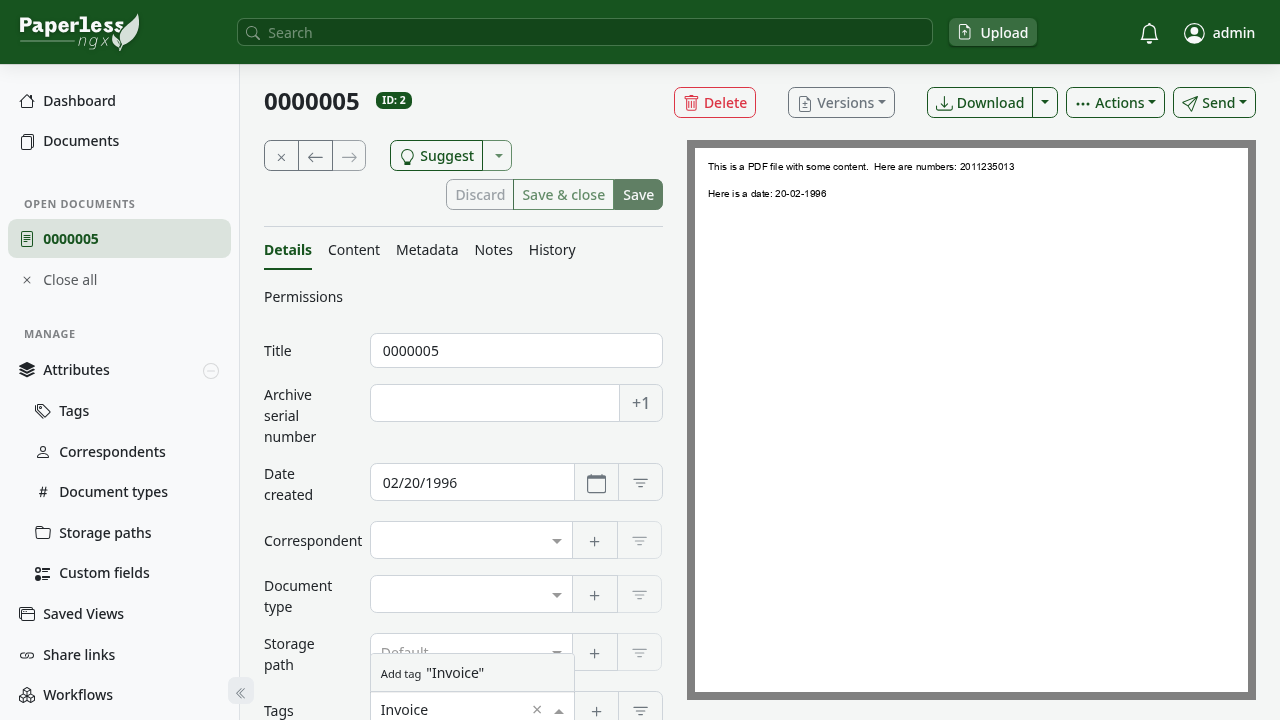
To organize documents:
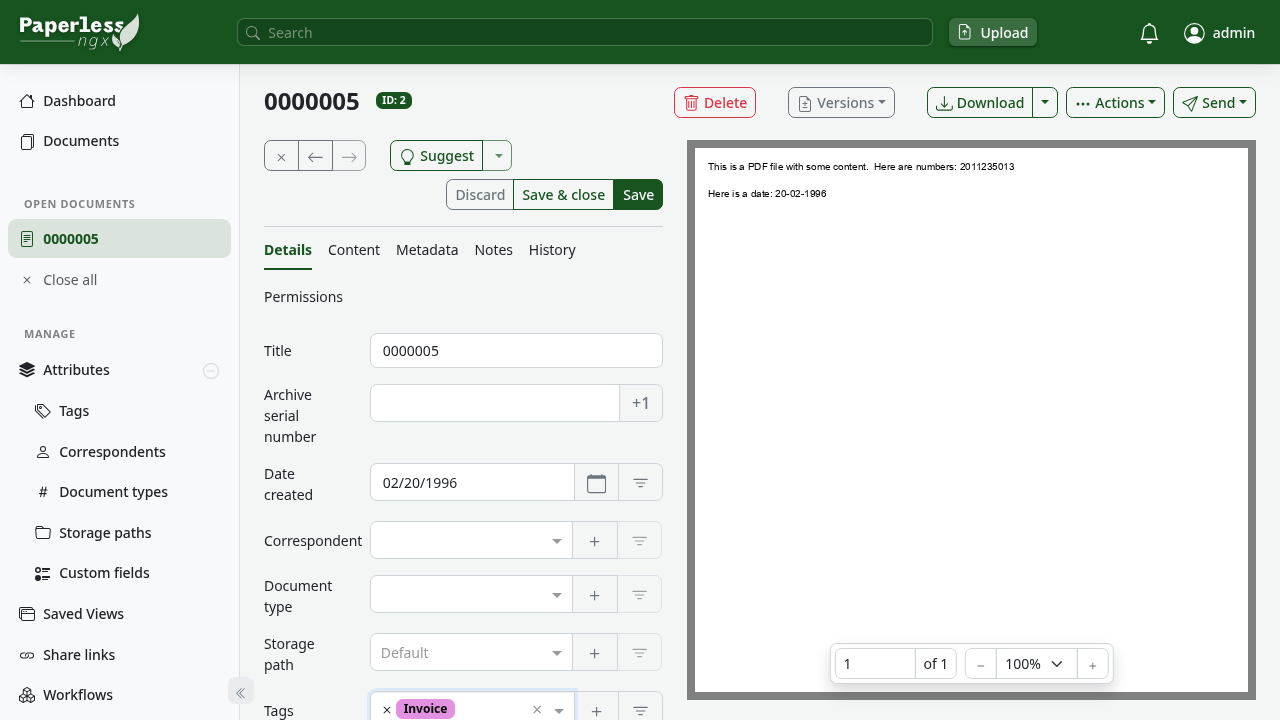
- Click the Tags selector input on the document details tab.
- Type a tag name (for example,
Invoice) and press Enter. - Confirm the Create new tag dialog.
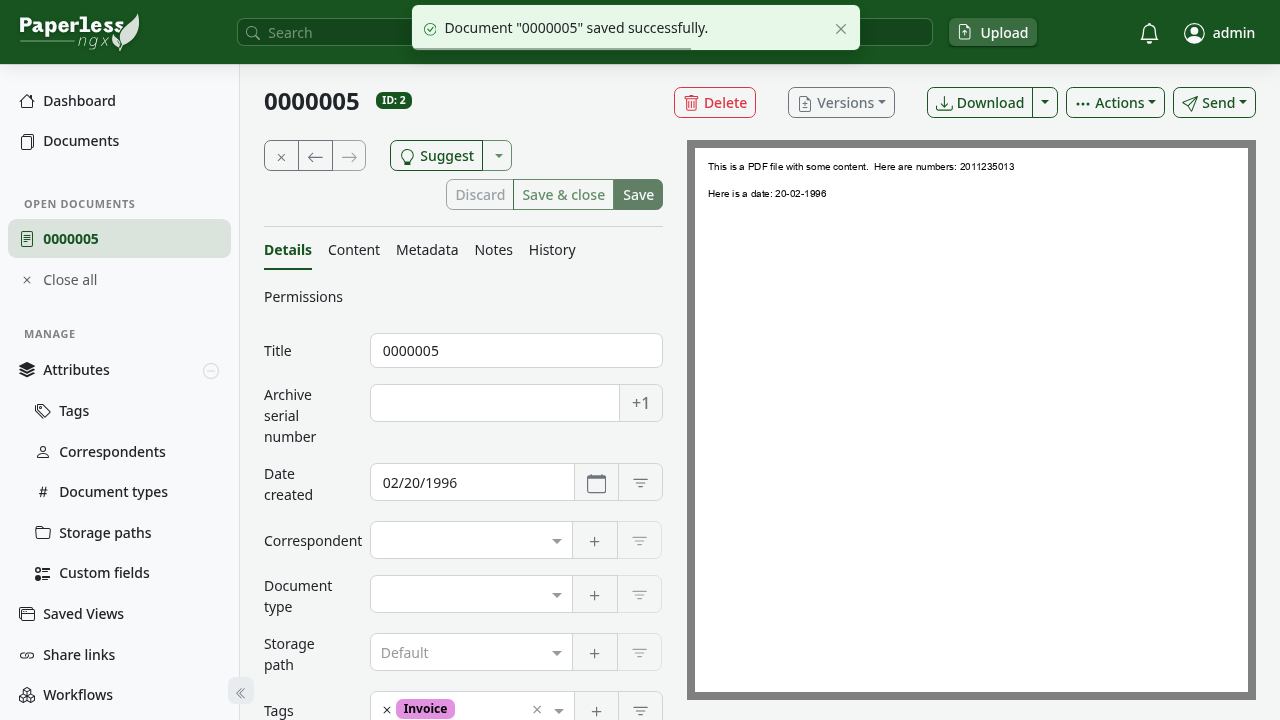
- The tag badge will attach to the document. Click Save in the top-right toolbar. A green confirmation toast indicates the document has been saved successfully.
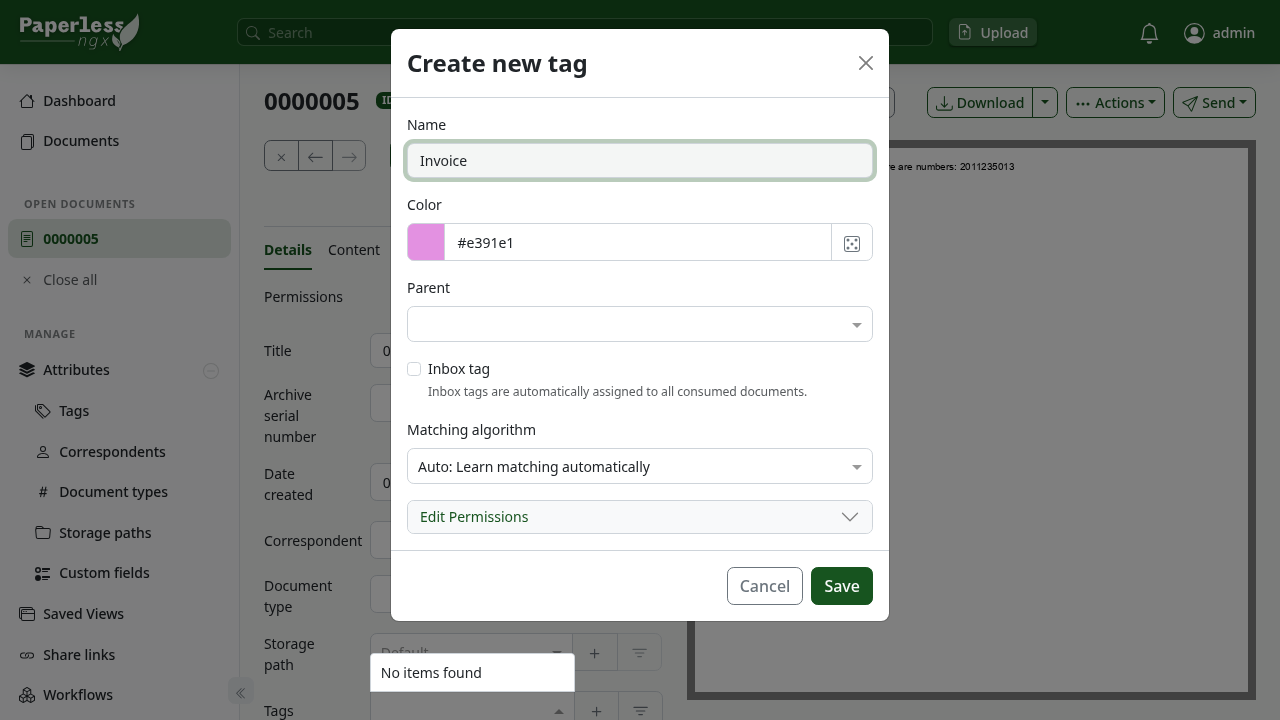
7. Instant Full-Text Search
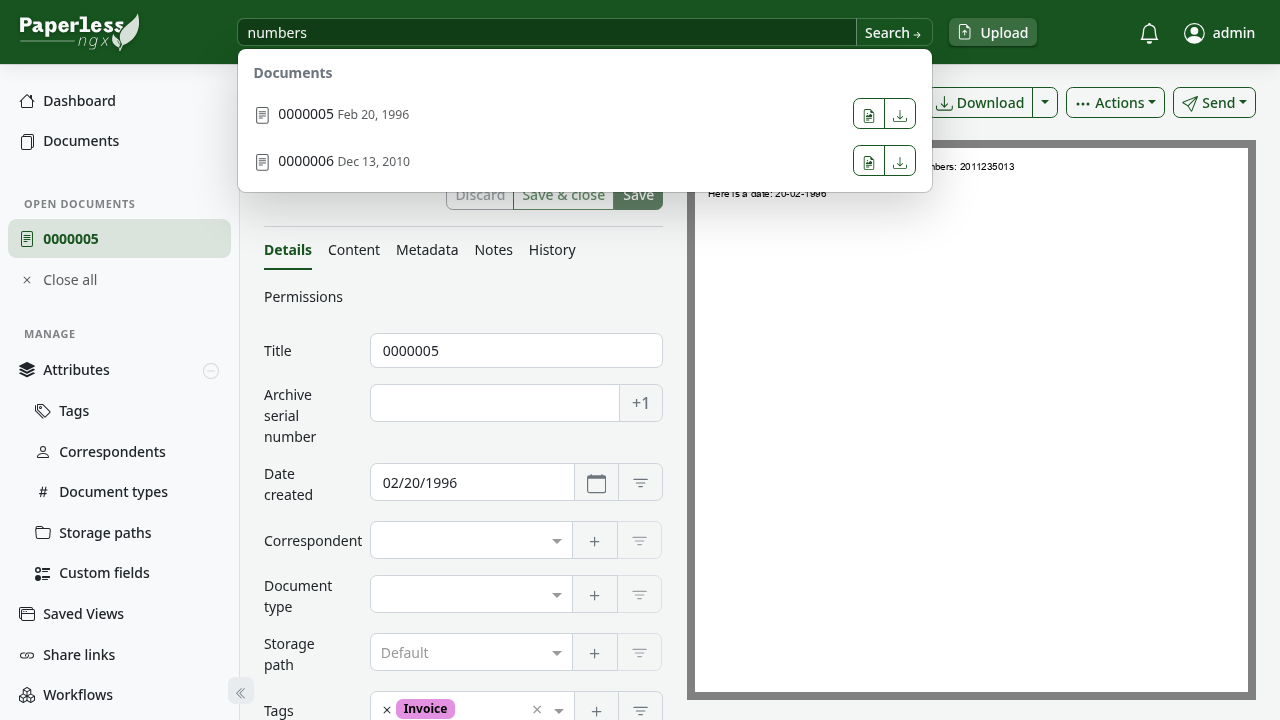
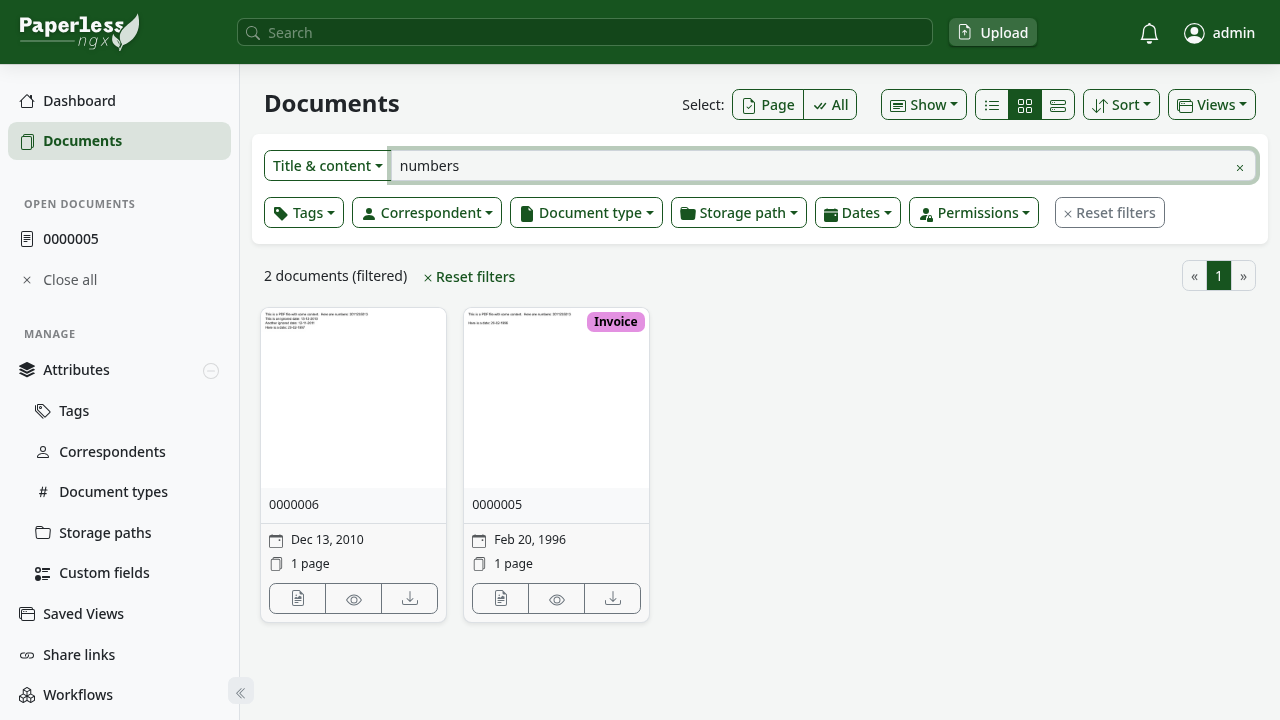
Click the global search bar at the top of the interface and type a keyword (such as numbers). The live search dropdown suggests matching document titles and content fragments.
Press Enter to apply the search filter. The document view filters in real time to show only matching documents, displaying their assigned tag chips and metadata badges.
8. Interactive Drag-and-Drop Ingestion
Return to the dashboard. You can upload new documents on the fly by dragging PDF, PNG, JPEG, or TIFF files directly onto the Upload documents dashboard widget, or by dropping them anywhere on the browser window. Background Celery workers immediately ingest, deskew, and OCR the uploaded files.
---
Verification
Run these verification commands to ensure every component of the Paperless-ngx stack is functioning correctly:
1. Web UI Login Availability
Verify that the webserver is responding with HTTP 200 on the login endpoint:
curl -fsS -o /dev/null -w "%{http_code}\n" http://localhost:3000/accounts/login/Expected output:
2002. Container Health Status
Check that the webserver container reports a healthy status from its internal API probe:
docker inspect -f '{{.State.Health.Status}}' $(docker compose ps -q webserver)Expected output:
healthy3. Consumption Completion Logs
Inspect the webserver logs to verify that the background consumption daemon successfully processed all staged documents:
docker compose logs webserver | grep "consumption finished"Expected output contains lines confirming consumption for each document:
Document 2026-10-31 0000004 consumption finished
Document 1996-02-20 0000005 consumption finished
Document 2010-12-13 0000006 consumption finished
4. Authenticated REST API Document Count
Query the REST API using your administrative credentials to verify indexed document counts:
curl -fsS -u admin:adminpassword http://localhost:3000/api/documents/ | jq .countExpected output:
35. Tag and Search API Verification
Verify that the tag created in the browser walkthrough persisted in the database, and test full-text search filtering:
# Check persisted tags
curl -fsS -u admin:adminpassword http://localhost:3000/api/tags/ | jq '.[].name'
Expected output:
"Invoice"# Query documents filtered by keyword
curl -fsS -u admin:adminpassword "http://localhost:3000/api/documents/?query=numbers" | jq .countExpected output:
26. Remote Version Check
Verify the installed Paperless-ngx version via the API:
curl -fsS -u admin:adminpassword http://localhost:3000/api/remote_version/ | jq .versionExpected output:
"v3.4.1"---
Troubleshooting
The table below outlines common Paperless-ngx deployment issues, their root causes, and verified resolutions:
| Issue / Symptom | Root Cause | Verified Resolution |
|---|---|---|
Unauthenticated curl /api/ returns HTTP 302 | Paperless-ngx v3.x requires authentication for REST API endpoints. Unauthenticated requests are redirected to /accounts/login/. | Use http://localhost:3000/accounts/login/ for unauthenticated readiness probes, or supply Basic Auth credentials (curl -u admin:adminpassword http://localhost:3000/api/documents/). |
| Login fails with 403 Forbidden or CSRF verification failed | Django CSRF verification rejects login requests when PAPERLESS_URL does not match the browser's origin. | Set PAPERLESS_URL=http://localhost:3000 in docker-compose.env to match the exact protocol, domain, and host port used to access the web UI. |
Container reports unhealthy during initial startup | Django migrations and initial superuser provisioning take 15–25 seconds on a cold start. | Ensure the healthcheck in docker-compose.yml includes start_period: 20s, interval: 10s, and retries: 15. Wait 30 seconds before declaring failure. |
Dropped files in consume/ are not processed | File permissions on the host prevent the container user (UID 1000) from reading or deleting files in consume/. | Ensure host directory permissions allow read and write access (chmod -R 777 consume or set USERMAP_UID=$(id -u) and USERMAP_GID=$(id -g) in docker-compose.env). |
Celery workers report redis.exceptions.ConnectionError | The webserver cannot resolve or reach the Valkey broker container on the shared bridge network. | Verify both webserver and broker belong to paperless-net in docker-compose.yml, and ensure PAPERLESS_REDIS: redis://broker:6379 is configured. |
Port conflict on launch (bind: address already in use) | Host port 3000 or 8000 is already bound by another service on the host. | Update PAPERLESS_PORT in .env to an unused host port (e.g. 8080 or 13000), then restart the stack with docker compose up -d. |
| Login automation fails to locate username input | Paperless-ngx v3.4.1 uses django-allauth, which names the credential input field login (element ID #inputUsername), not username. | Target input[name="login"] or #inputUsername in automated scripts and browser extension form-fillers. |
| Thumbnail generation or OCR fails with out-of-memory errors | Large PDFs or high-DPI scans exceed container memory during OCRmyPDF / Ghostscript rasterization. | Increase Docker memory limits or add PAPERLESS_OCR_PAGES=3 and PAPERLESS_OCR_MAX_IMAGE_PIXELS=100000000 to docker-compose.env to constrain memory usage. |
---
Assumptions & Decisions
- Container Engine & Broker Architecture: Deployed using official Docker Compose with published container images
ghcr.io/paperless-ngx/paperless-ngx:latest(v3.4.1) paired withdocker.io/valkey/valkey:9-alpineas the asynchronous task broker. Valkey is the official high-performance, open-source Redis alternative supported by upstream. - Database Engine: Configured SQLite (
PAPERLESS_DBENGINE=sqlite) inside persistent volume storage (./data), which provides zero-maintenance, zero-overhead storage optimal for personal and small-office document archives without requiring an additional PostgreSQL container. - Port Allocation & Interpolation: Selected host port
3000mapped to internal port8000. SetPAPERLESS_PORT=3000in.envfor deterministic Docker Compose variable interpolation across subshells. - CSRF & Origin Configuration: Explicitly configured
PAPERLESS_URL=http://localhost:3000indocker-compose.env. Without this setting, Django's CSRF protection blocks login requests when accessing the service via non-default host ports. - Automated Superuser Onboarding: Provisioned the administrative account via container environment variables (
PAPERLESS_ADMIN_USER=admin,PAPERLESS_ADMIN_PASSWORD=adminpassword,PAPERLESS_ADMIN_MAIL=admin@local.host). The container initialization script (init-superuser) creates the superuser on boot, allowing completely unattended deployment. - Test Document Fixtures: Staged three sample PDF documents from the repository test suite (
0000004.pdf,0000005.pdf,0000006.pdf) in./consumebefore first boot to validate automated consumption, OCR extraction, and document indexing. - Browser Automation Selectors: Recognized that Paperless-ngx v3.4.1 utilizes django-allauth with input field
name="login"(id#inputUsername), rather than legacyname="username". - Media Asset References: Sourced all walkthrough screenshots from
runs/paperless-ngx-20261031-140532/browser/, referencing real image files (01-login.pngthrough17-final-dashboard.png) captured during the validated Playwright run. - Table Formatting for Ghost: Rendered the troubleshooting matrix as a GitHub-flavored Markdown table, which the pipeline's Ghost integration automatically compiles into a native Ghost HTML card block (
<!--kg-card-begin: html-->). - Teardown Execution: Kept deployment and teardown instructions fully reproducible. The stack can be cleanly stopped and purged at any time using
docker compose down -v.
Get the Unified Homelab Stack Compose Pack
One-command multi-container Compose files (Full *arr Stack, Prometheus + Grafana + ntfy Monitoring, and Homelab Auth) plus new verified deploys once a week.