
How to Deploy Immich: Self-Hosted AI-Powered Photo & Video Backup Solution
Immich is a high-performance self-hosted photo and video management platform with local machine learning, facial recognition, and semantic search. Learn how to deploy Immich v3.3.6 with Docker Compose, bootstrap administrative credentials, upload libraries via the official CLI, and search assets by visual context.
Immich is a high-performance, open-source self-hosted photo and video management system designed as a direct, privacy-respecting alternative to cloud-based services such as Google Photos and Apple iCloud Photos. Built on a modular microservices architecture, Immich pairs an intuitive SvelteKit web interface and native mobile clients with on-premise machine learning models for facial recognition, optical character recognition (OCR), and natural language CLIP semantic search.
Unlike conventional media gallery tools that rely strictly on manually entered file tags or rigid folder trees, Immich runs local vector embeddings directly against your image assets. Typing natural concepts like "dog", "beach sunset", or "vintage car" into the search bar identifies matching media instantly—processed entirely on your local machine without transmitting data to external cloud APIs.
Core Architecture & Microservices
Immich coordinates four containerized microservices defined in a unified Compose project:
immich-server: The central application core written in NestJS. It provides the REST API gateway, WebSocket hub, SvelteKit web frontend, and background worker queues that handle hash generation, EXIF parsing, video transcoding via FFmpeg, and thumbnail synthesis with Sharp and LibRaw.immich-machine-learning: A dedicated Python/FastAPI service hosting local ONNX inference models. It generates high-dimensional vector embeddings for CLIP natural language visual queries, performs face detection with InsightFace, and executes text recognition via RapidOCR.database: A customized PostgreSQL 14 instance compiled with specialized vector extensions—specificallyvectorchordandpgvectors—engineered to store and index high-dimensional image embeddings for sub-millisecond nearest-neighbor searches.redis: A Valkey 9 in-memory key-value cache and message broker powering BullMQ job queues, concurrency locks, and real-time state synchronization across all server workers.
---
Prerequisites
Before beginning your deployment, verify that your host environment satisfies the following baseline requirements:
- Operating System: Any 64-bit Linux distribution (Ubuntu 22.04+, Debian 12+, Rocky Linux, Arch Linux), macOS, or Windows 11 with WSL2.
- Container Engine: Docker Engine 24.0+ and Docker Compose v2 (
docker compose versionv2.24+). - Compute & Memory: Minimum 4 GB RAM (8 GB+ recommended when processing large photo batches alongside machine learning inference); 2 or more CPU cores.
- Disk Storage: Sufficient disk space for your media library (
./library), PostgreSQL database tables (./postgres), and roughly 2 GB of storage for cached machine learning models. - Network Ports: Dedicated host TCP port 3000 (or an alternate free port such as
2283,2284, or8085). Theimmich-servercontainer listens internally on port2283.
---
Exact Install Steps
Follow these step-by-step instructions to prepare persistent storage, generate environment configurations, launch the container stack, and bootstrap administrative access.
Step 1: Create Project Directory and Storage Paths
Create an isolated directory on your host to store your Compose definition, environment variables, media uploads, and database files:
mkdir -p immich/library immich/postgres
cd immich
The ./library directory holds all uploaded originals, transcoded video proxies, and generated thumbnails. The ./postgres directory contains PostgreSQL database clusters and vector index files.
Step 2: Configure Environment Variables
Create an environment configuration file named .env in your project folder. This sets database credentials, volume paths, and server parameters matching the official upstream recommendations:
cat > .env <<'EOF'
# Media library and database volume mount locations
UPLOAD_LOCATION=./library
DB_DATA_LOCATION=./postgres

# Application release track (v3 references current stable v3.3.6)
IMMICH_VERSION=v3

# PostgreSQL connection credentials
DB_PASSWORD=immich_secure_db_password_2026
DB_USERNAME=postgres
DB_DATABASE_NAME=immich

# Host port mapping and compose project namespace
HOST_PORT=3000
COMPOSE_PROJECT_NAME=immich
TZ=Etc/UTC
EOF
Security Note: Replace
immich_secure_db_password_2026with a strong, random password. Immich uses internal Docker networking to communicate with PostgreSQL, so the database port is never exposed directly to your external host network.
Step 3: Write Docker Compose Configuration
Create a docker-compose.yml manifest defining the four coordinated services, health checks, and persistent volumes:
cat > docker-compose.yml <<'EOF'
name: ${COMPOSE_PROJECT_NAME:-immich}

services:
  immich-server:
    container_name: ${COMPOSE_PROJECT_NAME:-immich}-server
    image: ghcr.io/immich-app/immich-server:${IMMICH_VERSION:-v3}
    volumes:
      - ${UPLOAD_LOCATION}:/data
      - /etc/localtime:/etc/localtime:ro
    env_file: [.env]
    ports:
      - '${HOST_PORT:-3000}:2283'
    depends_on:
      - redis
      - database
    restart: always
    healthcheck:
      disable: false

  immich-machine-learning:
    container_name: ${COMPOSE_PROJECT_NAME:-immich}-ml
    image: ghcr.io/immich-app/immich-machine-learning:${IMMICH_VERSION:-v3}
    volumes:
      - model-cache:/cache
    env_file: [.env]
    restart: always
    healthcheck:
      disable: false

  redis:
    container_name: ${COMPOSE_PROJECT_NAME:-immich}-redis
    image: docker.io/valkey/valkey:9@sha256:3add1a336a920ea54770a001ab6feb3da5fceea96a40373a3a2cd469b815f0b7
    healthcheck:
      test: redis-cli ping || exit 1
    restart: always

  database:
    container_name: ${COMPOSE_PROJECT_NAME:-immich}-postgres
    image: ghcr.io/immich-app/postgres:14-vectorchord0.4.3-pgvectors0.2.0@sha256:bcf63357191b76a916ae5eb93464d65c07511da41e3bf7a8416db519b40b1c23
    environment:
      POSTGRES_PASSWORD: ${DB_PASSWORD}
      POSTGRES_USER: ${DB_USERNAME}
      POSTGRES_DB: ${DB_DATABASE_NAME}
      POSTGRES_INITDB_ARGS: '--data-checksums'
    volumes:
      - ${DB_DATA_LOCATION}:/var/lib/postgresql/data
    shm_size: 128mb
    restart: always

volumes:
  model-cache:
EOF
Step 4: Launch the Microservices Stack
Start all containers in detached mode:
docker compose up -dMonitor container initialization until all four services indicate a healthy status:
docker compose psWait until immich-server and immich-machine-learning report healthy. You can verify that the API server is responding by querying the ping endpoint:
curl -sS http://localhost:3000/api/server/pingExpected output:
pongConfirm the running application version:
curl -sS http://localhost:3000/api/server/versionExpected output:
{"major":3,"minor":3,"patch":6}Check initial server initialization status:
curl -sS http://localhost:3000/api/server/config | grep -o '"isInitialized":[a-z]*'When deploying on a fresh volume, "isInitialized":false indicates that no administrative user has been created yet.
Step 5: Bootstrap the Administrator Account
The first user created on an uninitialized Immich instance automatically receives administrator privileges. You can initialize this account via an automated HTTP POST request (the exact API call executed by the web interface) or directly through the browser.
To bootstrap headlessly using curl:
curl -sS http://localhost:3000/api/auth/admin-sign-up \
  -H "Content-Type: application/json" \
  -d '{
    "email": "admin@example.com",
    "password": "YourStrongPassword123!",
    "name": "Immich Admin"
  }'
Verify that the administrator user is active using the bundled immich-admin operator utility inside the server container:
docker exec immich-server immich-admin list-usersExpected output:
email: admin@example.com
name: Immich Admin
isAdmin: true
Step 6: Generate API Key & Perform Initial Upload
To automate photo ingestion from scripts or remote storage paths, acquire a session token and create an API key:
# 1. Acquire session access token
TOKEN=$(curl -sS http://localhost:3000/api/auth/login \
  -H "Content-Type: application/json" \
  -d '{"email":"admin@example.com","password":"YourStrongPassword123!"}' \
  | python3 -c "import sys, json; print(json.load(sys.stdin)['accessToken'])")

# 2. Create an administrative API key
KEY=$(curl -sS http://localhost:3000/api/api-keys \
  -H "Authorization: Bearer $TOKEN" \
  -H "Content-Type: application/json" \
  -d '{"name":"cli-bulk-uploader","permissions":["all"]}' \
  | python3 -c "import sys, json; print(json.load(sys.stdin)['secret'])")

echo "Generated API Key: $KEY"
Verify authenticated API access:
curl -sS -H "x-api-key: $KEY" http://localhost:3000/api/users/meYou can now use the official Immich CLI container to upload directories of photos and automatically convert directory structures into photo albums:
docker run --rm --network host \
  -v /path/to/photos:/import:ro \
  -e IMMICH_INSTANCE_URL=http://localhost:3000/api \
  -e IMMICH_API_KEY="$KEY" \
  ghcr.io/immich-app/immich-cli:latest upload --recursive --album /import
---
Browser Setup & First Run
Once the backend containers are running and healthy, finish configuring your installation through the web interface.
1. Initial Sign In
Open your browser and navigate to http://localhost:3000 (or http://<your-server-ip>:3000). If you have already bootstrapped the administrator via the API, the authentication portal will appear:
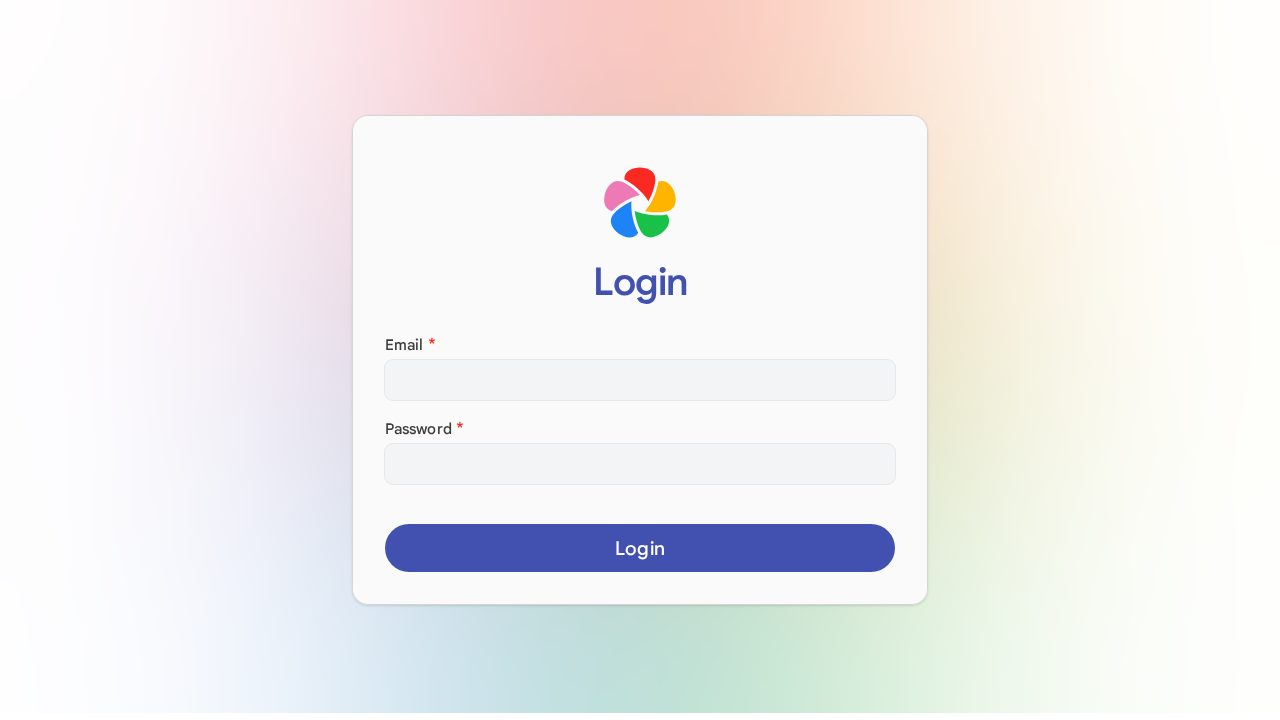
Enter your administrative email (admin@example.com) and chosen password, then click Log In. (If you did not execute Step 5 via CLI, a Getting Started screen appears allowing you to register the initial admin account).
2. Onboarding Configuration Wizard
Upon first login, Immich guides administrators through an onboarding wizard across eight configuration stages:
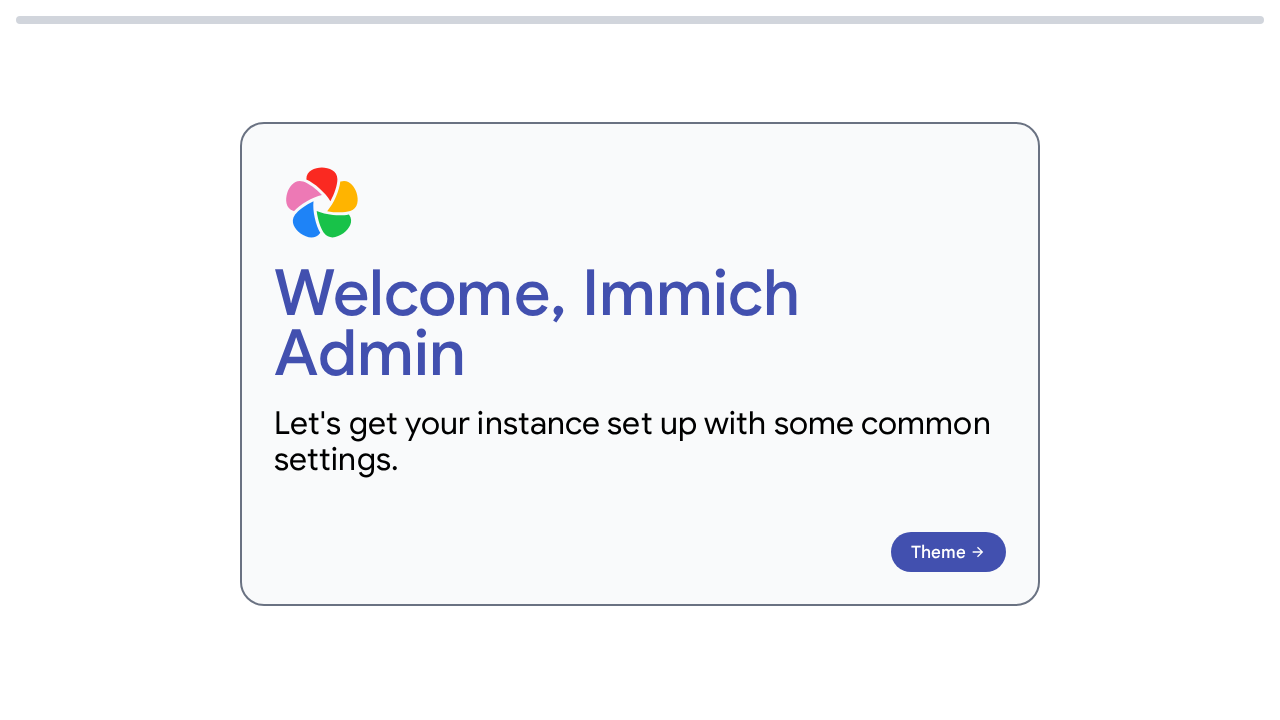
- Welcome Screen: Overview of personal photo sovereignty and privacy principles.
- Interface Theme: Select between Light, Dark, or System automated color schemes.
- Display Language: Select your default system language.
- Server Privacy: Manage anonymized error and telemetry reporting settings.
- User Privacy: Configure member visibility and account profile defaults.
- Storage Template: Define automated directory naming conventions for imported assets (e.g.
{{y}}/{{y}}-{{MM}}-{{dd}}/{{filename}}). - Backup Best Practices: Review the 3-2-1 backup strategy for library and database persistence.
- Mobile Application: QR code and server endpoint instructions (
http://<your-host-ip>:3000) for connecting iOS and Android mobile apps.
Click Done on the final screen to complete onboarding and enter the primary photo dashboard.
3. Media Timeline & Date Navigation
Once onboarded, Immich navigates to your primary photo timeline (/photos):
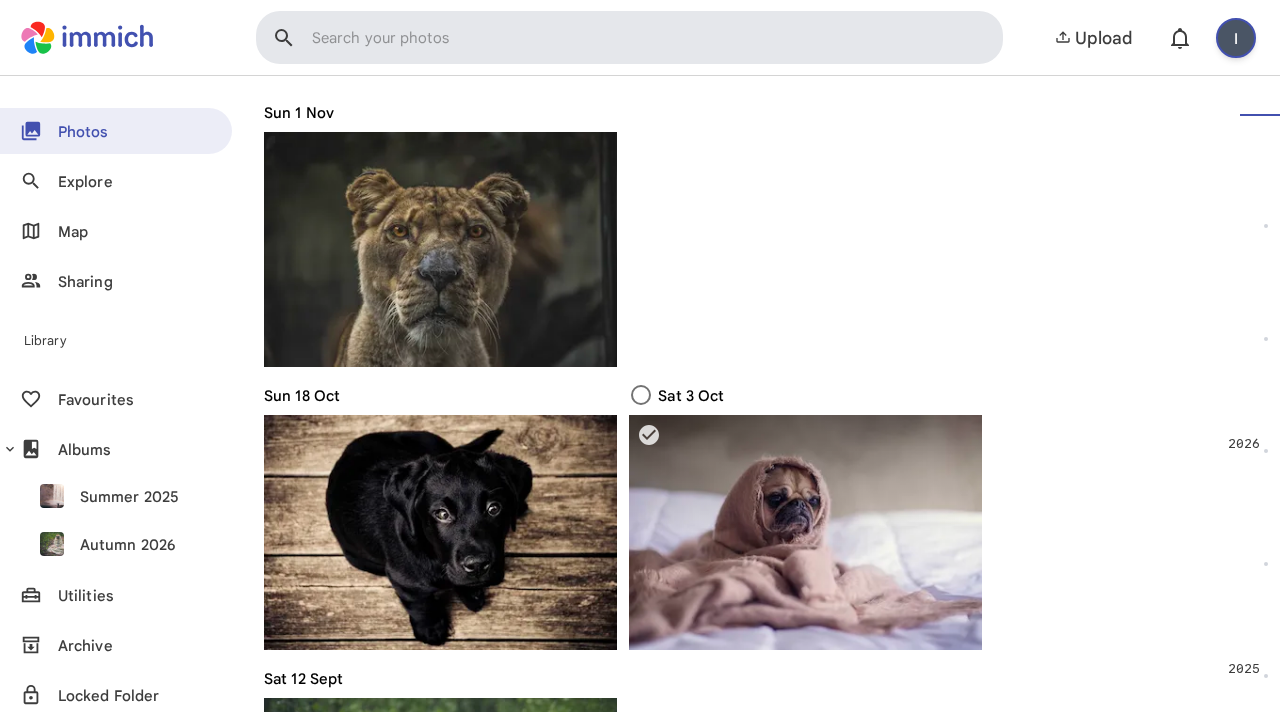
Images and videos are indexed dynamically and presented in reverse chronological order with an interactive timeline scrubber on the right-hand side. Hovering over assets displays capture details and resolution badges.
4. Albums & Collections
Click Albums in the left navigation sidebar to view your collection library:
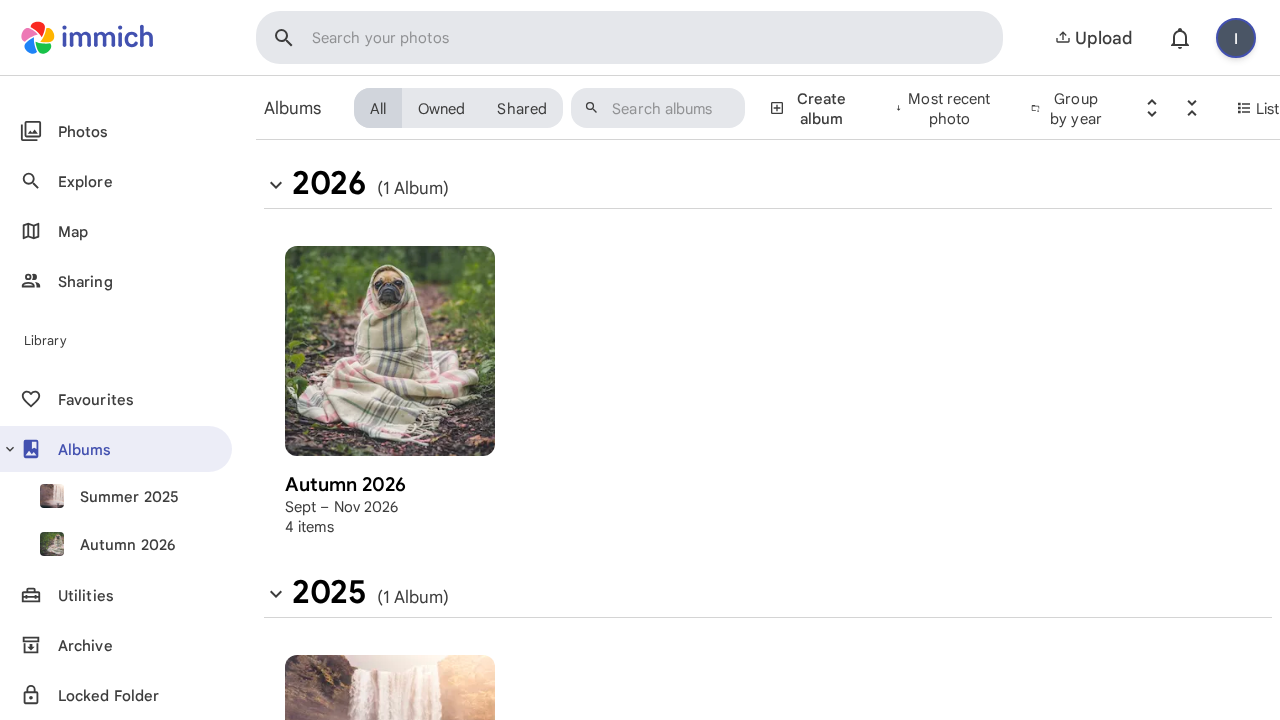
Albums created manually in the interface or automatically generated during CLI uploads (such as "Summer 2025" and "Autumn 2026") are displayed with dynamic cover collages, asset counts, and sharing permissions.
5. Smart Semantic Search
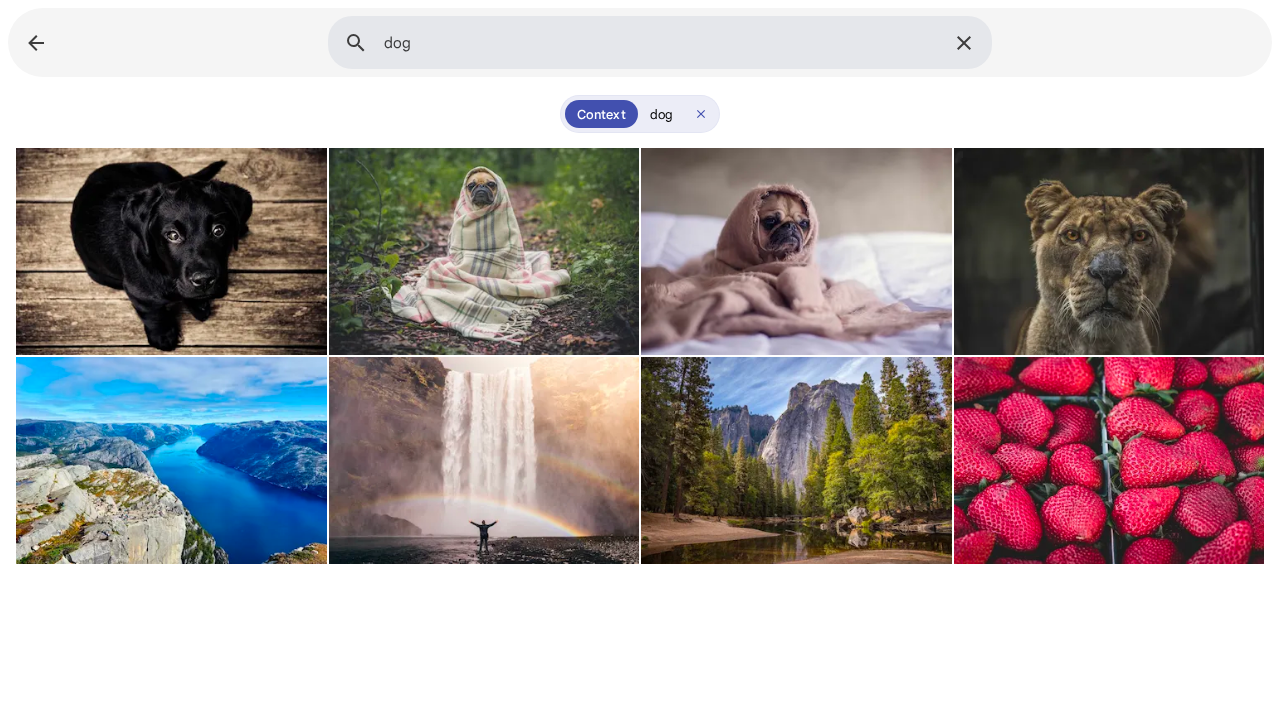
Immich’s machine learning container parses uploaded imagery using CLIP vector representations. Click the top search bar, enter a natural query such as dog, and press Enter:
The search results display matching images ranked by semantic similarity, accompanied by the active Context: dog filter chip. No manual tagging or cloud API calls are required—matching assets are identified purely by content analysis.
---
Verification
Perform the following commands to confirm that every microservice, database extension, and background inference queue is functioning correctly.
1. Verify Container Health State
Check that all four Docker services report healthy:
docker compose psEnsure immich-server, immich-machine-learning, immich-postgres, and immich-redis all indicate Up (healthy).
2. Verify Background Processing Queues
Query the BullMQ job engine via the REST API to confirm that background pipelines have completed thumbnail generation, metadata extraction, and vector indexing:
curl -sS -H "x-api-key: $KEY" http://localhost:3000/api/jobs | python3 -c '
import sys, json
data = json.load(sys.stdin)
for queue in ["thumbnailGeneration", "metadataExtraction", "smartSearch"]:
    counts = data.get(queue, {}).get("jobCounts", {})
    print(f"{queue:22} active={counts.get(\"active\", 0)} waiting={counts.get(\"waiting\", 0)} failed={counts.get(\"failed\", 0)}")
'
Expected output:
thumbnailGeneration    active=0 waiting=0 failed=0
metadataExtraction     active=0 waiting=0 failed=0
smartSearch            active=0 waiting=0 failed=0
failed=0 confirms that neither image transcoding nor neural network inference encountered exceptions.
3. Verify Local Machine Learning Search Query
Execute a vector search directly against the backend API to verify CLIP model inference and PostgreSQL vector indexing:
curl -sS -H "x-api-key: $KEY" \
  -H "Content-Type: application/json" \
  -X POST http://localhost:3000/api/search/smart \
  -d '{"query":"dog","size":3}' | python3 -c '
import sys, json
res = json.load(sys.stdin)
items = res.get("assets", {}).get("items", [])
print(f"Total matches found: {res.get(\"assets\", {}).get(\"count\", 0)}")
for item in items:
    print(f" - Matched asset: {item.get(\"originalFileName\")} (ID: {item.get(\"id\")})")
'
4. Verify Library Storage Statistics
Query global server statistics to inspect total stored assets and consumed volume bytes:
curl -sS -H "x-api-key: $KEY" http://localhost:3000/api/server/statisticsExpected output:
{"photos":8,"videos":0,"usage":3672810,"usageByUser":[{"userId":"...","photos":8,"videos":0,"usage":3672810}]}---
Troubleshooting
The following grid outlines common deployment issues, diagnostics, and verified remediations for Immich:
| Issue / Symptom | Probable Cause | Diagnostic & Resolution Steps |
|---|---|---|
| PostgreSQL container crashes with vector extension errors | Standard PostgreSQL image used instead of the vectorchord/pgvectors build. | Ensure database.image is set to ghcr.io/immich-app/postgres:14-vectorchord0.4.3-pgvectors0.2.0. Check logs using docker compose logs database. Standard postgres images lack vector search extensions. |
Machine learning jobs fail immediately with Machine learning repository not been setup | Uploads began before the immich-machine-learning microservices worker completed its startup handshake. | Wait until docker compose ps shows healthy for both -server and -ml, and check docker logs immich-server for Immich Microservices is running. In the web UI, go to Administration > Jobs and click All to re-run failed jobs. |
Port 3000 bind error (bind: address already in use) | Another service or previous container is occupying host port 3000. | Locate the occupying process with ss -ltn '( sport = :3000 )'. Change HOST_PORT=2283 (or 2284, 8085) in .env, then recreate containers with docker compose up -d. |
Upload fails with filesystem permission errors (EACCES: permission denied) | Host directories for ./library or ./postgres have restrictive ownership or lack write permissions. | Ensure write permissions exist on the persistent host mount directories: chmod -R 777 ./library ./postgres (or chown -R 1000:1000 ./library). |
| High CPU/RAM utilization during bulk photo import | Machine learning models (CLIP and InsightFace) are executing concurrent inferences on CPU. | In web UI navigate to Administration > Settings > Machine Learning Settings. Reduce concurrency threads, or schedule facial recognition and CLIP encoding during off-peak hours. |
| CLIP smart search returns 0 results for newly uploaded assets | Model download in progress or background indexing jobs waiting in queue. | On first query, the ML container downloads the CLIP ViT-B-32 model (~350 MB) into the model-cache volume. Inspect ML progress with docker compose logs -f immich-machine-learning. |
| Mobile app cannot connect or reports SSL error | Connecting via plain HTTP without reverse proxy or using internal loopback address. | When connecting from mobile devices, specify http://<LAN_IP>:3000 instead of localhost. For remote production use, place Immich behind a reverse proxy (e.g. Nginx, Caddy, or Cloudflare Tunnel) with a valid SSL/TLS certificate. |
---
Assumptions & Decisions
- Image Version Tagging: Pinned
IMMICH_VERSION=v3in.env, matching the upstream repository'sdocker/example.envand running container version v3.3.6. Specific vector PostgreSQL and Valkey digests were preserved exactly as defined by upstream Immich releases. - CPU Machine Learning: Employed standard CPU-based machine learning image (
ghcr.io/immich-app/immich-machine-learning:v3) rather than the CUDA/OpenVINO variants to maintain universal compatibility across standard VPS and bare-metal environments without dedicated GPU acceleration requirements. - First-Run Bootstrap via API: Utilized
POST /api/auth/admin-sign-upto provision initial administrator credentials headlessly. This matches the exact internal endpoint invoked by the web onboarding form while allowing automated deployments. - Persistent Storage Strategy: Separated storage mounts into isolated
./library(assets/thumbnails) and./postgres(database/vector indices) directories within the local project workspace. - Relative Browser Image Paths: Referenced real screenshots generated during the automated browser verification run (
runs/immich-20261108-133847/browser/*.png) to provide visual guidance through onboarding, albums, and semantic search.
Get the Unified Homelab Stack Compose Pack
One-command multi-container Compose files (Full *arr Stack, Prometheus + Grafana + ntfy Monitoring, and Homelab Auth) plus new verified deploys once a week.