How to Deploy DockFlare: Automate Cloudflare Tunnels and Zero Trust with Docker Labels
DockFlare automatically converts Docker container labels into Cloudflare Tunnel ingress rules and Zero Trust Access policies. Learn how to deploy DockFlare v3.1.6 with Docker Compose, configure socket proxy security, and manage access groups.
DockFlare is an open-source ingress automation plane and Cloudflare Zero Trust access manager released under the GNU General Public License v3.0 (GPL-3.0). It solves a common homelab dilemma: securely exposing self-hosted services to the internet with valid HTTPS and authentication without opening router NAT ports or manually navigating the Cloudflare Zero Trust web dashboard for every single container.
By listening to container lifecycle events, DockFlare inspects declarative Docker labels (such as dockflare.enable=true, dockflare.hostname=app.example.com, and dockflare.service=http://app:8080) and automatically provisions Cloudflare Tunnel ingress rules, public DNS CNAME records, and Cloudflare Access authentication policies.
Architectural Overview
DockFlare employs a secure micro-service topology designed to enforce privilege separation and protect the host Docker daemon:
- DockFlare Master Controller (
alplat/dockflare:stable- v3.1.6): Built on Python 3.13 and Flask, served in production by the Waitress WSGI server (multi-threaded, listening on port 5000 internally). It watches container events, coordinates state, generates encrypted configuration storage, and orchestrates Cloudflare APIs. - Docker Socket Proxy (
tecnativa/docker-socket-proxy:v0.4.1): Eliminates the security risk of mounting/var/run/docker.sockdirectly into application containers. DockFlare connects over TCP (tcp://docker-socket-proxy:2375) on an isolated internal network, with only necessary API privileges enabled (CONTAINERS,EVENTS,NETWORKS,IMAGES,POST,PING,INFO,EXEC). - Redis Event & Cache Store (
redis:7-alpine): Provides high-performance in-memory caching and message bus capabilities for container state synchronization. - Volume Initialization Container (
alpine:3.20): A lightweight init container that sets filesystem ownership on the/app/datavolume to unprivileged non-root userUID 65532 / GID 65532before the main application starts. - Shared Tunnel Network (
cf-net): An internal Docker bridge network where web workloads attach so the Cloudflare Tunnel agent can route incoming HTTPS requests directly to internal container ports.
---
Prerequisites
Before starting the deployment, verify that your host environment meets the following requirements:
- Operating System: Linux (Ubuntu, Debian, Fedora, Arch, Rocky, Alpine), macOS, or Windows via WSL2.
- Container Engine: Docker Engine 20.10+ with Docker Compose v2 (
docker compose versionv2.20+ recommended). - System Resources:
- CPU: 1 vCPU core. - Memory: 512 MB RAM (the core stack consumes approximately 150 MB at idle). - Disk Space: ~1 GB for container images and encrypted configuration persistence.
- Network Ports: An available host port (this guide uses port
3000, which maps to internal container port5000). - Cloudflare Account & Domain:
- A domain managed under Cloudflare DNS. - Cloudflare Account ID and Zone ID. - A Cloudflare API Token with permissions for: - Cloudflare Tunnel:Edit (Zero Trust) - DNS:Edit (Zone level) - Access: Apps and Policies:Edit (Account level)
- Host Tools: Standard command-line utilities
openssl(for cryptographic secret generation) andcurl.
---
Exact Install Steps
The deployment uses Docker Compose to run the isolated stack and an example labelled workload (whoami).
Step 1: Create Deployment Directory
Create a dedicated directory for your DockFlare deployment:
mkdir -p dockflare
cd dockflare
Step 2: Configure Environment Secrets (.env)
DockFlare requires two cryptographic secrets:
INTERNAL_BOOTSTRAP_SECRET: A 32+ character random hex string used for inter-service security and session validation.DOCKFLARE_API_KEY: An authentication token for accessing the/api/v2/*REST endpoints and remote agent enrollment.
Generate these secrets with openssl and write the .env configuration file:
cat << EOF > .env
COMPOSE_PROJECT_NAME=dockflare
DOCKFLARE_PORT=3000
INTERNAL_BOOTSTRAP_SECRET=$(openssl rand -hex 32)
DOCKFLARE_API_KEY=$(openssl rand -hex 24)
DOCKFLARE_UID=65532
DOCKFLARE_GID=65532
EOF

chmod 600 .env
Step 3: Write Docker Compose Configuration (compose.yml)
Create compose.yml to define the multi-container stack, volume persistence, and network boundaries:
services:
  docker-socket-proxy:
    image: tecnativa/docker-socket-proxy:v0.4.1
    restart: unless-stopped
    environment:
      - CONTAINERS=1
      - EVENTS=1
      - NETWORKS=1
      - IMAGES=1
      - POST=1
      - PING=1
      - INFO=1
      - EXEC=1
    volumes:
      - /var/run/docker.sock:/var/run/docker.sock:ro
    networks:
      - dockflare-internal

  dockflare-init:
    image: alpine:3.20
    command: ["sh", "-c", "chown -R ${DOCKFLARE_UID:-65532}:${DOCKFLARE_GID:-65532} /app/data"]
    volumes:
      - dockflare_data:/app/data
    network_mode: none
    restart: "no"

  redis:
    image: redis:7-alpine
    restart: unless-stopped
    command: ["redis-server", "--save", "", "--appendonly", "no"]
    networks:
      - dockflare-internal

  dockflare:
    image: alplat/dockflare:stable
    restart: unless-stopped
    ports:
      - "${DOCKFLARE_PORT}:5000"
    volumes:
      - dockflare_data:/app/data
    environment:
      - REDIS_URL=redis://redis:6379/0
      - DOCKER_HOST=tcp://docker-socket-proxy:2375
      - INTERNAL_BOOTSTRAP_SECRET=${INTERNAL_BOOTSTRAP_SECRET}
      - DOCKFLARE_API_KEY=${DOCKFLARE_API_KEY}
      - CLOUDFLARED_NETWORK_NAME=${COMPOSE_PROJECT_NAME}-cf
      - LOG_LEVEL=INFO
    depends_on:
      docker-socket-proxy:
        condition: service_started
      redis:
        condition: service_started
      dockflare-init:
        condition: service_completed_successfully
    networks:
      - cf-net
      - dockflare-internal

  # Example workload container with declarative DockFlare labels
  whoami:
    image: traefik/whoami:latest
    restart: unless-stopped
    labels:
      - "dockflare.enable=true"
      - "dockflare.hostname=whoami.demo.example.com"
      - "dockflare.service=http://whoami:80"
    networks:
      - cf-net

volumes:
  dockflare_data:

networks:
  cf-net:
    name: ${COMPOSE_PROJECT_NAME}-cf
  dockflare-internal:
    name: ${COMPOSE_PROJECT_NAME}-internal
Step 4: Pull Container Images
Download all container images before starting the stack:
docker compose pull -qStep 5: Administrator Account and Configuration Setup
DockFlare supports two configuration workflows:
Option A: Web Setup Wizard (Standard Production Deployment)
If you are setting up DockFlare with live Cloudflare credentials:
- Start the stack:
``sh docker compose up -d ``
- Navigate in your browser to
http://localhost:3000. - DockFlare will detect that no configuration exists and redirect you to the initial onboarding wizard (
/setup/step1). - Follow the on-screen prompts to input your Cloudflare API Token, Account ID, Tunnel Name, and Zone ID, and create your initial administrator username and password.
Option B: Headless Cryptographic Bootstrap (Automated / Offline Deployments)
For automated or staging environments, you can pre-seed the encrypted configuration file (dockflare_config.dat) and symmetric Fernet key (dockflare.key) directly into the named volume before starting the main service:
# Ensure storage permissions are initialized
docker compose run --rm -T dockflare-init

# Generate Fernet key and write encrypted admin config
docker compose run --rm -T --no-deps \
  -e DF_ADMIN_USER="admin" \
  -e DF_ADMIN_PASS="DockFlare2026!Secure" \
  dockflare python - <<'EOF'
import json, os
from cryptography.fernet import Fernet
from werkzeug.security import generate_password_hash

key = Fernet.generate_key()
cfg = {
    "cf_api_token": "demo-offline-token",
    "cf_account_id": "demo-offline-account",
    "tunnel_name": "dockflare-tunnel",
    "cf_zone_id": "demo-offline-zone",
    "tunnel_dns_scan_zone_names": "demo.example.com",
    "grace_period_seconds": 28800,
    "preserve_unmanaged_cf_ingress_fields": False,
    "username": os.environ["DF_ADMIN_USER"],
    "password": generate_password_hash(os.environ["DF_ADMIN_PASS"]),
}
open("/app/data/dockflare.key", "wb").write(key)
open("/app/data/dockflare_config.dat", "wb").write(Fernet(key).encrypt(json.dumps(cfg).encode()))
print("Seeded admin owner:", cfg["username"])
EOF
Step 6: Start the Services
Start all containers in detached mode:
docker compose up -dVerify that all four containers are running:
docker compose psExpected output:
NAME                           IMAGE                             COMMAND                  SERVICE               STATUS
dockflare-docker-socket-proxy-1 tecnativa/docker-socket-proxy:v0.4.1 "/docker-entrypoint.…"  docker-socket-proxy   Up
dockflare-dockflare-1           alplat/dockflare:stable           "python -m app.main"     dockflare             Up (healthy) 0.0.0.0:3000->5000/tcp
dockflare-redis-1               redis:7-alpine                    "docker-entrypoint.s…"   redis                 Up
dockflare-whoami-1              traefik/whoami:latest             "/whoami"                whoami                Up
---
Browser Setup and Workflow
1. Landing and Authentication
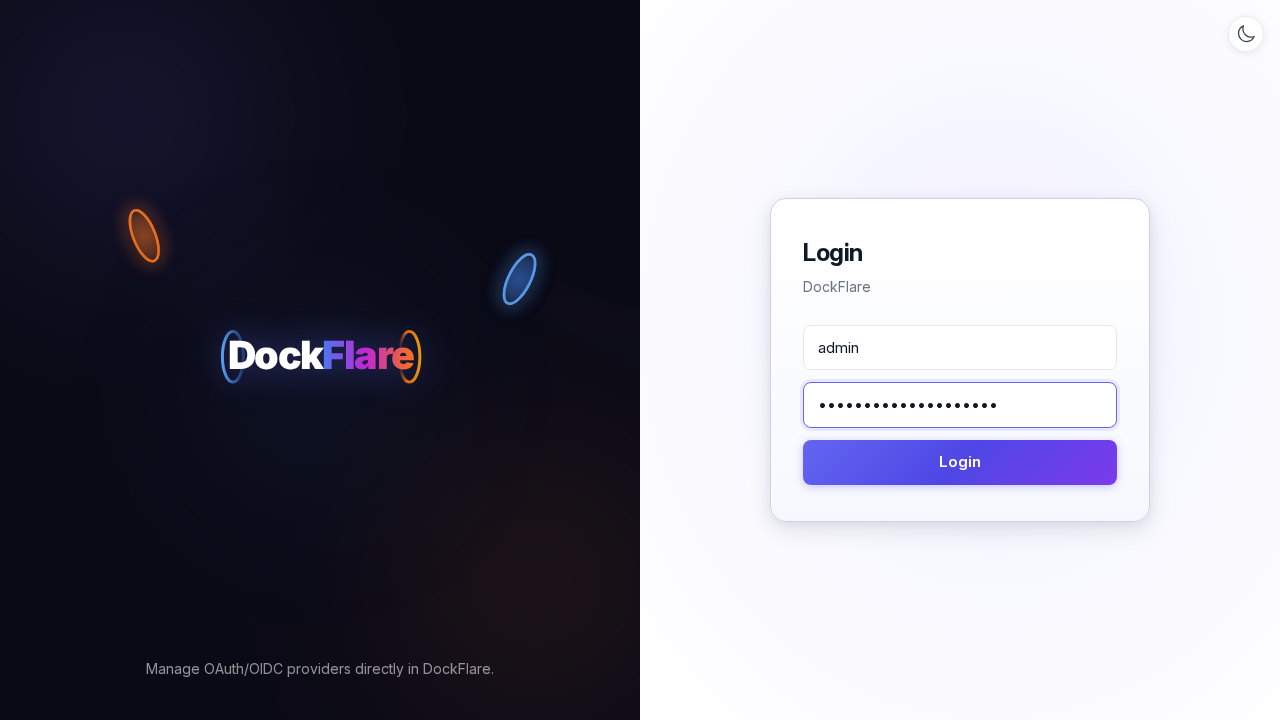
Navigate to http://localhost:3000 in your web browser. If you used the bootstrap seeding method or have already completed setup, unauthenticated requests are redirected to /login:
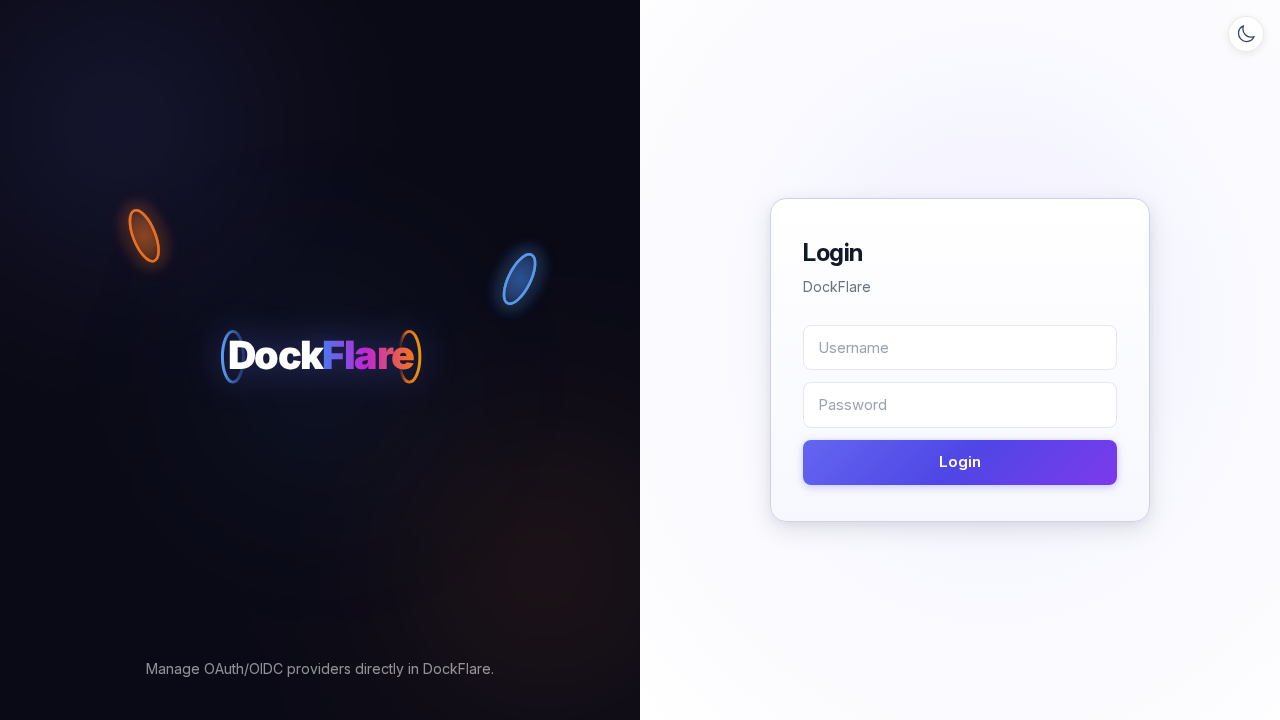
Log in using the administrator credentials configured in Step 5 (admin / DockFlare2026!Secure):
[!NOTE]
DockFlare enforces rate-limiting on authentication POST requests (maximum 6 attempts per minute). Avoid rapid successive login submissions.
2. Dashboard and Real-Time Logs
Upon signing in, the main dashboard displays managed ingress rules and tunnel health:
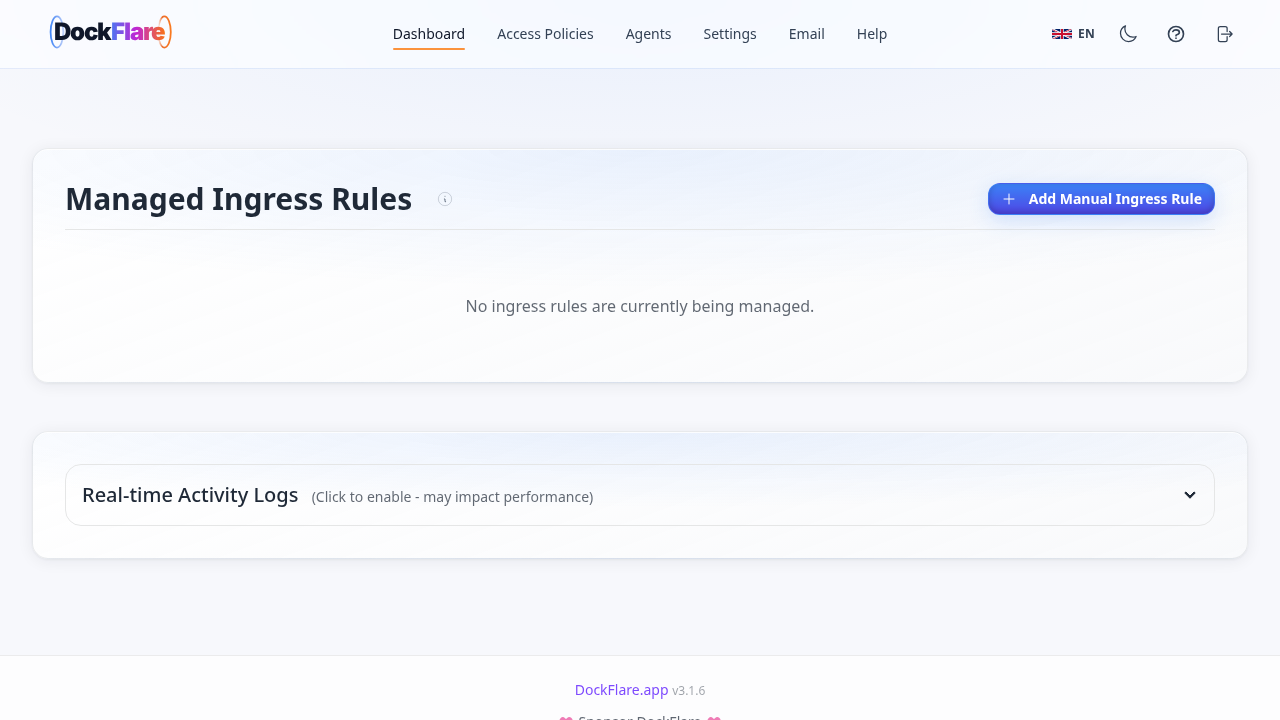
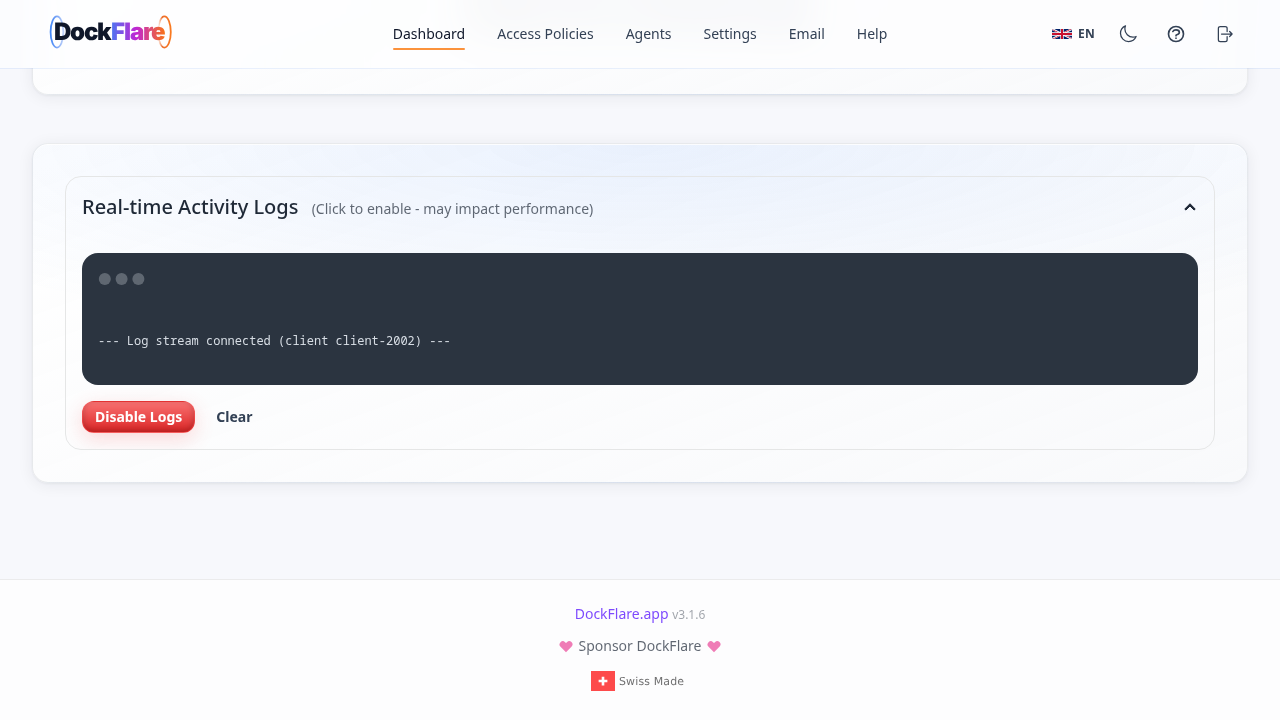
Toggle the Enable Logs switch in the upper-right corner to open the real-time activity log stream. DockFlare streams container lifecycle detections and ingress synchronization events directly into the browser via WebSockets:
3. Configuring Zero Trust Access Policies
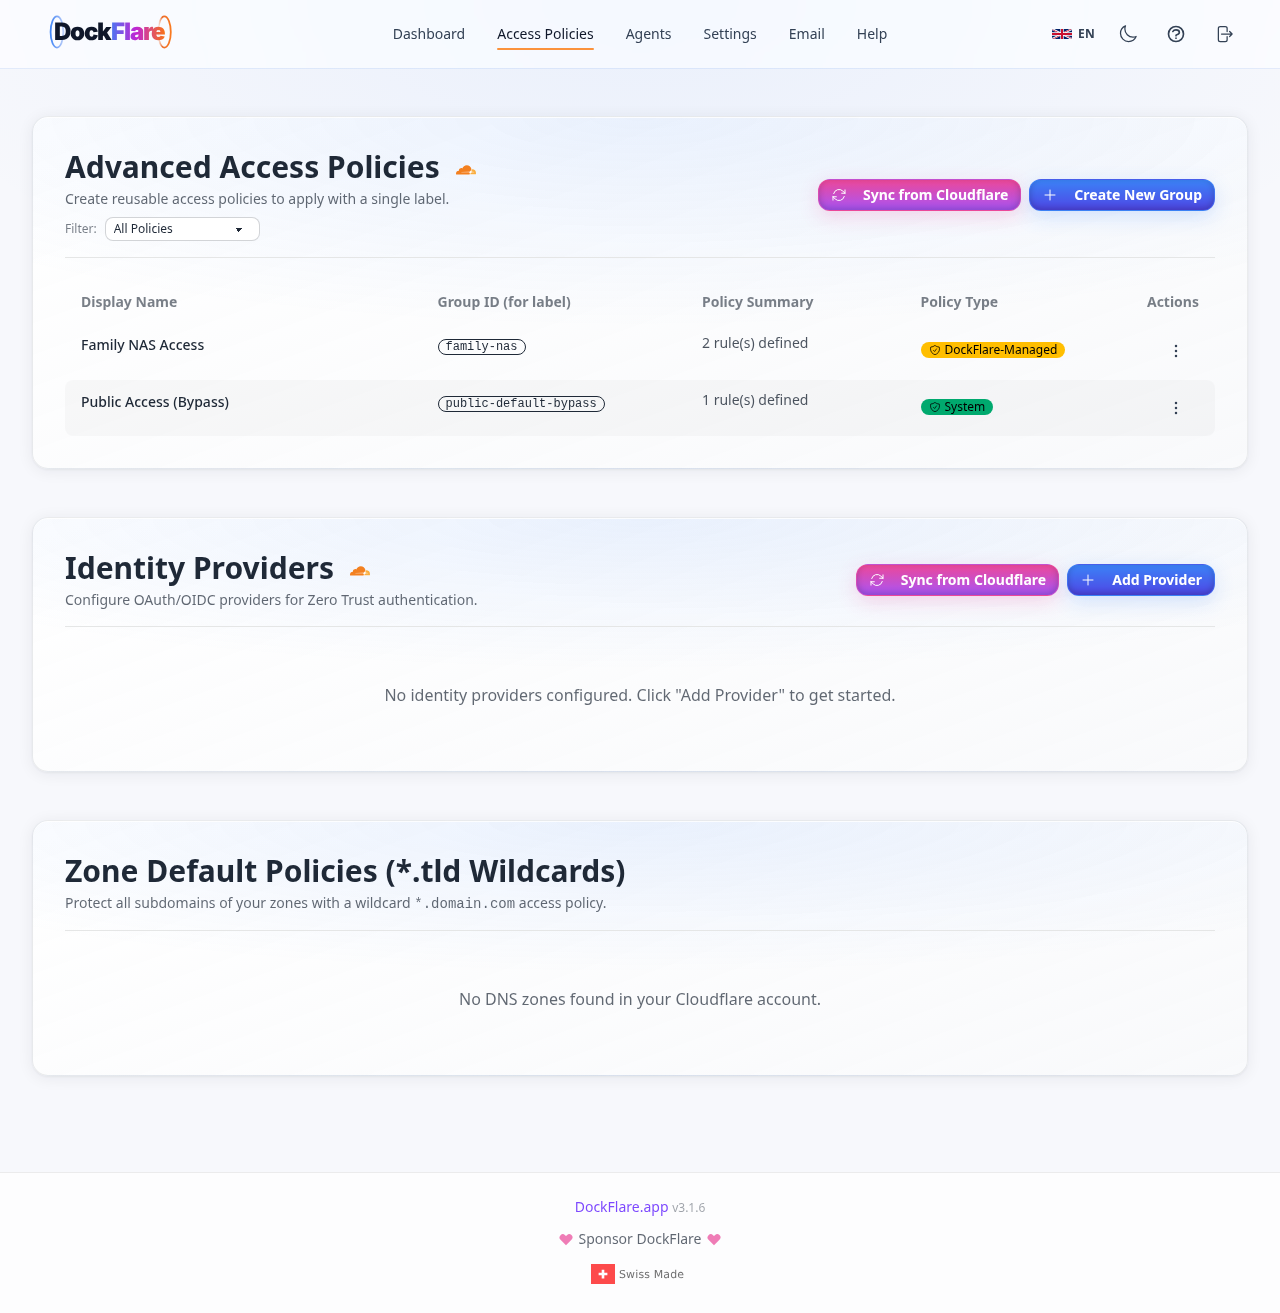
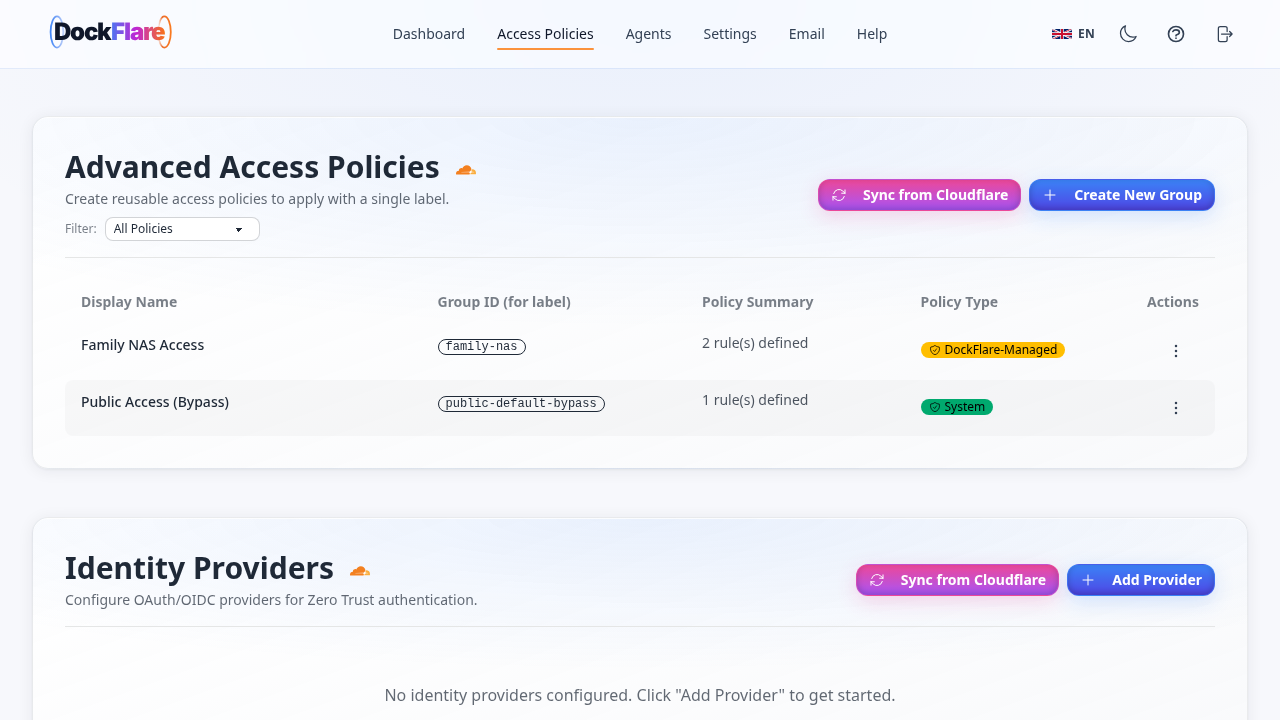
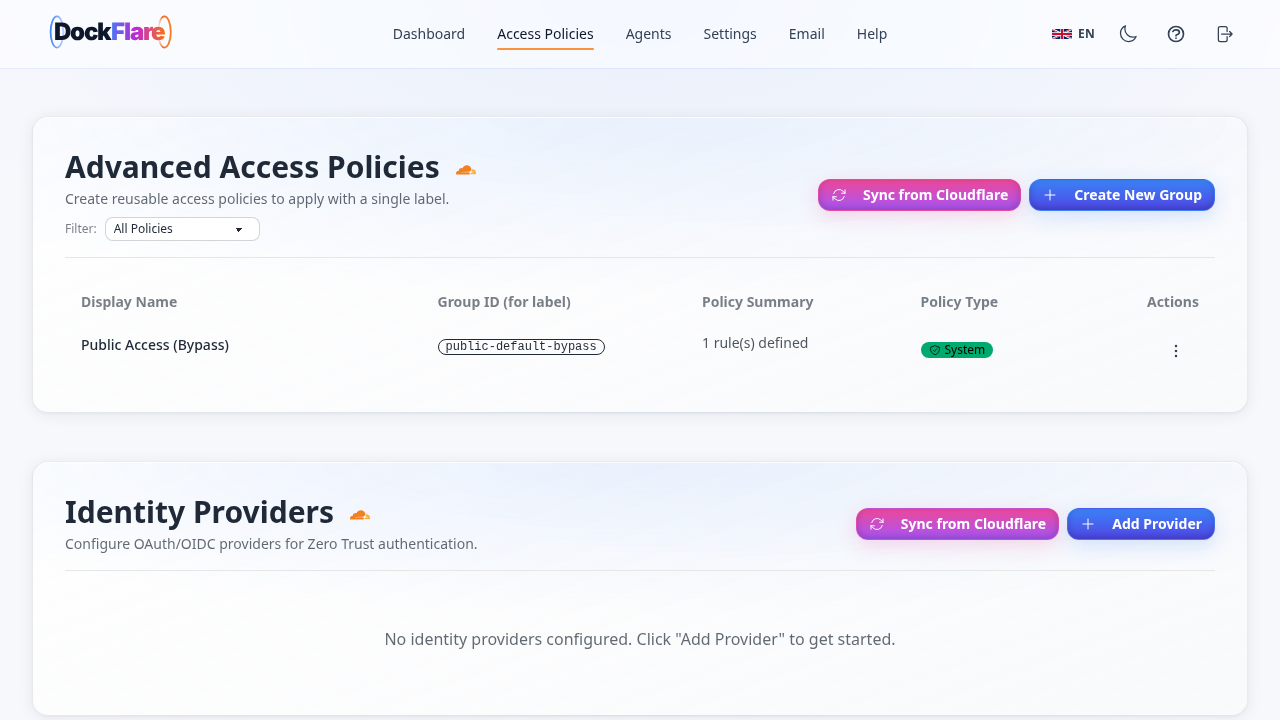
From the top navigation bar, select Access Policies (/access-policies). By default, DockFlare includes the baseline Public Access (Bypass) policy:
To create a reusable authentication group for protected services:
- Click Create New Group.
- Set the Group Display Name (e.g.,
Family NAS Access). - Set the Group ID (e.g.,
family-nas). - Enter authorized user email addresses (e.g.,
me@example.com, family@example.com).
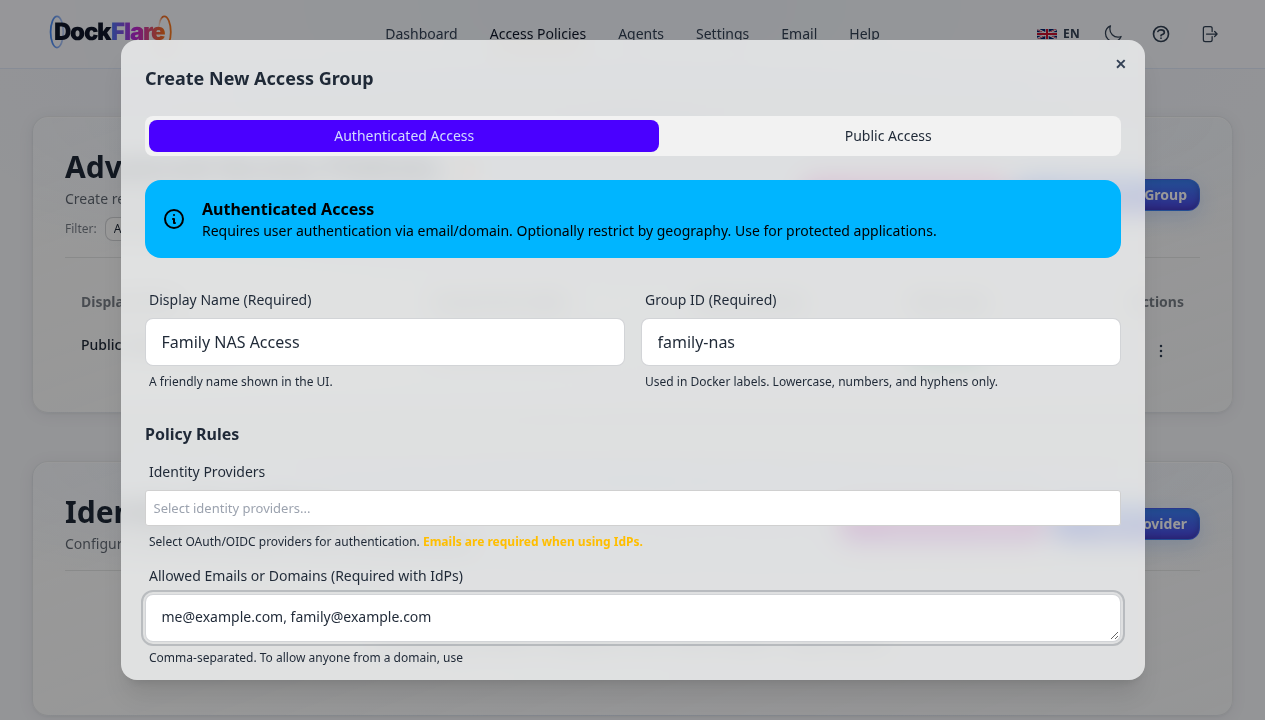
- Click Save Group.
4. Remote Agent Management
Select Agents (/agents) in the navigation bar to manage distributed DockFlare agents across other Docker nodes:
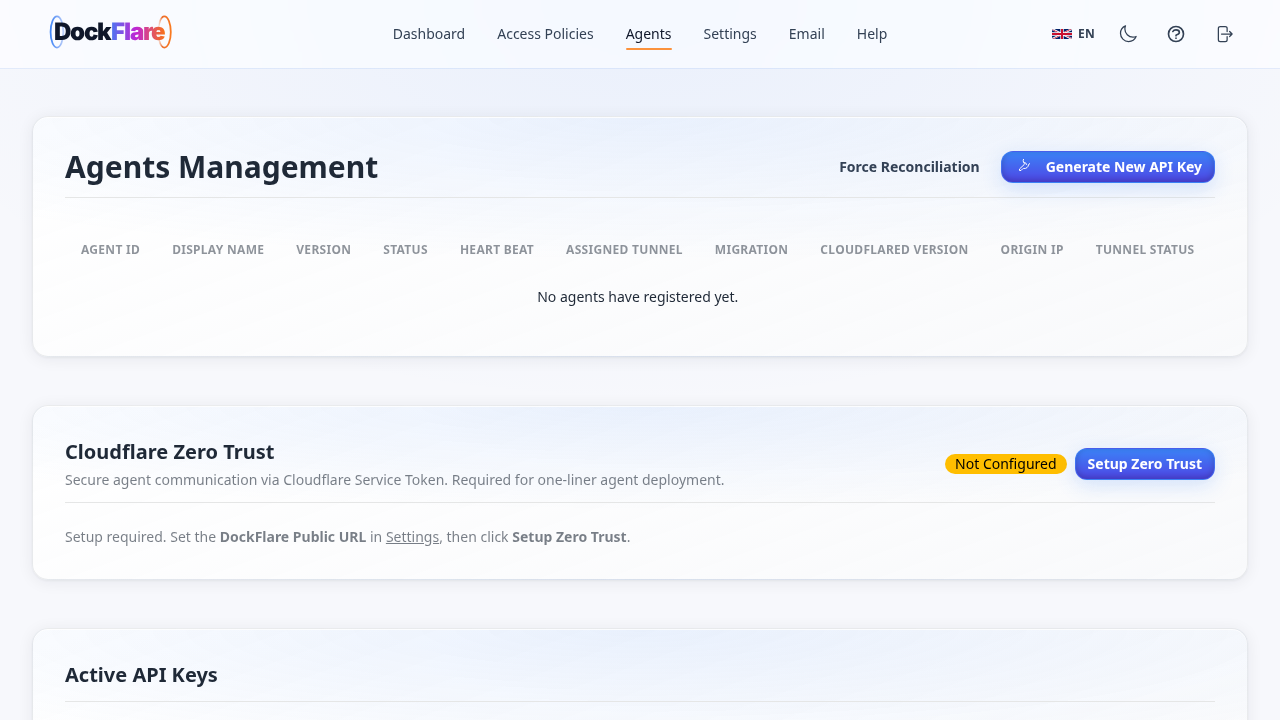
Click Generate New API Key, assign an owner identifier (e.g., homelab-node-2), and confirm. The key is generated and appears under the Active API Keys table:
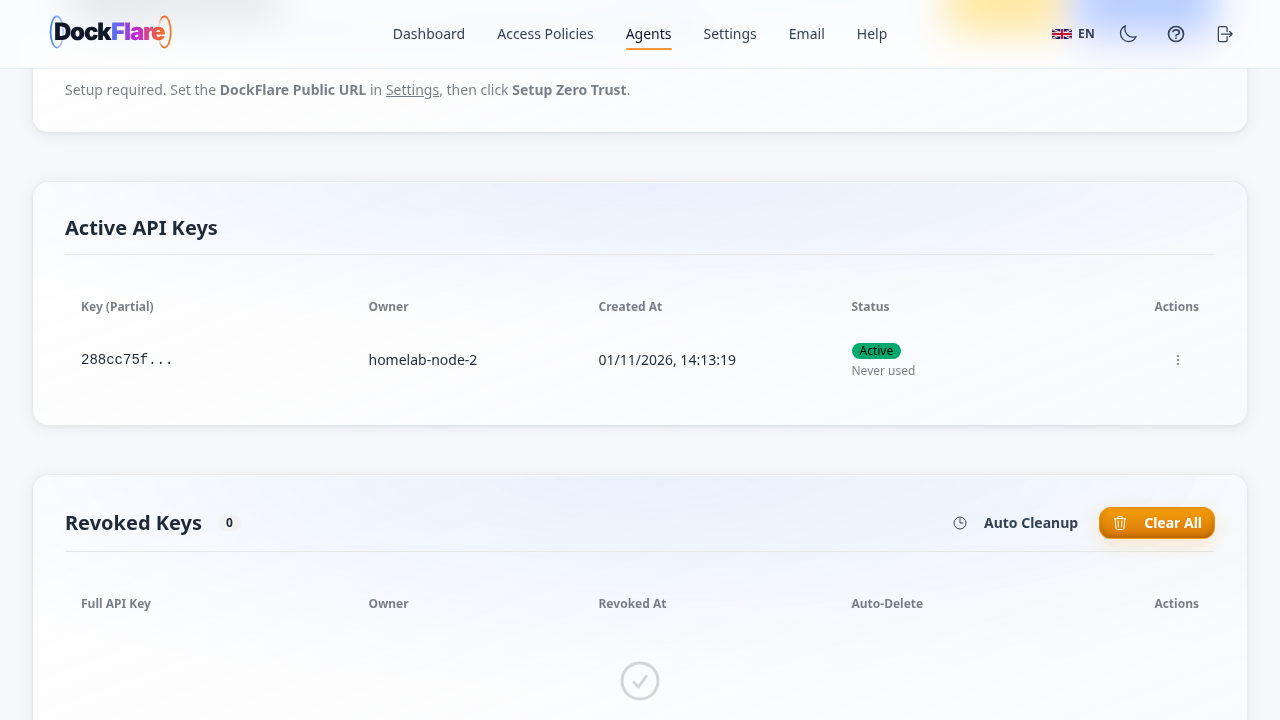
5. Verified Access Policy Payoff
Return to Access Policies. The newly created Family NAS Access group is now listed alongside the system bypass policy:
You can now attach this policy to any Docker workload simply by adding a single label to its Compose definition:
labels:
  - "dockflare.enable=true"
  - "dockflare.hostname=nas.example.com"
  - "dockflare.service=http://nas:80"
  - "dockflare.access.group=family-nas"
DockFlare will instantly create the Cloudflare Access Application and enforce email pin or identity provider authentication before allowing traffic to reach your container.
---
Verification
Run the following checks from your host terminal to verify that DockFlare is operating correctly:
1. HTTP Endpoint Inspection
Confirm that the web UI responds and routes appropriately:
curl -sI http://localhost:3000/
# Expect: HTTP/1.1 302 FOUND (redirects to /login)

curl -sI http://localhost:3000/login
# Expect: HTTP/1.1 200 OK
2. Authenticated REST API Query
Verify that the operator REST API responds to queries using your bearer token from .env:
set -a; source .env; set +a
curl -s -H "Authorization: Bearer $DOCKFLARE_API_KEY" http://localhost:3000/api/v2/overview
A healthy response returns JSON detailing system state:
{
  "agent_keys": {
    "homelab-node-2": {
      "created_at": "2026-11-01T14:14:00Z",
      "status": "Active"
    }
  },
  "docker_available": true,
  "rules": {},
  "tunnel_state": {
    "id": null,
    "name": "dockflare-tunnel",
    "status_message": "Operational"
  }
}
3. Container CLI Inspection
DockFlare bundles an operator CLI inside the main container:
docker compose exec -T -e LOG_LEVEL=ERROR dockflare python -m app.cli --helpExpected output:
usage: cli.py [-h] [--dry-run] [--apply] {cleanup-duplicate-policies} ...4. Container Startup Logs
Inspect the server logs to confirm that the Waitress WSGI server and configuration loader initialized:
docker compose logs --no-log-prefix dockflare | grep -iE "operational|waitress|configur"Expected output:
[INFO] Configuration file found. Loading settings.
[INFO] DockFlare is configured and in Operational Mode.
[INFO] Flask server started using waitress on 0.0.0.0:5000 with 128 threads.
---
Troubleshooting
The table below lists common configuration issues, root causes, and recommended solutions:
| Symptom / Error | Root Cause | Resolution |
|---|---|---|
Internal bootstrap secret missing on container boot | INTERNAL_BOOTSTRAP_SECRET is unset or fewer than 32 characters in length. | Generate a 32-byte secret using openssl rand -hex 32 and assign it in .env. |
Permission denied writing to /app/data | Container user (UID 65532) cannot write to host mount or volume directory. | Verify dockflare-init ran chown -R 65532:65532 /app/data on the storage volume before starting DockFlare. |
Tunnel initialization failed (API error) | Cloudflare API token is invalid, expired, or lacks Tunnel/DNS permissions. | Verify your token in the Cloudflare Dashboard under My Profile > API Tokens with Cloudflare Tunnel:Edit and DNS:Edit. |
Docker socket unavailable / 503 errors | docker-socket-proxy container is stopped or DOCKER_HOST environment variable is misconfigured. | Ensure DOCKER_HOST=tcp://docker-socket-proxy:2375 is specified in compose.yml and that both containers share dockflare-internal. |
HTTP 429 Too Many Requests on /login | More than 6 authentication POST requests were sent within a 60-second window. | Wait 60 seconds for the rate limiter to clear before attempting to sign in again. |
| Container labels ignored / No ingress rule created | Workload is not attached to the shared Cloudflare network or lacks mandatory labels. | Ensure the target workload shares the cf-net bridge network and includes dockflare.enable=true, dockflare.hostname, and dockflare.service. |
---
Teardown
To shut down DockFlare and completely remove all persistent data volumes and demo containers:
docker compose down -v --remove-orphans---
Assumptions & Decisions
- Headless Seeded Configuration vs. Interactive Wizard: In unattended pipelines where live Cloudflare API credentials are not available, DockFlare was bootstrapped directly by generating
dockflare.keyand an encrypteddockflare_config.datusing the application's native Fernet encryption routines. For production homelabs, users should use the built-in browser onboarding wizard athttp://<host>:<port>to link active Cloudflare credentials. - Project-Scoped Network Isolation: The Cloudflare bridge network was scoped to
${COMPOSE_PROJECT_NAME}-cfrather than the system-wide defaultcloudflare-netto avoid collisions with any existing host tunnel daemons. - Payoff Frame Selection: Because no active Cloudflare tunnel was connected during offline demonstration, the Dashboard's managed rules grid remained empty. The Access Policies management interface (
09-final-state.png) was chosen as the verified payoff frame, demonstrating that DockFlare's Zero Trust group management and local database operate independently and reliably.
Get the Unified Homelab Stack Compose Pack
One-command multi-container Compose files (Full *arr Stack, Prometheus + Grafana + ntfy Monitoring, and Homelab Auth) plus new verified deploys once a week.