
How to Deploy Dispatcharr with Docker Compose: IPTV and Live TV Stream Management
Dispatcharr is an open-source stream management hub and proxy relay that unifies multiple IPTV playlists, XMLTV guides, and stream profiles with HDHomeRun emulation. Here is how to deploy Dispatcharr v0.33 using Docker Compose, complete the first-run superuser setup, and configure stream relays.
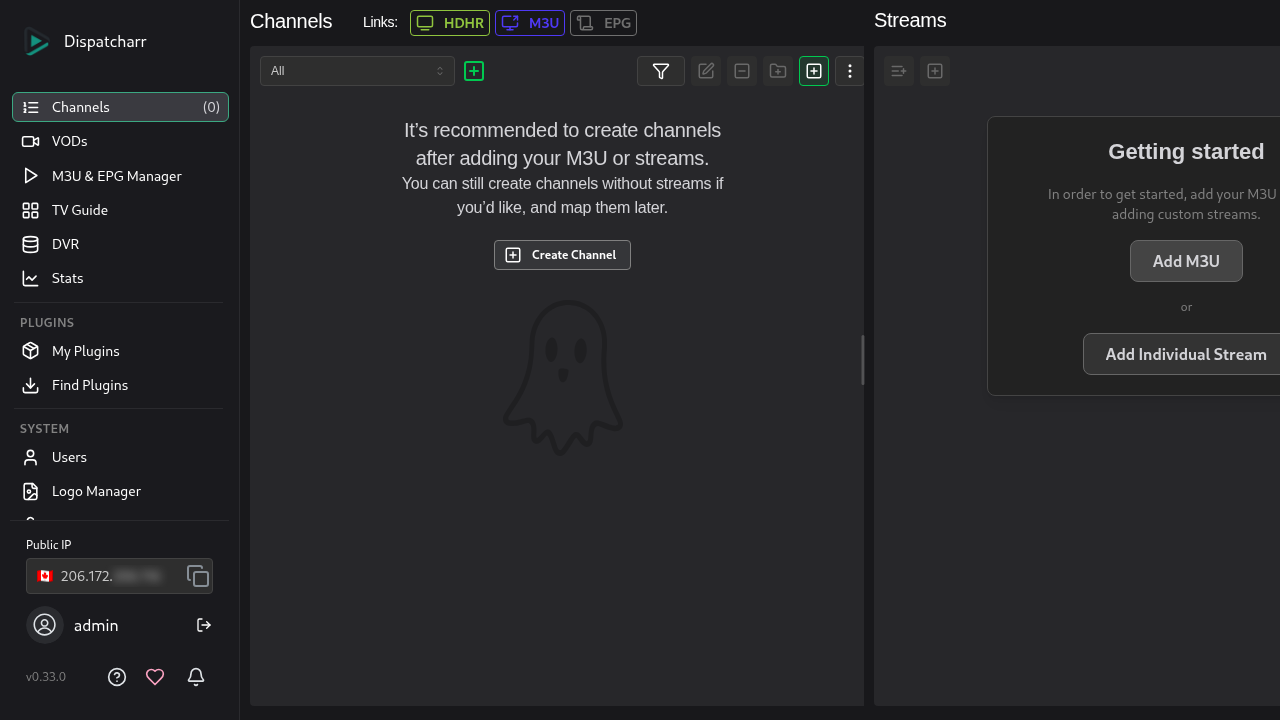
Dispatcharr is an open-source (AGPL-3.0) stream management hub, proxy relay, and DVR companion designed as the "*arr" ecosystem's counterpart for live television and IPTV. While tools like Radarr, Sonarr, and Lidarr organize on-demand movie, TV, and music downloads, live streaming has historically suffered from brittle M3U playlists, mismatched Electronic Program Guides (EPG), and strict provider connection limits. Dispatcharr bridges this gap by centralizing multiple IPTV sources, standardizing guide data, and exposing unified endpoints and virtual HDHomeRun tuners to media servers like Plex, Jellyfin, and Emby.
Instead of exposing fragile provider URLs directly to consumer playback clients—which frequently leads to exceeded simultaneous connection caps and account bans—Dispatcharr acts as an intelligent intermediary. It manages channel lineups, synchronizes XMLTV and Schedules Direct metadata, handles stream routing through configurable profiles, and offers automated DVR series recording rules.
Dispatcharr's core architecture delivers several key streaming capabilities:
- Unified Tuner Emulation (HDHomeRun): Emulates SiliconDust HDHomeRun (HDHR) network tuners alongside standardized M3U playlist and XMLTV guide URLs, enabling seamless live TV integration with Plex Live TV & DVR, Jellyfin, and Emby.
- Flexible Stream Relay Profiles: Routes incoming streams through five distinct engine profiles: direct Proxy (passthrough with chunk buffering), HTTP Redirect (direct client-to-source handover for zero server bandwidth), FFmpeg (live transcoding, container repackaging, and audio normalization), Streamlink (handling complex web feeds), or VLC (alternative transcode and demux engine).
- Provider Connection Guardrails: Enforces per-provider maximum stream limits (
Max Streams) to guarantee that simultaneous client streams never exceed your IPTV subscription allowance. - Automated M3U & EPG Synchronization: Regularly refreshes remote M3U and Xtream Codes accounts on a configurable schedule, scans for Video-on-Demand (VOD) assets, and aligns guide data with channel lineups.
- Modern React 19 Web Interface: Provides an interactive Single Page Application (SPA) built with React 19 and Mantine v8, featuring a two-pane channel and stream editor, an interactive timeline TV guide, real-time connection stats, and downloaded log auditing.
- All-in-One Container Architecture: Packages Nginx, uWSGI (Django backend), Daphne (ASGI WebSockets), Celery task workers, Celery Beat scheduler, Redis cache/broker, PostgreSQL 16, FFmpeg, and Comskip into a single zero-dependency Docker image (
ghcr.io/dispatcharr/dispatcharr:latest).
This guide walks through deploying Dispatcharr v0.33 using Docker Compose with persistent data volumes, creating the initial administrator account, navigating the web interface, and configuring stream relays.
Prerequisites
Before deploying Dispatcharr, verify that your host system satisfies the following requirements:
- Docker Engine & Docker Compose: Docker Engine 20.10+ and Docker Compose v2.24+ installed on your host system (
docker compose version). - Operating System & Architecture: Linux x86_64 or arm64 with network egress to pull container images from GitHub Container Registry (
ghcr.io). - Host Port Availability: Dispatcharr's internal Nginx web server listens on port
9191. In this guide, host port3000(or9191) is forwarded to container port9191. Ensure the selected host port is free:
``sh ss -ltn | grep -E ':(3000|9191)\b' ``
- User Permissions (PUID/PGID): Identify your non-root host user and group IDs (typically
1000:1000viaid -uandid -g) so container operations and PostgreSQL write with proper permissions. - Persistent Storage: Sufficient storage for Dispatcharr's runtime state (
/data), which houses the PostgreSQL database (/data/db), application logs (/data/logs), JWT secrets (/data/jwt), recordings, and cache. - Web Browser: Any modern web browser (Chrome, Firefox, Safari, or Edge) to access the web UI.
Exact Install Steps
Follow these steps to deploy Dispatcharr using Docker Compose with persistent volume storage.
1. Create Deployment Directory Structure
Create a dedicated directory for your compose configuration and persistent data:
mkdir -p dispatcharr/data
cd dispatcharrdispatcharr/: Contains deployment configuration manifests (.env,docker-compose.yml).dispatcharr/data/: Persistent mount directory for PostgreSQL database files, logs, and authentication keys.
2. Configure Environment Variables (.env)
Create a .env file in the deployment directory to define project parameters:
cat > .env <<'EOF'
COMPOSE_PROJECT_NAME=dispatcharr
IMAGE=ghcr.io/dispatcharr/dispatcharr:latest
DISPATCHARR_PORT=3000
PUID=1000
PGID=1000
TZ=Etc/UTC
EOFCOMPOSE_PROJECT_NAME: Defines the Docker Compose project namespace and container name prefix.IMAGE: Specifies the official All-in-One image from GitHub Container Registry (ghcr.io/dispatcharr/dispatcharr:latest).DISPATCHARR_PORT: Specifies the host port mapping to Dispatcharr's web interface (maps to internal port9191).PUIDandPGID: Match container process execution to your host user account to prevent file permission mismatches.TZ: Configures the container timezone.
3. Create Docker Compose File (docker-compose.yml)
Create the docker-compose.yml manifest:
services:
  dispatcharr:
    image: ${IMAGE}
    container_name: ${COMPOSE_PROJECT_NAME}-dispatcharr
    restart: unless-stopped
    ports:
      - "127.0.0.1:${DISPATCHARR_PORT}:9191"
    volumes:
      - "./data:/data"
    environment:
      - DISPATCHARR_ENV=aio
      - REDIS_HOST=localhost
      - CELERY_BROKER_URL=redis://localhost:6379/0
      - DISPATCHARR_LOG_LEVEL=info
      - DISPATCHARR_PORT=9191
      - PUID=${PUID}
      - PGID=${PGID}
      - TZ=${TZ}
    healthcheck:
      test: ["CMD-SHELL", "curl -fsS http://127.0.0.1:9191/api/core/version/ || exit 1"]
      interval: 5s
      timeout: 3s
      retries: 20
      start_period: 15s
Key configuration parameters:
DISPATCHARR_ENV=aio: Boots the container in All-in-One mode, automatically launching PostgreSQL, Redis, Celery, Daphne, uWSGI, and Nginx in a unified environment.ports: Binds host port3000(127.0.0.1:3000) to internal container port9191.volumes: Maps local./datato/datain the container.healthcheck: Queries the unauthenticated internal/api/core/version/endpoint to confirm service readiness.
4. Pull and Start the Container
Pull the container image and start the service in detached mode:
docker compose pull --quiet
docker compose up -d
5. Wait for Application Readiness
The container entrypoint initializes the internal PostgreSQL database, runs Django database migrations, generates internal JWT signing keys, and launches background workers. Poll the version endpoint until the service responds:
echo "Waiting for Dispatcharr to become ready..."
until curl -fsS http://localhost:3000/api/core/version/ >/dev/null 2>&1; do
  sleep 3
done
echo "Dispatcharr is ready!"
Once the loop prints Dispatcharr is ready!, the web UI and REST API are fully initialized.
Browser Setup
Once the container is healthy, launch your web browser and navigate to:
http://localhost:3000/*(If you set DISPATCHARR_PORT=9191, visit http://localhost:9191/).*
Step 1: Create the Initial Superuser Account
Dispatcharr implements strict first-run onboarding security: there are no default passwords or unauthenticated administrator backdoors. When visiting a clean installation, Dispatcharr checks /api/accounts/initialize-superuser/. Detecting that no superuser exists (superuser_exists: false), it presents the Super User Account creation card.
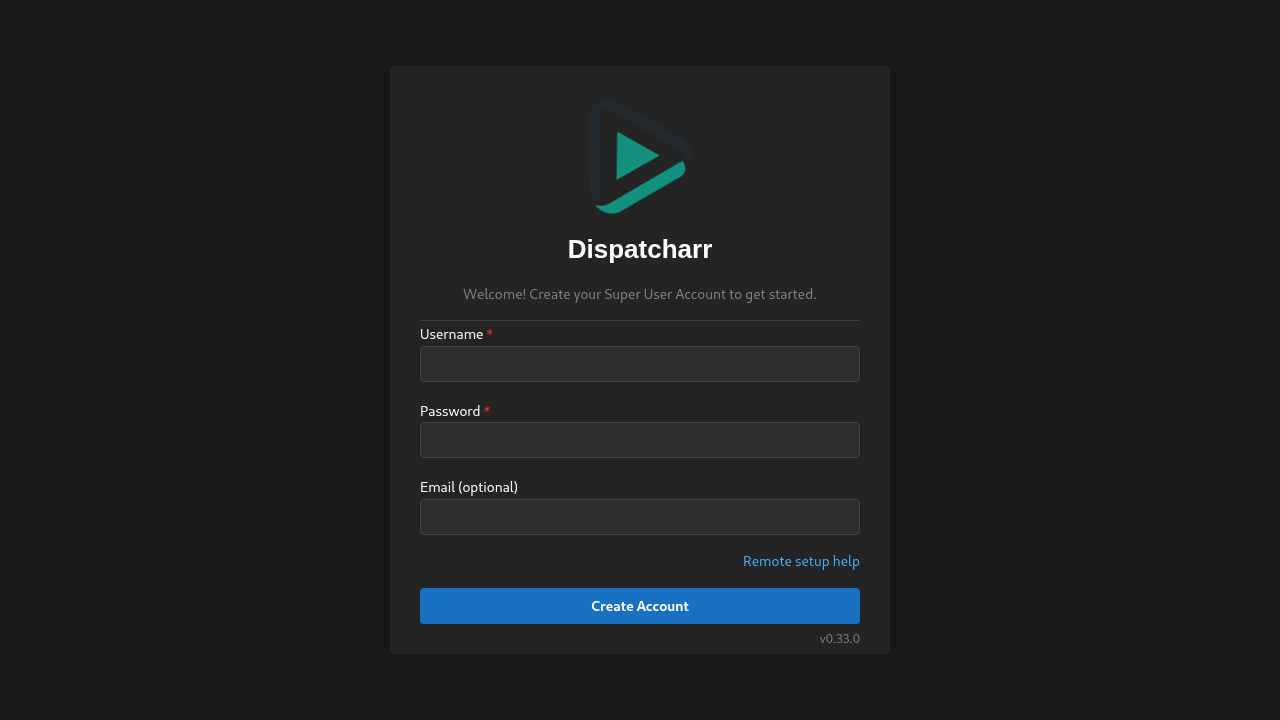
Populate the administrator credentials:
- Username: Enter an administrative username (e.g.,
admin). - Password: Enter a strong password (e.g.,
Dispatcharr2026!). - Email (optional): Enter an administrative email address (e.g.,
admin@dispatcharr.local).
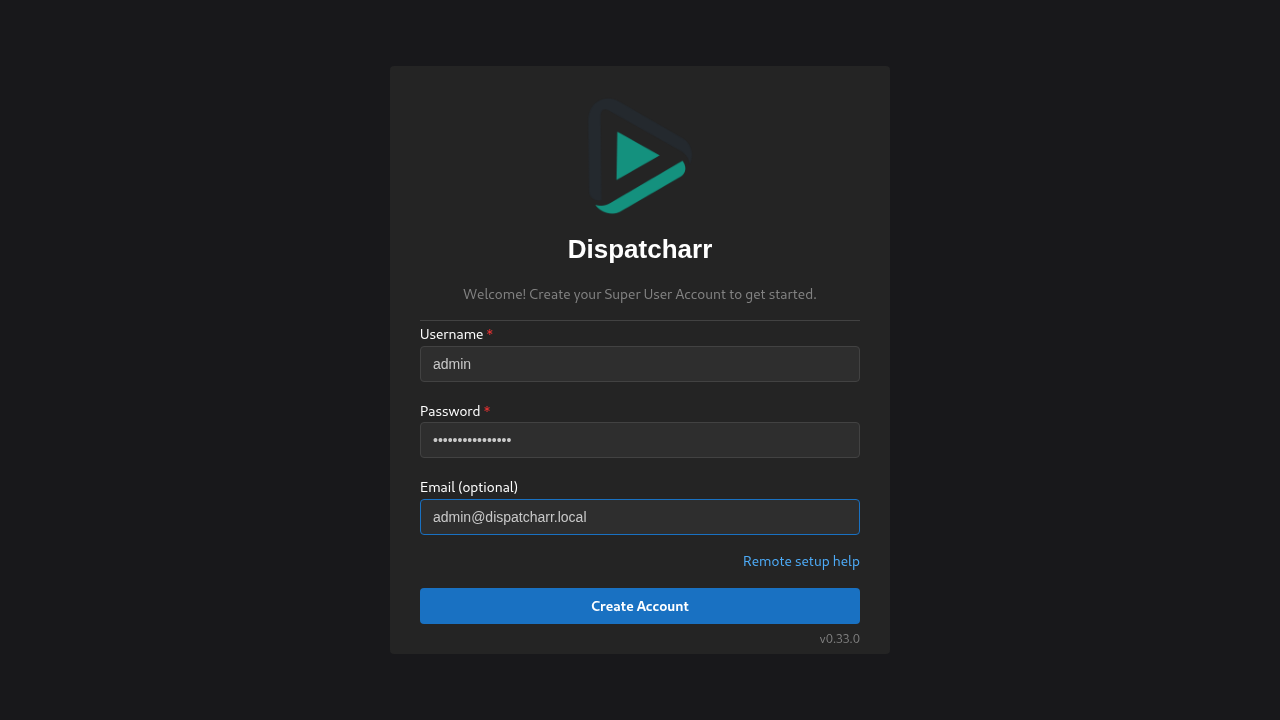
Click the blue Create Account button. Dispatcharr provisions the administrator record in the PostgreSQL database and immediately transitions to the standard login card.
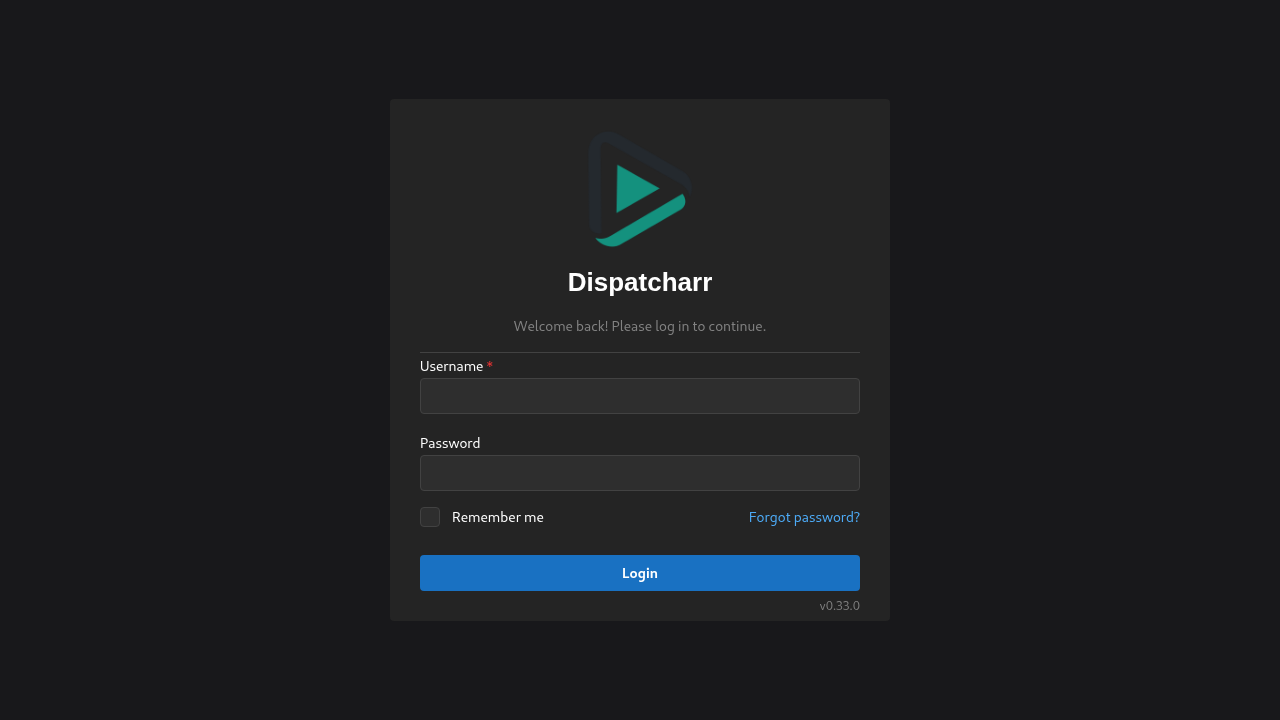
Step 2: Authenticate as Administrator
On the login screen, enter your newly created credentials:
- Username:
admin - Password:
Dispatcharr2026!
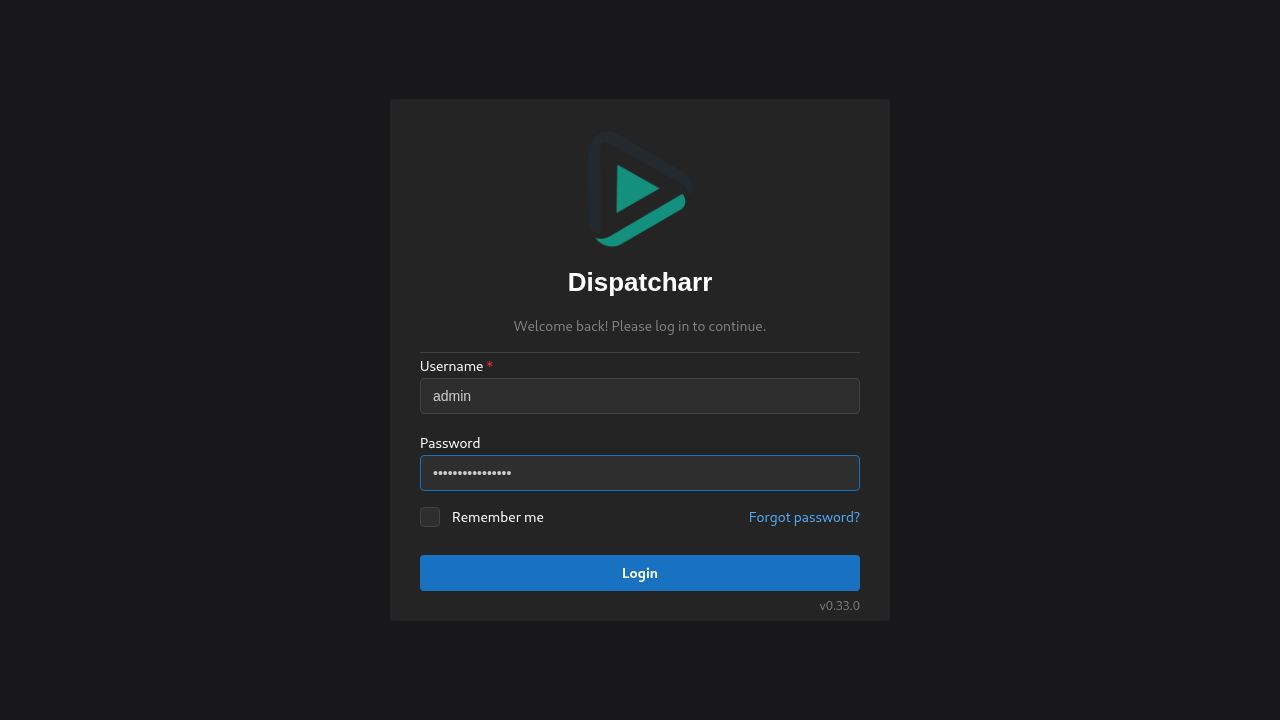
Click Login. The frontend authenticates via POST /api/accounts/auth/login/, stores JWT access and refresh tokens, and redirects to the default Channels view.
Step 3: Explore Channels and Client Endpoints
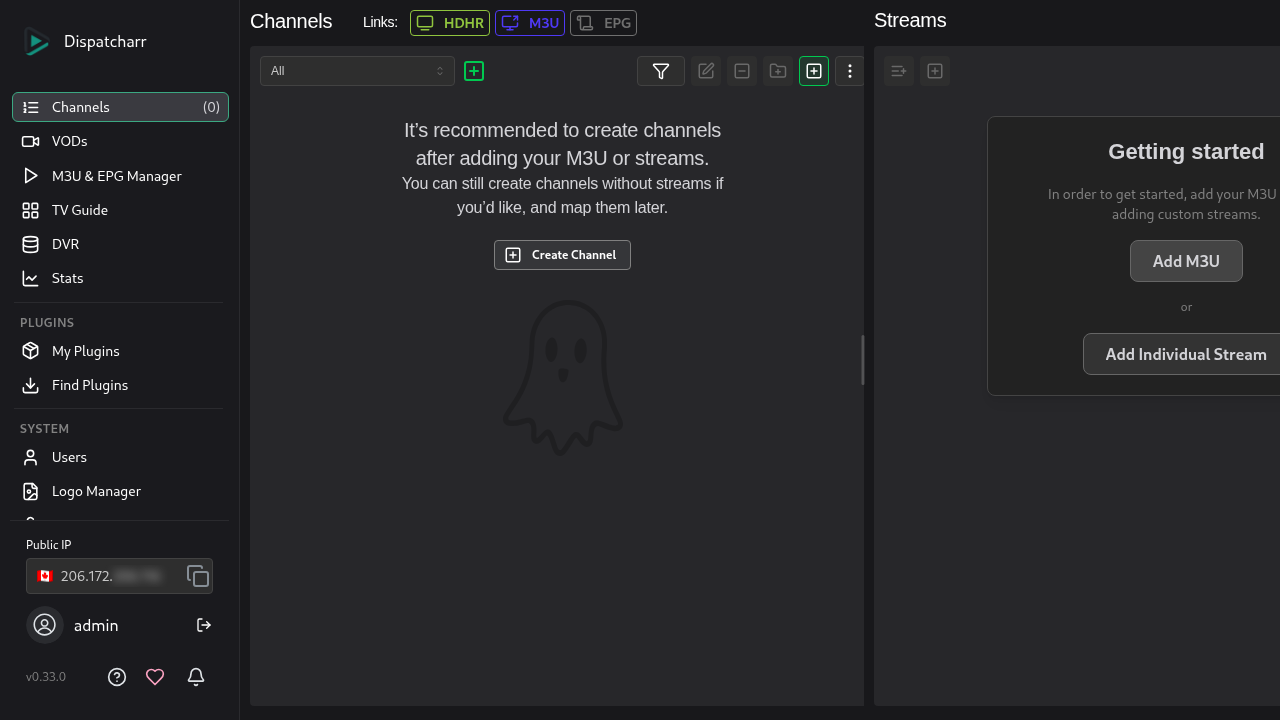
The primary Channels view (/channels) features a responsive two-pane layout:
- Left Pane: Channels table displaying configured channel numbers, logos, channel names, and linked stream counts.
- Right Pane: Streams table displaying the individual stream sources associated with the selected channel.
- Top Bar Client Links: Includes quick-copy endpoint chips for HDHR, M3U, and EPG. These links provide the tuner emulation and playlist feeds that you supply to downstream media players (Plex, Jellyfin, Emby, or Kodi).
Step 4: Add an IPTV Provider (M3U & EPG Manager)
To add your IPTV playlists or Xtream Codes accounts:
- Click M3U & EPG Manager (
/sources) in the left sidebar. - The page displays two sections: M3U Playlists and XMLTV / EPG Guides.
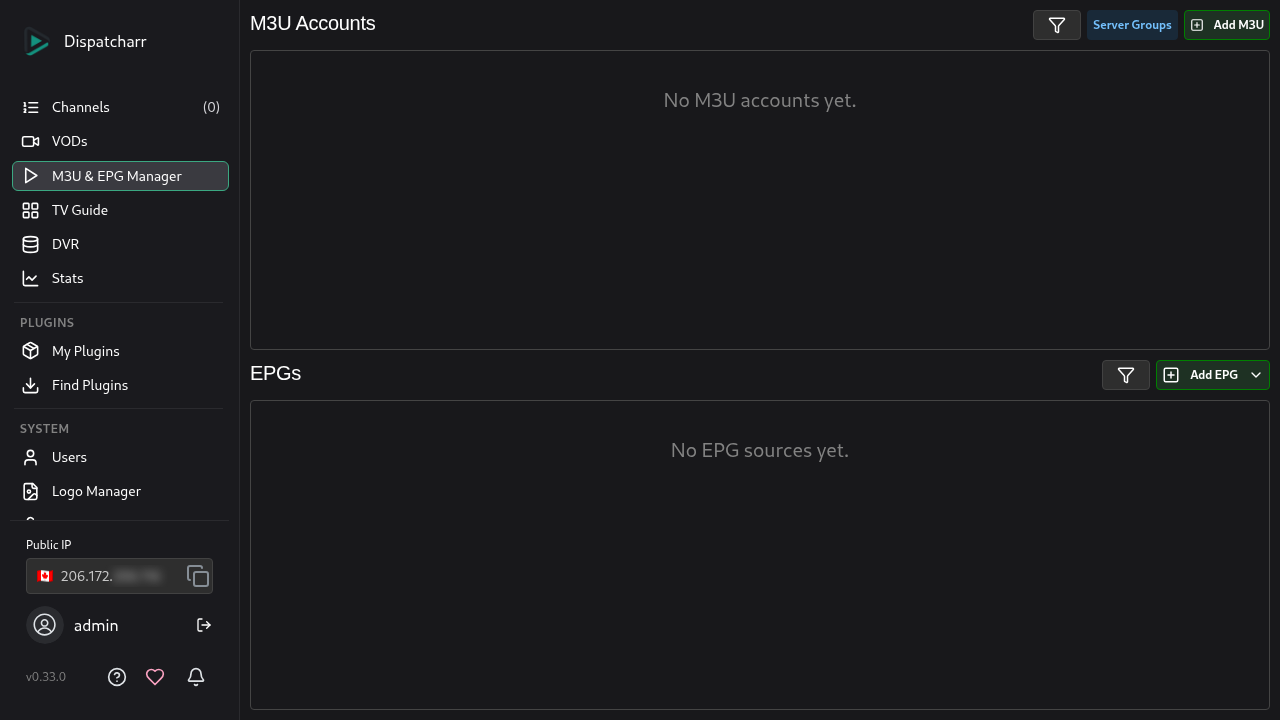
- Click the green + Add M3U button.
- The M3U Account modal opens with a three-column layout:
- Column 1 (Account Information): Specify the Account Name, Server URL, Account Type (defaults to *Xtream Codes*, or select *M3U Playlist*), Username, and Password. - Column 2 (Stream Limits & Routing): Set Max Streams (crucial: configure this to match your IPTV provider's simultaneous stream cap to avoid IP bans), assign a Server Group, set a custom User-Agent, and enter an optional Hash Key. - Column 3 (Sync & Automation): Configure the Refresh Interval (defaults to 24 hours), enable or disable VOD Scanning, set VOD Priority, and toggle automatic Create EPG.
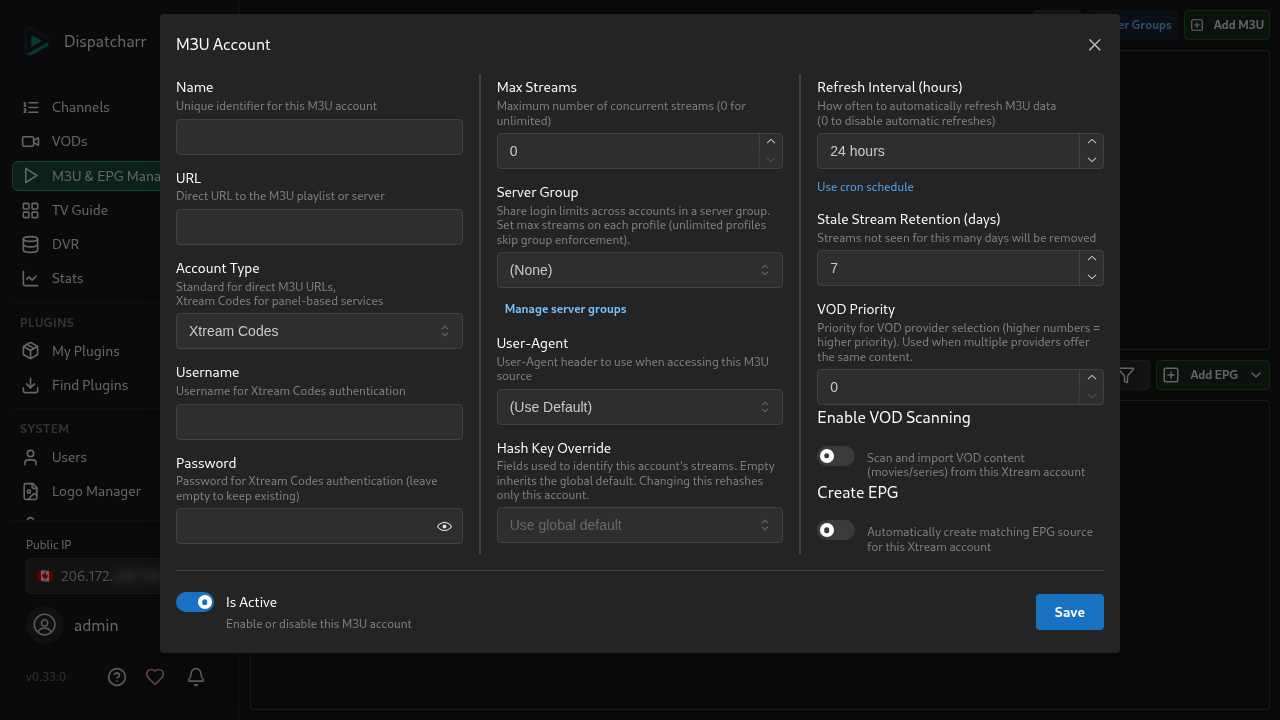
- Click Save to begin importing channels and streams, or press Esc to return to the manager.
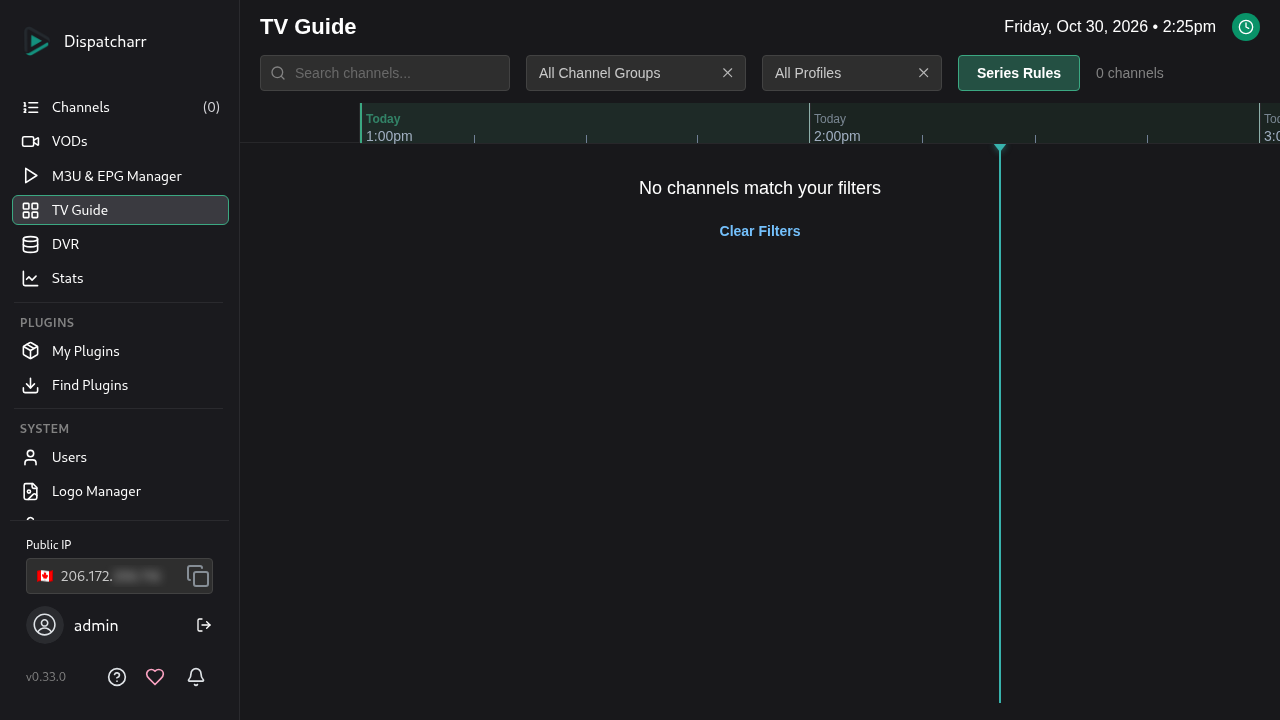
Step 5: Review the TV Guide & DVR Rules
Click TV Guide (/guide) in the left sidebar to open the Electronic Program Guide:
- The interactive timeline grid organizes channels by channel number, displaying current programming, upcoming airings, and a red indicator line representing current playback time.
- Click the Series Rules button in the upper right to define recurring recording rules for the built-in DVR scheduler.
Step 6: Monitor Live Connections & Stats
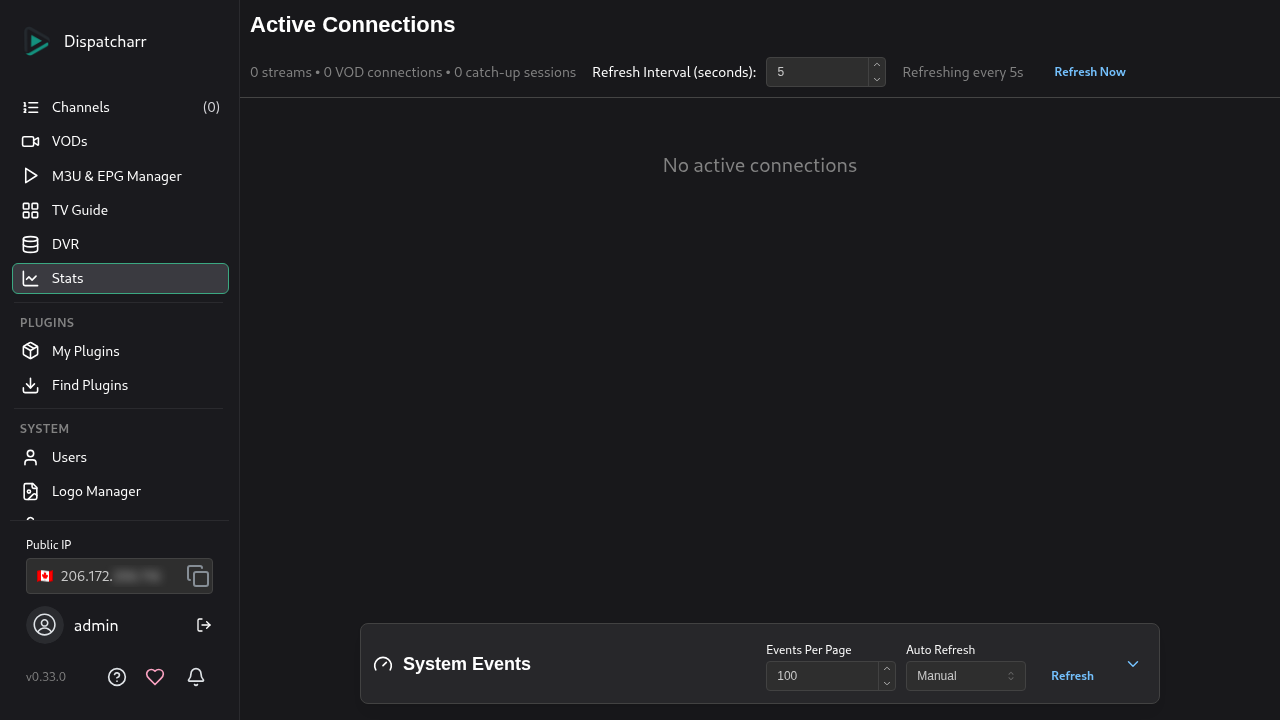
Click Stats (/stats) in the left navigation menu:
- The dashboard displays an active summary banner: *"Active Connections — 0 streams • 0 VOD connections • 0 catch-up sessions"*.
- Real-time connection metrics refresh automatically every 5 seconds.
- The collapsible System Events panel logs internal dispatch and worker events.
Step 7: Configure Stream Profiles
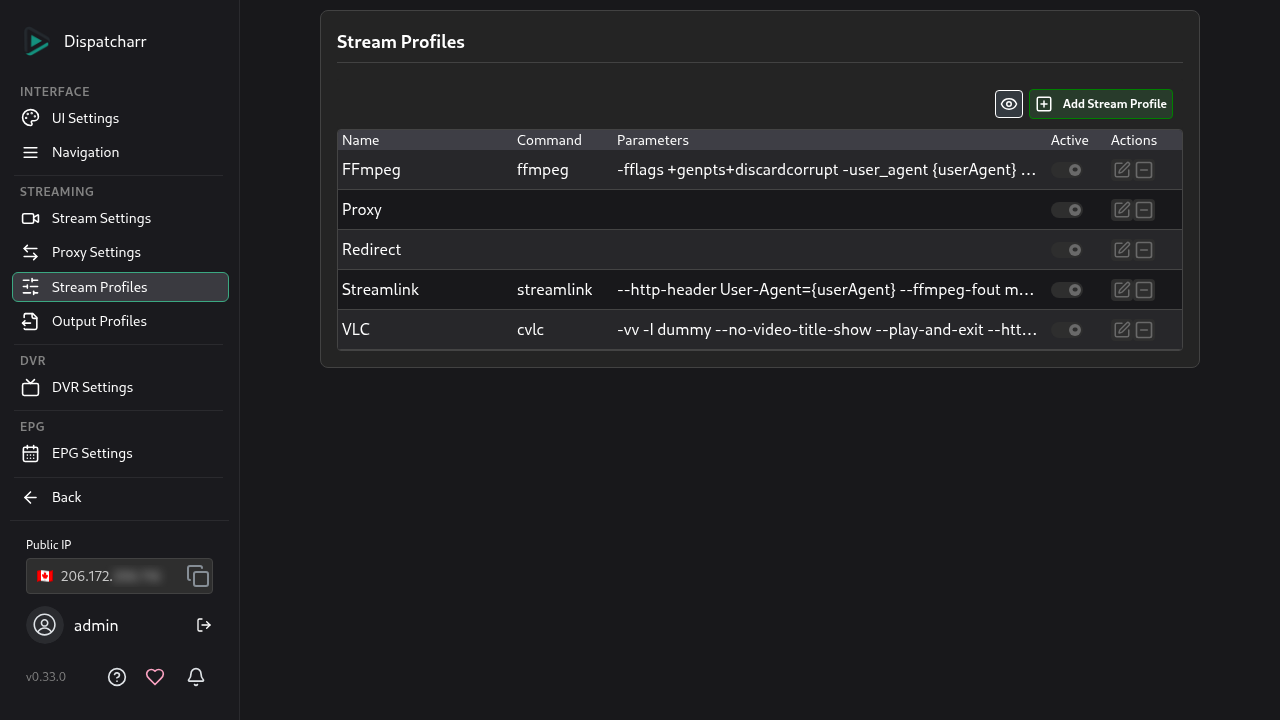
Navigate to Settings (/settings) in the sidebar, then select Stream Profiles: Dispatcharr provides five pre-configured stream processing profiles:
- Proxy: Relays raw provider stream chunks directly through Dispatcharr to the client without transcoding. Low CPU usage.
- Redirect: Returns an HTTP 302 redirect sending the playback client directly to the provider stream URL. Uses zero server bandwidth.
- FFmpeg: Passes streams through the bundled FFmpeg binary for on-the-fly video transcoding, audio normalization, and container repackaging (e.g., MPEG-TS to fMP4).
- Streamlink: Uses Streamlink to extract and relay live streams from dynamic or protected streaming endpoints.
- VLC: Uses libVLC as an alternate demuxing and transcoding engine.
Step 8: Inspect System Logs
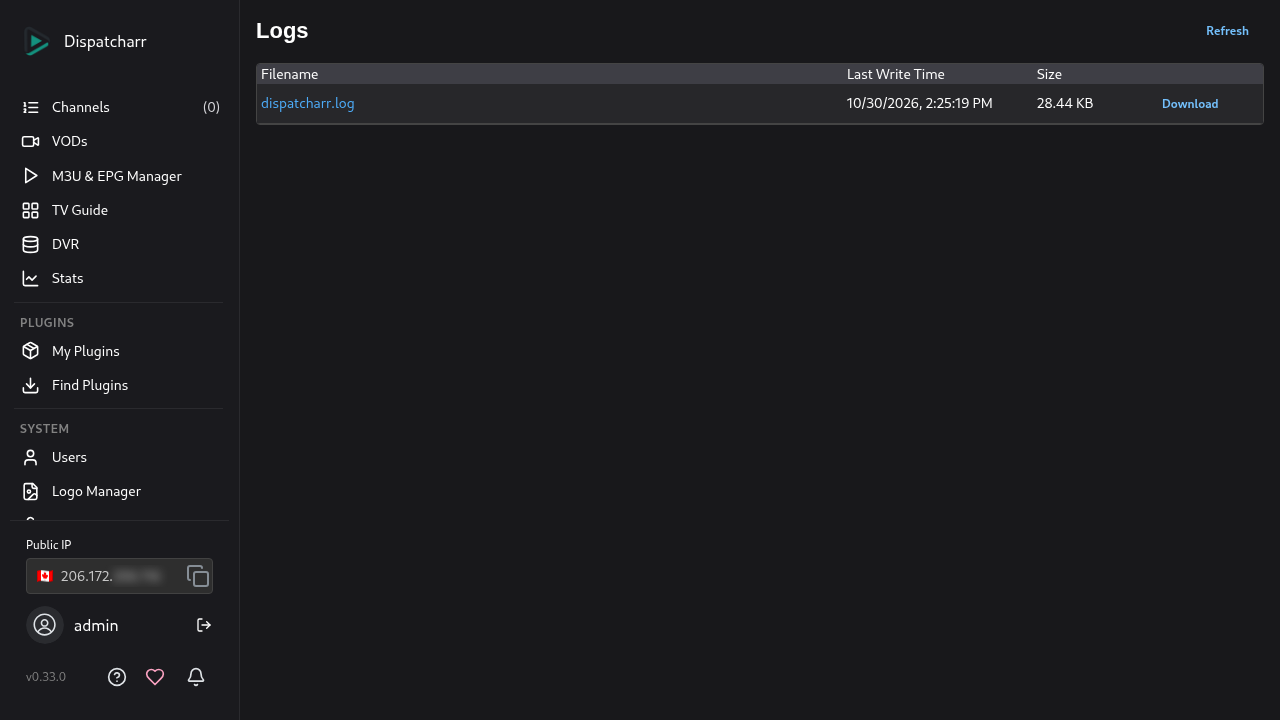
Navigate to System › Logs (/logs):
- Dispatcharr provides a centralized log view listing runtime log files (such as
dispatcharr.log). - Click the Download link beside any log file to retrieve full diagnostic traces from the uWSGI, Daphne, Celery, and Nginx processes.
Verification
Run these verification checks against your running Dispatcharr instance to confirm that all services are operational:
1. Application Version Endpoint
Query Dispatcharr's unauthenticated core version API:
curl -fsS http://localhost:3000/api/core/version/Expected output:
{"version":"0.33.0","timestamp":null}2. Superuser Status Gate
Check the superuser status endpoint to confirm that initial administrative onboarding succeeded:
curl -fsS http://localhost:3000/api/accounts/initialize-superuser/Expected output:
{"superuser_exists": true, "client_ip": "172.21.0.1", "setup_allowed": true}3. Application Web Shell
Verify that the React SPA HTML shell loads with the expected title:
curl -fsS http://localhost:3000/ | grep -o '<title>[^<]*</title>'Expected output:
<title>Dispatcharr</title>4. Container Health Status
Check the health status reported by Docker Engine:
docker compose psThe container status should display Up (healthy).
5. API Authentication Token Verification
Test administrator authentication by requesting a JWT token pair:
curl -fsS -X POST http://localhost:3000/api/accounts/token/ \
  -H "Content-Type: application/json" \
  -d '{"username":"admin","password":"Dispatcharr2026!"}'
Expected output:
{"refresh":"<jwt-refresh-token>","access":"<jwt-access-token>"}Troubleshooting
| Symptom / Error | Root Cause | Resolution |
|---|---|---|
Initial setup blocked: setup_allowed: false or HTTP 403 Forbidden | Dispatcharr restricts initial superuser creation to private local IP ranges (RFC1918) and localhost (127.0.0.1). If accessing through an external reverse proxy, client IP detection fails. | Access the setup page directly via http://localhost:3000/ or ensure your reverse proxy (Nginx, Traefik, Caddy) forwards the client IP header using proxy_set_header X-Forwarded-For $remote_addr;. |
| Container fails to start or exits with port allocation error | Host port 3000 (or 9191) is already in use by another service on your system. | Run ss -ltn to identify the conflicting process. Change DISPATCHARR_PORT in .env to an unused port (such as 3002 or 19191) and run docker compose up -d. |
Container health check remains starting or times out after 90 seconds | On slower disks or initial container creation, PostgreSQL database initialization and Django migrations require extra time before Nginx and uWSGI open the HTTP port. | Monitor progress with docker compose logs -f dispatcharr. Wait for the entrypoint to log database initialization completion. In automated scripts, increase the readiness check timeout to 240 seconds. |
Permission denied errors writing to /data (/data/db or /data/logs) | The PUID or PGID values in .env do not match the ownership of the host ./data directory. | Run id -u and id -g on your host. Update PUID and PGID in .env to match, run chown -R $(id -u):$(id -g) ./data, and restart the container with docker compose up -d. |
| IPTV streams terminate abruptly or provider account is temporarily banned | The number of simultaneous streams requested by media clients exceeds your provider subscription allowance. | Open M3U & EPG Manager (/sources), edit your M3U account, and set Max Streams to your subscription limit (e.g., 1 or 2). Dispatcharr will queue or reject excess stream requests rather than exceeding provider caps. |
| Downstream client (Plex / Jellyfin) reports playback error or buffering | Provider stream codec or container format is incompatible with the client, or direct proxy bandwidth is unstable. | In Dispatcharr, edit the channel or provider and change the assigned Stream Profile from Proxy to FFmpeg. FFmpeg remuxes the stream into standard MPEG-TS and normalizes audio tracks for consistent playback. |
| Host public IP address visible in sidebar widget | Dispatcharr's sidebar includes a Public IP detection widget that displays the first two octets of the host IP. | When recording screencasts or taking screenshots for public sharing, blur or crop the bottom-left sidebar area (approximately x: 26–213, y: 558–594 at 1280×720 resolution). |
Teardown / Cleanup
If you need to stop and remove the Dispatcharr deployment, execute the following commands from your deployment directory:
# 1. Stop and remove containers, networks, and internal Docker volumes
docker compose down --remove-orphans -v

# 2. Remove persistent data directories (handling container-owned files)
cd ..
docker run --rm -v "$(pwd)/dispatcharr:/d" alpine rm -rf /d/data
rm -rf dispatcharr

# 3. Verify no containers remain
docker ps -a --filter "name=dispatcharr"
Assumptions & Decisions
- Official All-in-One Image Selection: Dispatcharr explicitly designates Docker Compose with the All-in-One (
aio) image (ghcr.io/dispatcharr/dispatcharr:latest) as its official deployment method. Bare-metal deployments are unsupported upstream. The AIO image packages PostgreSQL 16, Redis, Celery, Daphne, uWSGI, Nginx, FFmpeg, and Comskip into a single zero-dependency container, avoiding host runtime installation. - Port Mapping (3000 to 9191): Dispatcharr's internal Nginx listens on port
9191. We mapped host port3000to internal container port9191(127.0.0.1:3000:9191) to maintain consistency across homelab deployment guides while documenting9191as the upstream default. - Documentation Discrepancy Corrections: Based on the live validated deployment and Playwright browser inspection (
validated-process.md):
- *Superuser Endpoint:* The authoritative endpoint is /api/accounts/initialize-superuser/ rather than the informal name /api/accounts/superuser-exists/. - *M3U Dialog Layout:* The Add M3U modal is a single 3-column form (Account Info, Stream Limits, Sync Automation), not a multi-tab dialog. - *Stats Telemetry:* On a fresh instance, the Stats page displays active connection counts and events; bandwidth graphs appear only after active client streaming commences. - *Stream Profiles:* The Settings interface provides 5 distinct stream routing profiles (FFmpeg, Proxy, Redirect, Streamlink, VLC). - *Logs View:* The Logs page provides downloadable log files (dispatcharr.log) rather than a real-time terminal stream.
- First-Run Superuser Creation: We documented the exact credentials (
admin/Dispatcharr2026!/admin@dispatcharr.local) verified during automated browser testing. - Storage Isolation: Persistent application state is isolated in
./data(/data), ensuring database tables, JWT keys, and logs survive container restarts and can be completely removed upon teardown. - Table Formatting: In accordance with Ghost publishing constraints, the troubleshooting section is formatted as a GitHub-flavored Markdown pipe table, which
ghost-draftparses and wraps into a Ghost HTML card (<!--kg-card-begin: html-->). - Screenshot References: All referenced screenshots point to verified local image assets in
runs/dispatcharr-20261030-135938/browser/captured during automated Playwright execution.
Get the Unified Homelab Stack Compose Pack
One-command multi-container Compose files (Full *arr Stack, Prometheus + Grafana + ntfy Monitoring, and Homelab Auth) plus new verified deploys once a week.